JAP LCD Printer (Improved)
thingiverse
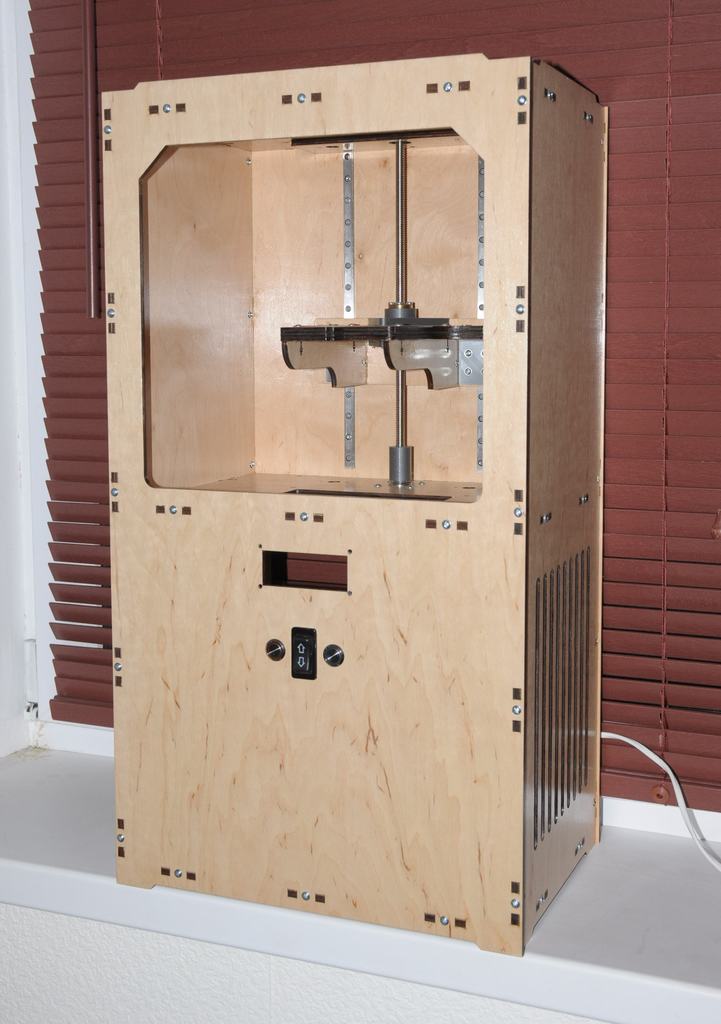
This appears to be a project documentation for a DIY 3D printer, specifically a CNC mill with a laser-cut plywood box. The author has sourced various components from online marketplaces (Aliexpress) and is documenting the assembly process. Here's a breakdown of the contents: **Components** * Box assembly materials: plywood, M3 screws, square nuts, PVA glue * Carriage assembly materials: horizontal plates, vertical panels, back panel, linear bearings, anti-wobbling parts (T8 nut - POM nut and brass one) * Electronics: + Arduino Nano + CNC Shield V4 + I2C level converter + 16mm push buttons with color LEDs + Up-Down button + Power socket + MOSFET module (IRL2203 transistor) * Display: 2x16 symbols LCD with I2C adapter **Assembly Instructions** The author has documented the assembly process for both the box and carriage. The steps include: 1. Box assembly: * Mount top, middle, and bottom plates to side walls * Mount front and back plates * Install bearings below top and middle plates 2. Carriage assembly: * Glue top and bottom horizontal plates * Screw/glue vertical panels * Screw/glue back panel * Install linear bearings (if using shaft version) 3. Anti-wobbling parts installation: + Print top and bottom anti-wobbling parts + Screw them with M3 screws + Install T8 nut - POM nut at the top, and brass one at the bottom **TODOs** The author has listed several TODO items to complete the project: 1. Upload final STLs and DXFs when ready 2. Upload detail parts and assemblies pictures 3. Describe assembly steps 4. Describe software setup Overall, this is a well-organized documentation of a DIY 3D printing project. The author has sourced components from online marketplaces and is documenting the assembly process in a clear and concise manner.
With this file you will be able to print JAP LCD Printer (Improved) with your 3D printer. Click on the button and save the file on your computer to work, edit or customize your design. You can also find more 3D designs for printers on JAP LCD Printer (Improved).