Japanese Table Lamp
prusaprinters
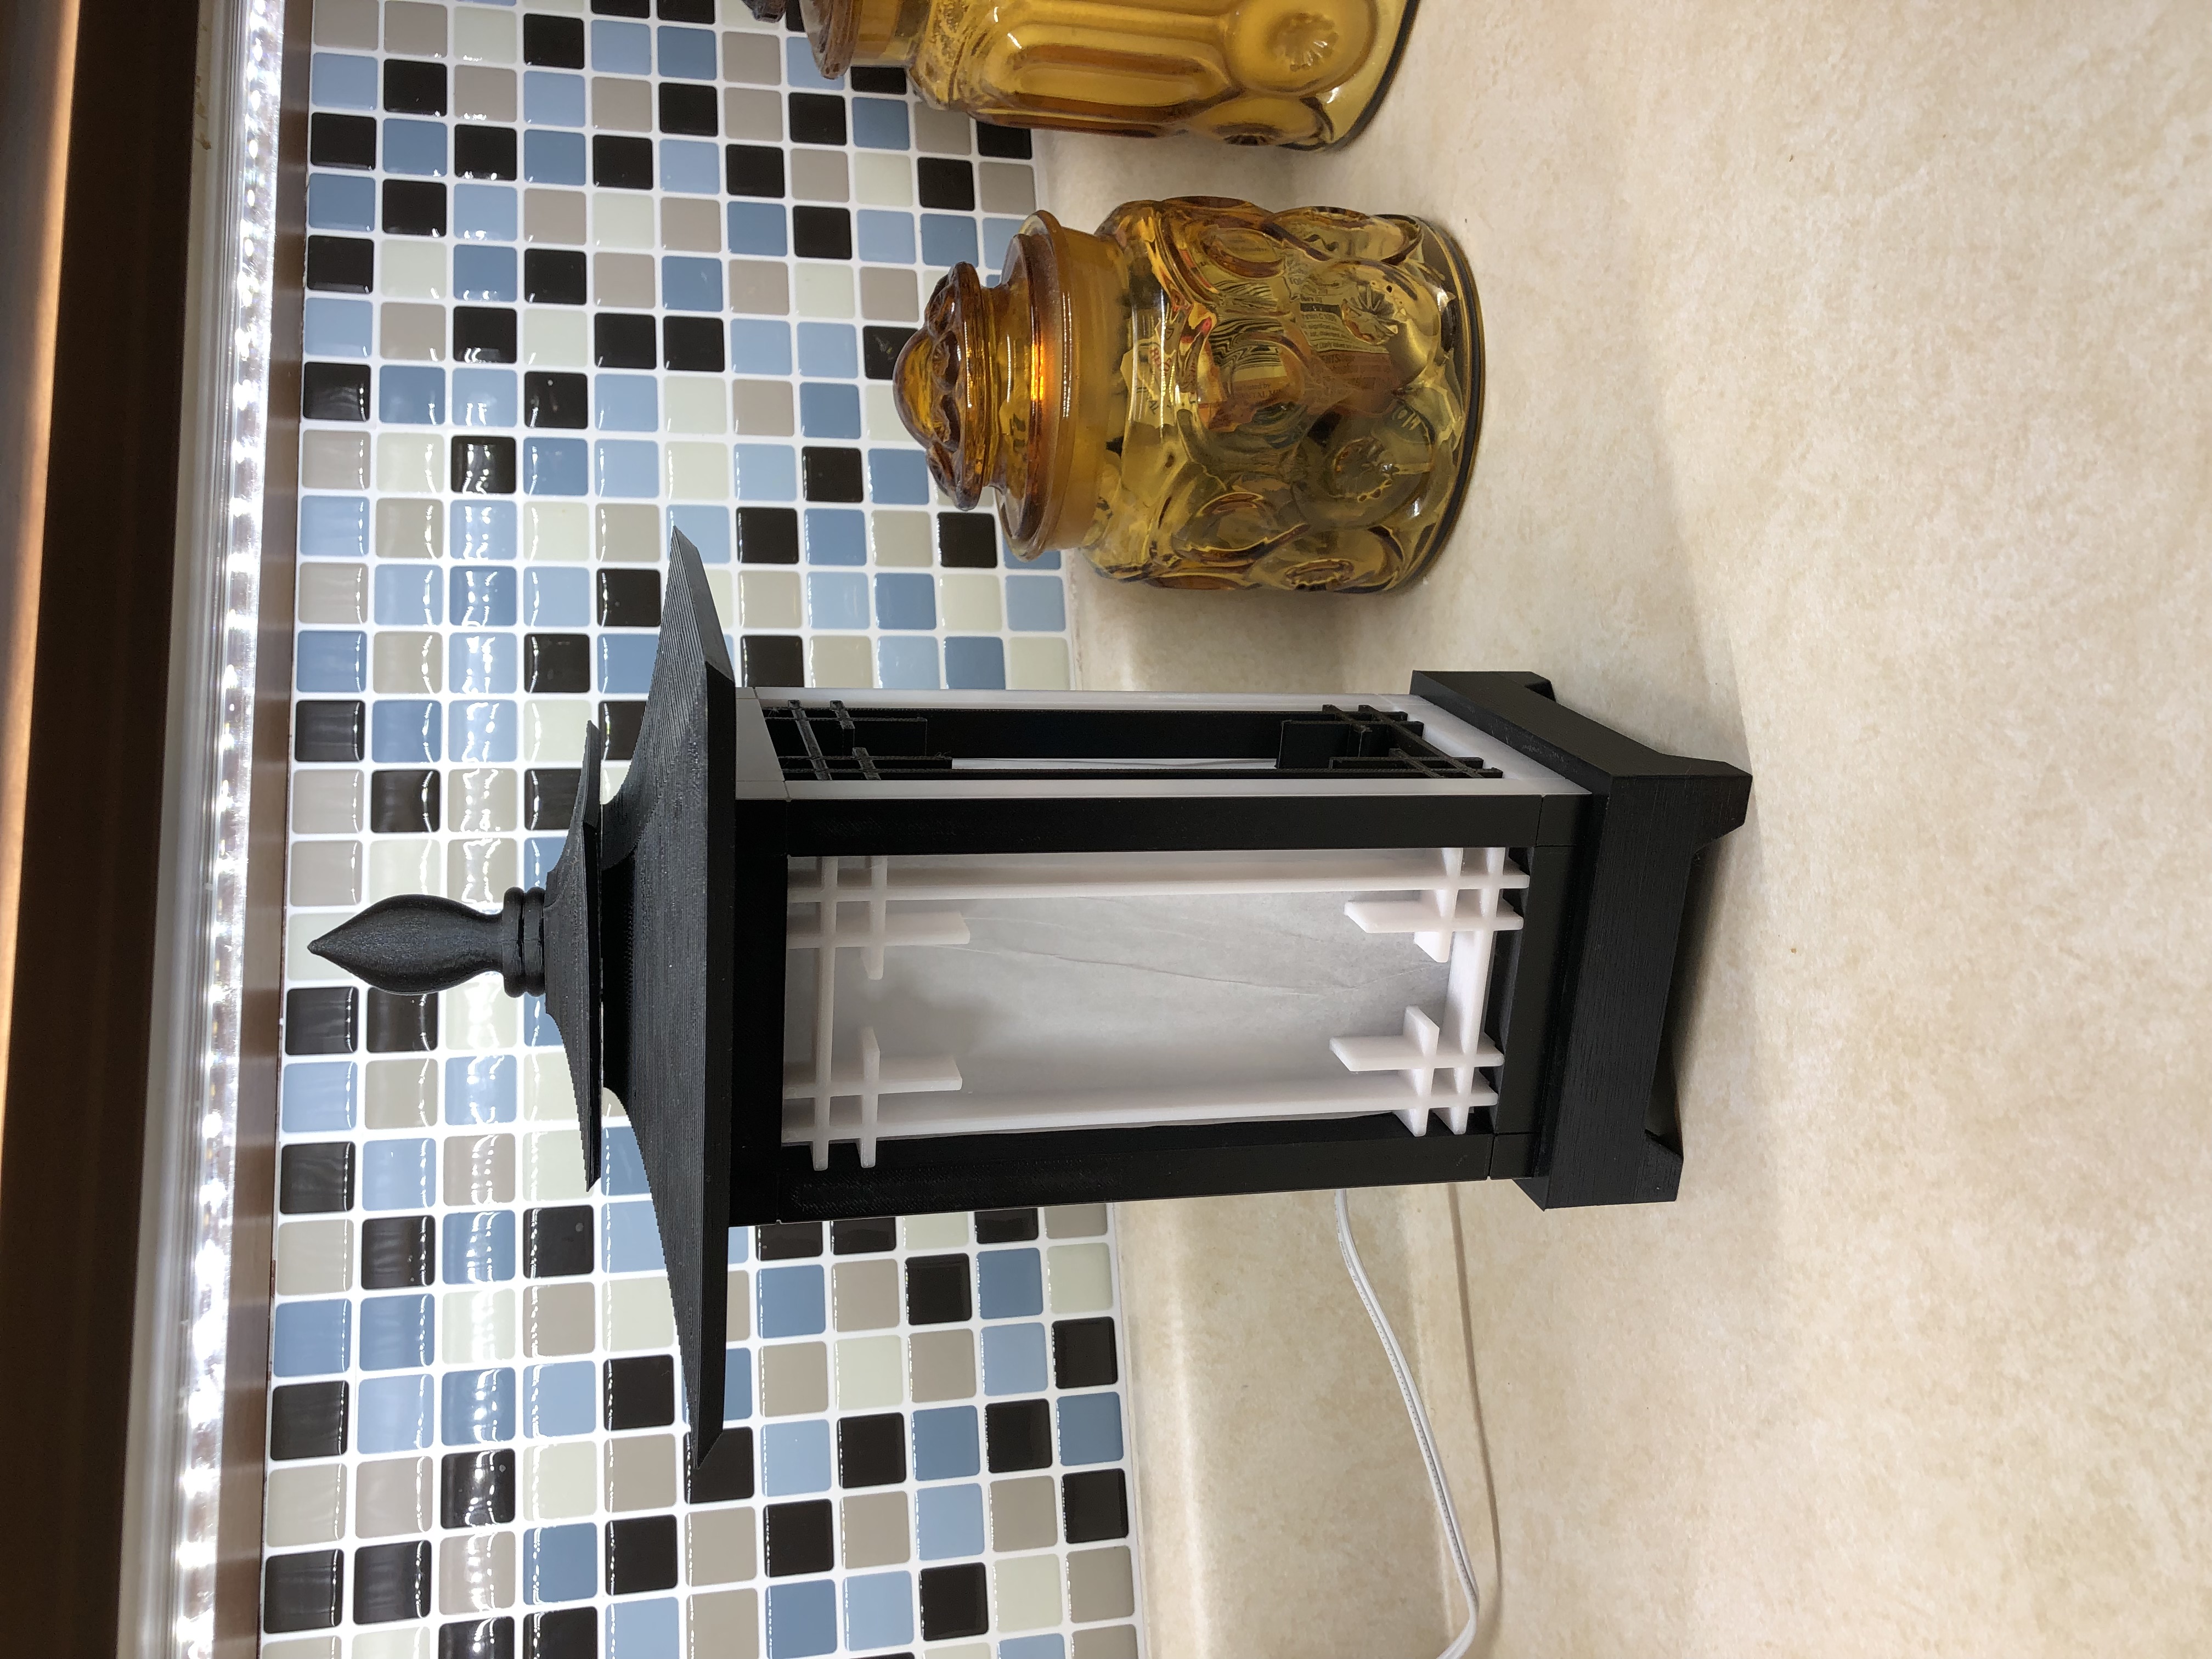
<p>A modern version of a Japanese table lamp. Designed use a clip in light bulb socket (E12). </p><p>Hardware needed to build</p><ul><li>4x M3x15mm socket cap screws</li><li>12x 3x8mm pins</li><li>1x clip-in-light socket such as, <a href="https://www.walmart.com/ip/National-Artcraft-Lighting-Cord-Set-Has-Two-Clip-In-Sockets-Pkg-1/887348341?wmlspartner=wlpa&selectedSellerId=12866&&adid=22222222227000000000&wl0=&wl1=g&wl2=c&wl3=42423897272&wl4=pla-51320962143&wl5=9005910&wl6=&wl7=&wl8=&wl9=pla&wl10=125206346&wl11=online&wl12=887348341&veh=sem&gclid=EAIaIQobChMI74W504uD9wIV1QWICR3ARA2CEAQYASABEgINNPD_BwE&gclsrc=aw.ds">https://www.walmart.com/ip/National-Artcraft-Lighting-Cord-Set-Has-Two-Clip-In-Sockets-Pkg-1/887348341?wmlspartner=wlpa&selectedSellerId=12866&&adid=22222222227000000000&wl0=&wl1=g&wl2=c&wl3=42423897272&wl4=pla-51320962143&wl5=9005910&wl6=&wl7=&wl8=&wl9=pla&wl10=125206346&wl11=online&wl12=887348341&veh=sem&gclid=EAIaIQobChMI74W504uD9wIV1QWICR3ARA2CEAQYASABEgINNPD_BwE&gclsrc=aw.ds</a></li><li>Tissue Paper/rice paper (for shade material)-optional</li><li>double sided tape (for shade material)-optional</li><li>1x E12 base LED bulb. (a flicker flame bulb is a nice touch)</li></ul><p>Print:</p><ul><li>4x Frame</li><li>4x Screen</li><li>1x Base, or taller base, whatever you choose</li><li>1x Top 1</li><li>1x Top 2</li><li>Glass-optional. Not needed if optioning to use tissue paper.</li></ul><p>If you are interested in a fast print set the layer thickness to 0.3. The photos shown are of that layer thickness.</p><p>Carefully use your M3 screws to thread the frames. There is an arrow that points at the bottom of the frame denoting the hole to thread. Run the screw into the hole with a battery operated driver and carefully remove. This will create a thread without having to use a tap. Do this to all 4 frames.</p><p>Install a screen into each frame. The screen will snap into each frame.</p><p>OPTIONAL STEP-If not using the printed glass, cut 4 pieces of tissue paper to fit each frame and secure with double sided tape.</p><p>Insert the pins into the holes along the mitered edge of the frames. Press the frames together to form a box.</p><p>Install clip-in-bulb in base. Place frame box on base and secure using the 4 M3 screws.</p><p>Install glass if not using tissue paper.</p><p>Install bulb. (could be done earlier in the process if you have large hands)</p><p>Install 4 pins into Top 1 and snap top 2 onto top 1.</p><p>Place tops onto assembled base.</p><p>Plug in and enjoy!</p><p> </p><p> </p>
With this file you will be able to print Japanese Table Lamp with your 3D printer. Click on the button and save the file on your computer to work, edit or customize your design. You can also find more 3D designs for printers on Japanese Table Lamp.