Jato Brushless Conversion
thingiverse
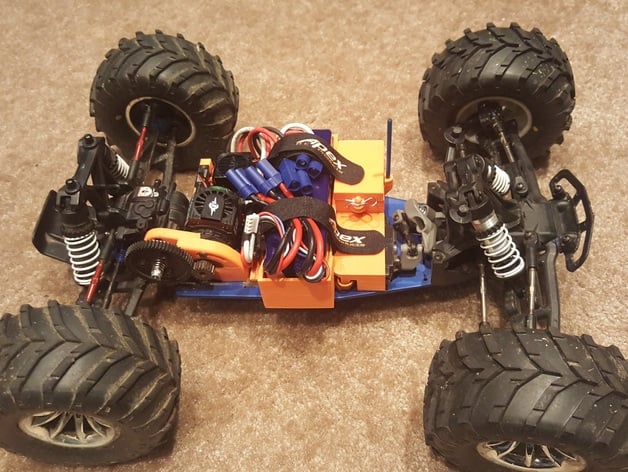
Update June 2017 All files containing V2 are the updated files. The original files will be left. Updates Added inserts for M3 nuts into the motor mount and battery trays. (No more screwing directly into the 3d printed parts Added a brace to go over the servo (No drilling holes in the chassis). Improved clearance for the radio & antenna. The assembly instructions are for the most part the same. The lower battery plate gets mounted, then the upper battery plate needs to be glued to the lower. Then the Servo cover can be aligned and glued in place. There is no need to drill holes in the chassis. End Update This is a brushless conversion kit for the Traxxas Jato. The battery box is 43mm * 135mm. I used two of these batteries in parallel: http://www.hobbyking.com/hobbyking/store/__11949__Turnigy_nano_tech_3300mah_3S_35_70C_Lipo_Pack.html The RX box is 32mm * 49mm. There is a significant amount of post processing and assembly required before these parts can be mounted in the truck. Print Settings Printer: Ultibots Kossel Rafts: Doesn't Matter Supports: Yes Resolution: .3 Infill: 100% Notes: The BatteryPlate_Top should not be printed with supports. Everything else requires them. Post-Printing Step 1 - Prepare the print There are a few areas that will need to be sanded/filed to fit you specific equipment The motor mount - check clearance for your motor shaft, pinion, and slipper clutch backing plate. The receiver cover/hatch - Check the tab fitment into the battery tray. This is a little fragile, so be careful when sanding. The pin for the receiver cover - once the cover fits nicely, the pin will need to be drilled to fit your body clips. This is easiest when the battery plate is not attached to the car. The battery tray, on the outboard servo mount holes. The bottom of the chassis angles up here. You will need to sand this tab to match the angle on the chassis. Step 2 - Prepare the Jato Remove everything from the front bulkhead back. You will need to install a single speed conversion. I recommend the steel gears from Hot Racing - http://www.hot-racing.com/index.cgi?partnumber=SJT1000SS;c=180 You will also need to remove the edge guards. They will not fit with this battery tray without significant modification. Clean/remove the foam under the original RX battery box. You need to drill at least one hole into the chassis to support the front of the battery tray near the servos. There are two holes, but the outboard hole is at an angle, which makes drilling the hole difficult. I have not had any problem only using the one inboard screw. Step 3 - Glue the parts together Test fit the bottom plate onto the chassis using a couple of screws from the side guards. Check the top plate fitment & mark it's position. Remove the bottom plate and glue the pieces together. I used Aceton and clamped the pieces together. You need to drill holes through the top plate, using the holes in the bottom plate as guides. I used a 3/32 drill bit. Once the glue has dried, you will need to feed in your battery straps. The slot that is adjacent to the RX cover is difficult. I found it easiest to drill a small hole down from the top of the slot, through both plates. Then I used a pin/drill bit through that hole to work the strap around the corner. Step 4 - Assemble the truck Mount all electronics into the battery plate. The ESC uses double sided tape, and there is a slot in the tray to fit a zip tie if needed. There are holes/channels for all of the servo wires to be hidden. Mount the motor to the motor mount, then install the motor mount in the truck. There are two bolts that go into the transmission, and one bolt that goes through the chassis plate. Mount the battery plate to the chassis. Do not over tighten the bolts into the 3d printed parts. They will strip. Some of the screws can be re-used from removed parts. I bought a screw kit off ebay just to have extras. For the battery plate you will need to use 3 of the screws for the side guards. They are 3*8 countersunk screws. You need to ensure whatever screws you use are not long enough to poke into the battery backs. The two holes near the steering servo and in the motor mount bottom also need 3mm countersunk screws. I used 10-12mm length screws.
With this file you will be able to print Jato Brushless Conversion with your 3D printer. Click on the button and save the file on your computer to work, edit or customize your design. You can also find more 3D designs for printers on Jato Brushless Conversion.