JGMaker Artist-D Pro Carriage Drag Chain Bracket 1011
thingiverse
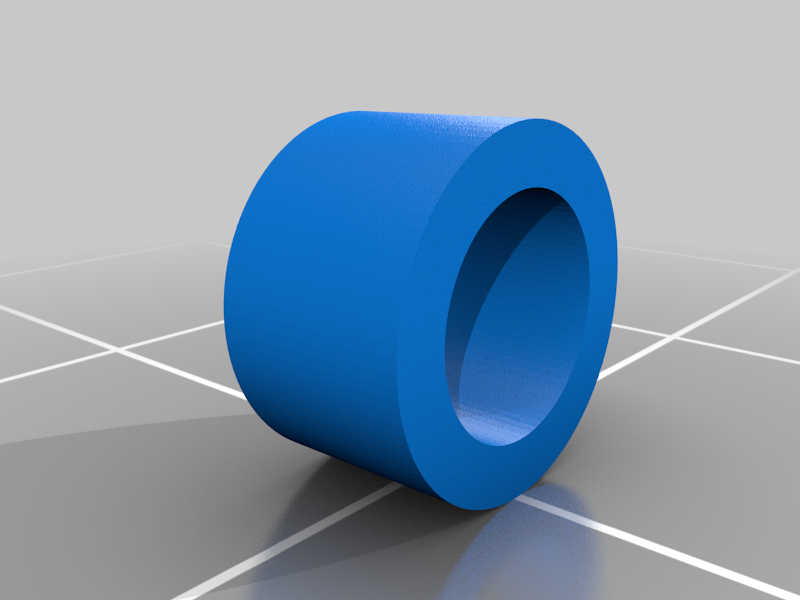
***Disclaimer: This upgrade will alter your printer beyond the manufactures specifications. Do not do this if you are not mechanically adept, have limited critical thinking skills, or average/below average common sense. I take ZERO responsibility for your actions.*** I wasn't able to find a fully working drag chain bracket for the Heated Bed wires on my Artist-D Pro. So, I decided that I would put one together. This drag chain is meant to go forward, underneath the build plate. I decided to do it this way so that nothing additional would be coming out of the back of the printer. This is not a straight forward addition to the printer. It does require some additional work. Please read the instructions through, before deciding if this bracket/upgrade is for you. What you will need: 1 x Printed Bracket (STL Provided) 2 x Printed M4 Spacers (17.2 mm long) (STL Provided - will have to alter size slightly) 8 x M5 Metal spacers (same kind that are used for the v-slot wheels) can try printed spacers here but I didn't like the idea of them for this application. 1 x M4x35 screw (button head or Hex machine head, either will work) 1 x M4x50 screw (button head or Hex machine head, either will work) 2 x M4x25 button head screws 6 x M3x10 button head screws 2 x M3x12 button head screws 13 x M3 washers 5 x M3 nuts 10x11 (29 links and two ends) Drag Chain (I had one, so I did not print it. But, a printed chain would work just as well, I am sure. Would need to be an R18 type though, else your radius may be too large. (https://www.amazon.com/gp/product/B08R1M9J2H) Zip Ties for wiring (Various sizes, will need one small for bracket wire tie-down) Drill w/ 9/64" light metal bit Screw driver set with various hex sizes Heat Gun 5/16th Hollow Punch bit (https://www.amazon.com/gp/product/B00687UXUG) Razor blade Filament clippers Glue Gun Silver sharpie HD Center Punch (https://www.amazon.com/gp/product/B00B5HOE1S) Vacuum with hose Small metal file 1.) Unplug printer 2) Remove bottom of printer 2a.) This requires the removal of 12 screws along the perimeter. 2b.) Use a heat gun to remove bottom plate. There is adhesive where the gantry attaches to the frame/case. 2c.) I suggest removing all adhesive with goo-gone (or similar) before continuing. Might as well get rid of it now. 2d.) Store screws and bottom plate aside, do not lose these. 3.) Remove Build Plate 3a.) Take off flexible plate and set aside. 3b.) Mark center of build plate magnet. 3c.) Use 5/16th Hollow Punch bit to drill through magnet to build plate. 3d.) Use razor blade to clean up hole and surface (to make surface flat) 3e.) Remove all leftover magnet pieces blocking screw head. 3f.) Carefully clip zip ties holding bed wires to carriage. DO NOT clip wire (Obviously) 3g.) Remove four bed tramming knobs. 3h.) Remove center screw 3i.) Set center screw, four knobs, and center spacers to the side. 3j.) Lift bed straight up and off of carriage. 3k.) Set springs to the side 3l.) Set bed upside down behind of printer, be careful not to put strain on the bed wires. 3m.) OPTIONAL: If bed wires, where attached to bed, do not have hot glue "brace", you can put some glue down now. Helps with strain, but not 100% required. 4.) Disconnect belt bracket from carriage. 4a.) There will be two screws near the center of carriage that are clearly holding the belt bracket, unscrew these two screws and set aside (these two screws will not be used again. 5.) Remove Y-axis endstop screw from carriage 5a.) This screw is also near center of carriage and is just screwed into the carriage. You can see that it is used to trigger the endstop. Remove this screw and set aside. (this screw will not be used again.) 6.) Remove Front Y-Axis brace/decorative brace 6a.) Front of the two Y-axis extrusions has a brace/cover. Remove the two screws holding this on and set screws and brace to the side. 7.) Remove carriage from y-axis extrusions. 7a.) Slide carriage forward and off of extrusions. 8.) Add additional spacers to carriage v-slot brackets 8a.) Unscrew each v-slot wheel and place two (2) of the metal spacers closest to the v-slot wheel. 8b.) Replace v-slot wheels on the carriage, where they came from. 9.) Reinstall carriage on extrusions. 9a.) This is simple. Slide carriage onto extrusions, reverse of when it was removed. 9b.) Screw brace back onto the front of the y-axis extrusions 10.) Adjust v-slot wheel eccentric nuts. Make sure the carriage does not wobble. DO NOT over tighten. Doing this now will keep you from having to reach under the build plate. 11.) Put M4x35mm screw in place of old endstop screw removed in Step 5. Screw this flush with carriage. 12,) Reattach belt bracket to carriage. 12a.) Position carriage over belt bracket, so holes are as close to the holes on the y-axis bracket. 12b.) One at a time; use pliers to hold printed m4 spacers in place, between carriage and belt bracket. 12c.) Use M4x25mm screws to secure carriage to belt plate. Tighten but do not overtighten, do not want to break the printed spacers. 13.) Install Female 1011 chain end to printer case/base 13a.) Reference image of bracket with wire, on this posting. 13b.) Place chain end in front of wire outlet and against ribbon control box edge. 13c.) Use silver sharpie to mark mounting holes for bracket. 13d.) Take Center Punch and "mark" center of silver points from last step. 13e.) Use Drill and metal bit to drill mounting holes do not press hard, just take your time and keep in control of drill. 13f.) Clean up holes with metal file, if needed. Get rid of any burrs. Inside and out. Careful when doing this, as you do not want to damage any wires. 13g.) Clean up all metal shavings with vacuum. If needed, use compressed air to clean out base. Be careful that you do not get metal shavings in your eyes, mouth, nose, ears, belly button, pockets, between toes, or anywhere else you don't want them. 13h.) Use three (3) M3x10 screws, six (6) M3 washers, and three (3) M3 nuts to attach chain bracket to base. Should be: Screw, washer, bracket, base, washer, nut (from top to bottom) 13i.) Tighten down screws well. 14.) Install printed drag chain bracket on carriage. 14a.) Bracket will point toward front of printer and be mounted to two holes on left side (and center) of carriage. These holes were originally for zip ties. 14b.) Bracket will be mounted on top of carriage and will be tight. 14c.) Use two (2) M3x12 screws, four (4) M3 washers, and two (2) M3 nuts; to attach the bracket to the carriage. 14d.) Should be: Screw, washer, bracket, carriage, washer, nut (from top to bottom). 14e.) Tighten well. 14f.) Add zip tie to two open holes, behind triangle of holes on bracket. Both ends should be pointed upwards and setup so it can be tightened from the open side of the printer. 14g.) Get male bracket for drag chain and attach to carriage bracket. Should be facing towards front of printer. 14h.) Use three (3) M3x10mm screws and three (3) M3 washers. This will take a little elbow grease to get them in, since they will be threaded into the bracket. Just brace the bottom of the bracket with one hand and screw the screws in with the other. 15.) Rewire heated bed wires. 15a.) Access the bottom of the printer, and take note of where all wires are connected for the heated bed. Yours will likely be different than mine since I installed a mosfet for my heated bed. 15b.) There will be six (6) wires to be unplugged. Four (4) power wires (2xRed, 2xBlack) and two (2) thermistor wires (1xgrey, 1xwhite; these will have a two prong plug on the end.) 15c.) Unplug all wires associated with the heated bed and clip (to free) all cable ties. Be careful not to cut any wires. 15d.) Gently pull wires from behind printer through hole in back of case. This should release the heated bed, completely. 15e.) OPTIONAL: If you have not done so already, put ferrules onto the power wires from heated bed. You can thank me later. If you do not know how to do this, look it up or don't do it. 15f.) Carefully feed bed wires through hole near left gantry, where other wires are exiting. Feed them in front of the wires that are already there. 15g.) Plug all wires back into their respective places. Do not use zip ties yet, this will be done later. 16.) Connect cable chain to bed wires. End of cable chain should be about 1" from bed. Be aware of how you are connecting so that it bends in the correct way and the ends are the correct ends for the chain brackets already in place. 17.) Connect cable chain to cable chain brackets. 17a.) Connect cable chain end, which is farthest away from bed (on the wire), to the cable chain bracket that is attached to the case/base. This may take a little work, but it will snap into place. 17b.) Put heated bed back in place on the carriage. Using the proper holes to align the bed. 17c.) Snap the loose cable chain end to the last cable chain bracket. 17d.) Make sure the heated bed wires are going through the zip tie (on the printed bracket) and tighten it, making sure there is enough slack that the bed wires are not pulling on their connections to the bed. 18.) Reinstall bed springs onto adjusting posts/screws. 18a.) Reinstall adjusting knobs onto posts/screws, do not tighten. 19.) If you are not putting center post back in place, skip to Step 20. 19a.) Using pliers, place first center post metal spacer on carriage above the center post hole. 19b.) Using pliers, hold second center post metal spacer below center post hole on heated bed. 19c.) With spacer still being held in place with pliers, put center post screw through top of heated bed and through both spacers. 19d.) Tighten down center post screw until it is tight against spacers. 20.) Tighten down bed adjusting knobs just past 50%. 21.) Put flexible plate back in place. 22.) Gently and slowly, work bed forwards and backwards to verify there is nothing inhibiting its movement. 23.) Access bottom of printer and make sure all wiring is routed well and zip tied in place. 23a.) Any zip tie that was originally cut, should be replaced at this point. Feel free to add more if you feel there is a benefit. 24.) Reinstall base plate with same screws used when removing it. Do not over tighten these screws. 25.) Set printer in standard orientation. 26.) Replace z-axis endstop screw. 26a.) Remove endstop screw, located on left gantry. 26b.) Put M4x50mm screw in place of original, using original spring. (You may need a washer, depending on what kind of screw you used. 26c.) Screw down endstop screw, almost as much as it will allow. 27.) Plug in printer 28.) Go through leveling process. 29.) Print something. If you have any questions or concerns, please feel free to message me. I will try to respond to you as quickly as possible. Happy Printing Everyone! **********----------********** File Index: Carriage bracket (STL) M4 spacer (STL) Final Wiring example (IMAGE) Location of Case/Base cable chain bracket (IMAGE) Installed Cable Chain with bed at half way point (IMAGE) Under Bed with endstop screw and installed printed spacer (IMAGE) Installed extra metal spacers for V-Slot wheels (IMAGE) Installed Cable Chain with bed all the way back (IMAGE) Metal Spacer (IMAGE)
With this file you will be able to print JGMaker Artist-D Pro Carriage Drag Chain Bracket 1011 with your 3D printer. Click on the button and save the file on your computer to work, edit or customize your design. You can also find more 3D designs for printers on JGMaker Artist-D Pro Carriage Drag Chain Bracket 1011.