JM Self Balancing Robot V1
cults3d
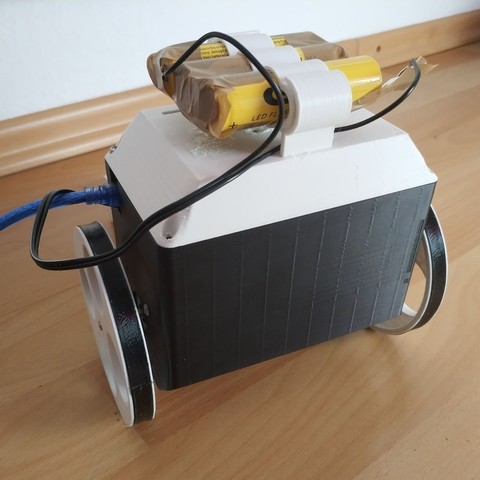
Hi, I have been working on my 3D printable self balancing robot which requires no additional soldering and part crafting. Just assembly needed. As you have a 3D printer and being hobbyist, you probably have most of the parts :) Note: I am lacking some coding skills so I am working on perfecting the coding part, that is why currently I can not share the code. It needs some PID value calibrations, angle drift filtering calibrations and many more improvements. Any help is actually welcome :) Check the moving video: https://youtu.be/KGVTsASj2y4 Assembly: 1)BodyDown part: Step motors, wheels, tires(which should be printed with flexible filament for better traction. You can use bunch of elastic if you do not have flexible filament) and Controller holder need to be fixed. Make sure the stepper motor connectors are not facing upwards. During coding you do not need to fix the Arduino so the USB cable can pass from the upper side. 2)BodyUp part: Here you fix mpu-6050 either upper face or down face with 2x M3. I stick mine with 3M adhesive paper facing downwards which works fine. In this case you do not see extra cables. You can glue Battery Holders Adapter so they do not fall during shaking or falling. Parts required: 1) Arduino Uno R3 (I have Atmega 328p processor one) 2) CNC Shield 3) mpu-6050 4) 2x Step Motor Drivers 5) 2x Nema 17 Step Motors 6) My biggest problem, battery selection. I went with 3x 18650 batteries, but they kind of heat up fast. I used powerbank which seems to work fine but it is not 12V so stepper motors have a little bit power lacking issues. So, battery selection is up to you. I created battery holder adapter, so you can insert your own battery or just put on top. 7) Bunch of M3 screws (between 16-24) depends on what you want to add. 8) (optional) HC-06 bluetooth module You can use the link for following parts 1,2,5:https://www.banggood.com/CNC-Shield-UNO-R3-Board-4xA4988-Driver-Kit-With-Heatsink-For-Arduino-Engraver-3D-Printer-p-1082323.html?p=XU281311011736201705 You can use the link for following part 3:https://www.banggood.com/6DOF-MPU-6050-3-Axis-Gyro-With-Accelerometer-Sensor-Module-For-Arduino-p-80862.html?p=XU281311011736201705 Future Plans: 1)Perfecting the balancing code 2)Finding a better powering solution 3) Bluetooth + android control 2) Adding a small screen to have 2 cute eyes with reactions
With this file you will be able to print JM Self Balancing Robot V1 with your 3D printer. Click on the button and save the file on your computer to work, edit or customize your design. You can also find more 3D designs for printers on JM Self Balancing Robot V1.