Joyant-Con
prusaprinters
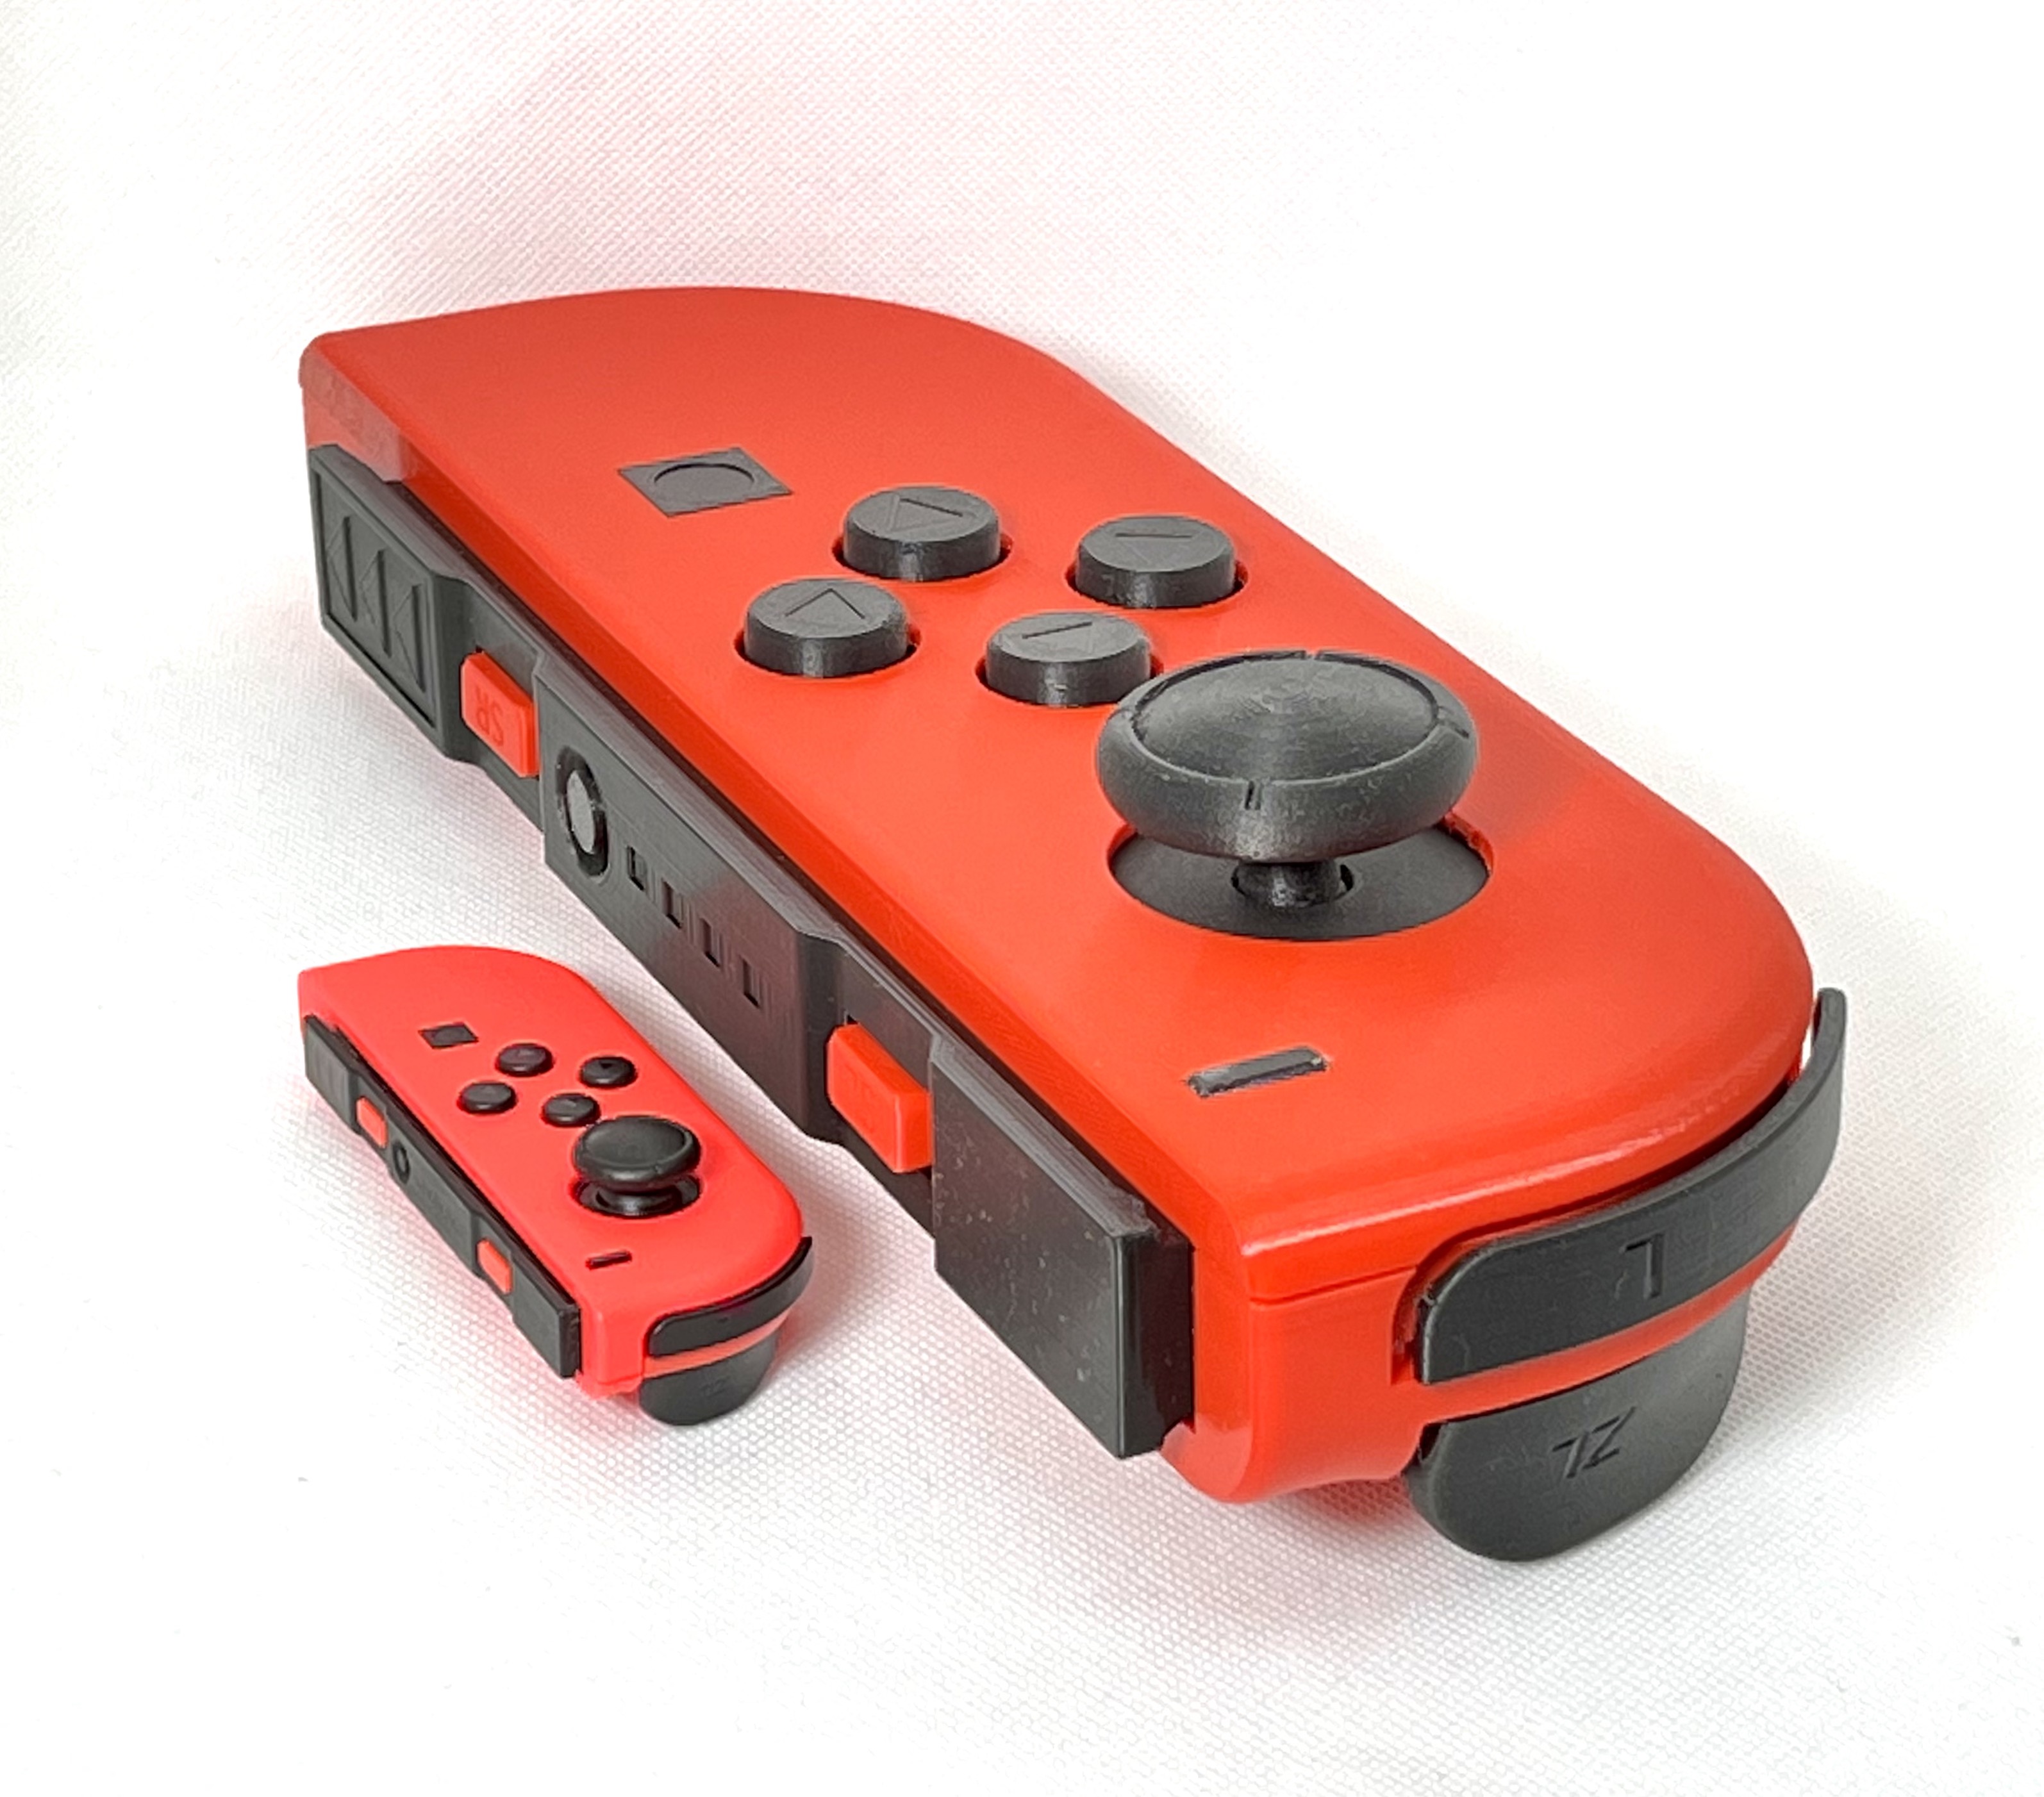
<p>This is a giant Joy-Con, with a real Nintendo Switch controller on the inside. The stick and buttons are connected to the real controller via flexure linkages. It's exactly three times larger than a Joy-Con in each dimension, making it truly Joynormous!<br><br>I created this as a prank to win a Smash Brothers match against a friend, who agreed he would play with a single Joy-Con as a handicap, against me on a Pro controller. (The rules didn't stipulate the Joy-Con couldn't be huge)</p><p>Aside from being a lot of fun as a gimmick when playing multiplayer games, these are great to hand out to first-time gamers or others who might find the miniscule Joy-Cons hard to hold and play.</p><p> </p><p>The whole design is printable without supports, and no outside hardware is needed. To print the base and the lid in one piece, you need at least a 230x230 mm bed. The objects fit snugly on an Ender 3 bed, but only if you place them diagonally, and remove the safe margins and skirt lines in your slicer settings.</p><p>If it doesn't fit on your bed, you might need to split the parts in two, and glue them together. I recommend splitting it near the butt end of the Joy-Con.</p><p>Once everything is printed, all parts slot together like a puzzle:</p><ul><li>Insert the Sync button by the flat tab into the Rail piece.</li><li>Slide the Rail and Shoulder buttons pieces together into the Base piece. Pay attention to the three trapezoidal tabs on the Rail, and the rectangular tab on the Shoulder buttons piece and that they go in their slots in the Base.</li><li>Maneuver the ZL button into the Base from the outside. (It is tight, but you can get it through by turning it a bit) Help the rectangular end of the flexure spring into the space near the SL button.</li><li>Insert the L button flexure (shaped like a hollow rectangle) on top of the ZL flexure, and then lock them all in place by inserting the thumbstick flexure (it has two hollow rectangles and two hollow circles).</li><li>Insert the L button from the outside, and mate it with its flexure spring. Use one or two pieces of raw filament to lock the two piece together. (or use glue)</li><li>Slide the thumbstick skirt onto the stick shaft. Screw the stick head onto the stick shaft.</li><li>Add a short piece of filament into the stick ball joint to keep the stick from spinning around. Snap the stick shaft's ball into the cradle in the Base. It goes through the stick flexure.</li><li>Snap the button-pushing arm into the holes under each face button. Add a bit of glue if they don't stay in well.</li><li>Stretch the face buttons piece and insert the tabs into the pockets in the lid piece. (The photo is of an older version, so the shape is slightly different)</li><li>Glue the Minus button, the Screenshot button, the Release button and four screwhead decorations onto the outside of the Joyant-Con.</li><li>To close the lid, first insert the tabs on the round edge of the Lid into the slots on the Base. Then latch the opposite side in. The Sync button opens the lid.</li></ul><p>Sadly I couldn't fit a working Minus button on the device so you will need a second Joy-Con to pause the game. I am working on a version for the right-hand side Joy-Con, and that version already has a working Plus button.</p><p>To open the Joyant-Con lid, push on the giant Sync button. The real Joy-Con slides onto a mounting rail in the center of the device. Help the circle in the stick-moving flexure onto the thumbstick of the Joy-Con. It's removed by pushing down on the release latch.</p><p>The stick and buttons use flexures – that is, thin pieces of plastic designed to flex – both as springs, and as mechanical linkages to transmit the inputs to the Joy-Con inside. My original prank device used screws, metals springs, and elastic bands, I'm pretty happy I was able to improve the design and replace all those with simple-to-print flexures. This improved version is easier to print and more robust, so I've decided to share it with you now.</p><p>It's hard to convey the size of this thing in photos. I think it's an absolutely hilarious object to see and play with, I hope you can print one and try it out.</p>
With this file you will be able to print Joyant-Con with your 3D printer. Click on the button and save the file on your computer to work, edit or customize your design. You can also find more 3D designs for printers on Joyant-Con.