Judy Jetson
thingiverse
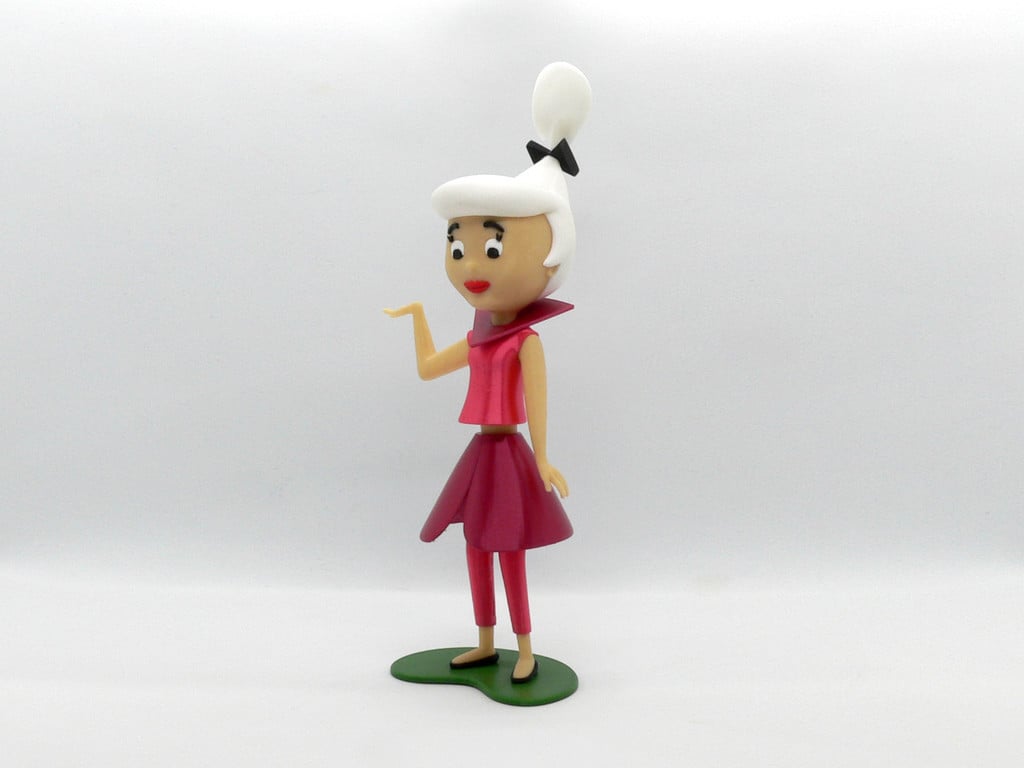
Judy Jetson, from the cartoon The Jetsons, by Hanna-Barbera Judy is the daughter of George and Jane Jetson. She is a typical teenage girl. She is obsessed with boys, rock stars, clothes, and loves to hang out with her friends from Orbit High School. Her favorite pastime is swooning after boys. No supports are required. Four pieces contains built-in supports or braces, optional parts without the built-in supports/braces are also supplied if you want to use your slicer options (see notes below). If you have the proper filament colors, no painting is needed. The assembled model is 280mm tall. ----------------- Updated 8/22/2021: Somehow the head was uploaded incorrectly (I cannot figure out how it happened). So, head_fixed.stl replaces head.stl ----------------- Enjoy! ........................................................................................................... **Print Instructions:** Supports: No Resolution: .2mm Infill: 10% Notes:** Refer to the notes below for a few helpful printing and assembly instructions. ........................................................................................................... **Building the model** Colors Black: (Paramount3D PLA - Black) eye_black_right eye_black_left hair_bow eyebrow_right eyebrow_left eyelashes_right eyelashes_left shoe_right shoe_left .. Red: (Hatchbox PLA - True Red) mouth .. White: (Overture PLA - White) eye_white_left eye_white_right hair_top hair_top_without-supports (optional piece) hair_bottom hair_bottom_without_brace (optional piece) .. Skin: (Paramount3D PLA - Universal Beige) arm_left arm_left_without_brace (optional piece) arm_right arm_right_without_brace (optional piece) head waist foot_right foot_left .. Green: (Paramount3D PLA - St Andrews Green) base .. Shiny Pink: (Polyalchemy Elixir- Bubblegum) legs shirt .. Shiny Red: (Polyalchemy Elixir- Merlot) skirt collar ........................................................................................................... **Printing and assembly tips** Printing tips 1 - No supports are required. Optional parts without the built-in supports or braces are also supplied if you want to use your slicer supports or if you have amazing bed adhesion. I have good bed adhesion, but adding braces assures a more consistent printing experience. Feedback on the braces will be highly appreciated. Supports and braces were tested with a .2mm layer height but should also work with other layer heights. -Three pieces contains built-in braces, hair_bottom, arm_left and arm_right. Those parts have small bed surface areas and are prone to coming off the bed without the braces. -One piece contains built-in supports, hair_top. 2 - There are some pieces that may need brims or rafts, use your discretion. When setting up my prints I prefer to be conservative, especially since the base of many parts are hidden when inserted into another part. *I used brims and printed multiple copies of: - eyelash_right - eyelash_left 3 - When removing parts from the printer bed, it's a good idea to place left/right parts into separate containers to help with the assembly process. .. Assembly tips: 1 - Take your time gluing the model together and enjoy the process. Give some thought into which parts to glue together as groups and then gluing the groups together. Let the glue for each group set completely before combining groups. 2 - **Update** I used 3D Gloop to put this model together (except for the eyelashes). I am not affiliated with 3D Gloop but have decided to try different glues for my models. Each type of glue has different pros/cons and I found that 3D Gloop was far easier to use than superglue (for me). The E6000 sticky glue that I usually use allows more time to position parts and is still the best for tiny parts, but requires taping some parts together until the glue sets. 3D Gloop covers the middle ground for me. It leaves enough time to set, so parts can be positioned correctly and it dries fast enough to holds awkward parts without the need for taping. I used the PLA version that comes in a tube. 3 - I suggest gluing in the waist to the shirt first. The triangular bottom connector on the waist points to the front. The waist leans and rests against the back of the shirt. Once positioned it makes sense, but it can be confusing. Apologies in advance. 4 - Eyelashes, sorry to say, but they are as small (actually tiny) and unwieldly as can be, but what is a teenage girl without eyelashes? I used a brim to print them and very carefully and slowly removed ALL the brim. Use a tiny amount of sticky glue and maneuver them into the appropriate place. Use the indent as a guide for gluing them on. 5 - The eye_blacks are not totally round. The flatter side of the oval should be on the bottom. If they are inserted the other way, she looks a bit cross-eyed. 6 - Refer to the assembly diagrams in the pictures section as well as the uploaded pictures for putting the model together. The model is meant to be glued. Do not hesitate to ask questions, feedback is essential to making better models.
With this file you will be able to print Judy Jetson with your 3D printer. Click on the button and save the file on your computer to work, edit or customize your design. You can also find more 3D designs for printers on Judy Jetson.