Junkrat RIP-Tire
thingiverse
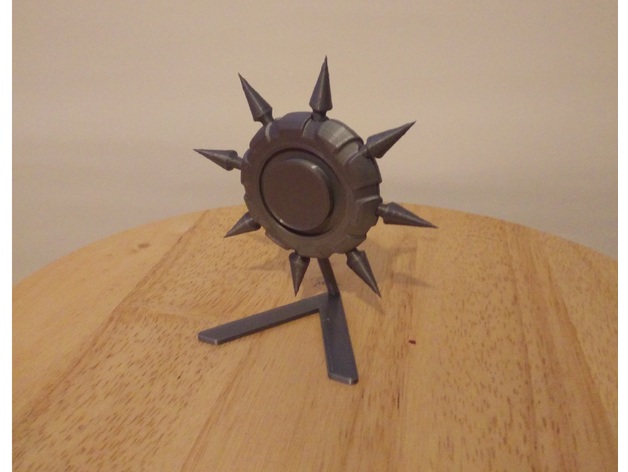
Junkrat's RIP-Tire (from Overwatch) with attachable stand. It can also rotate on the stand! This assembly does not require any glue to stick the pieces together but some pieces might become loose over time. The simple cover is not necessarily needed. It was intended to make up for some of the space left over between the axis and the back side (towards the stand) but after the print I realized that the space I had measured reserved for the cover was taken up by imperfections in the print. NOTES: I chose to print the RIP-Tire as two halves, then attached them together The tips of the RIP-Tire are quite sharp. Consider filing them down Assembly Tire Grab the Cover, Cover 2, two halves of the tire (Or single tire) and axle. Align the two halves and the cover on one side (cover flush with tire) Insert axis from side without cover to other side axis should clip on once past the cover Place Cover 2 over Cover. It should be a snug fit Spikes Grab the assembled tire and one by one insert the spikes into the tire Notes: Spikes might require some sanding down to fit in properly I've found that the spikes usually fit after the bottom of it has been rounded slightly Stand Once all the spikes are on, grab the stand and insert the small posts to the back of the tire on the Axle. Once secured, the RIP-Tire assembly is complete!
With this file you will be able to print Junkrat RIP-Tire with your 3D printer. Click on the button and save the file on your computer to work, edit or customize your design. You can also find more 3D designs for printers on Junkrat RIP-Tire.