Juno Rover: intro to electronics and coding
thingiverse
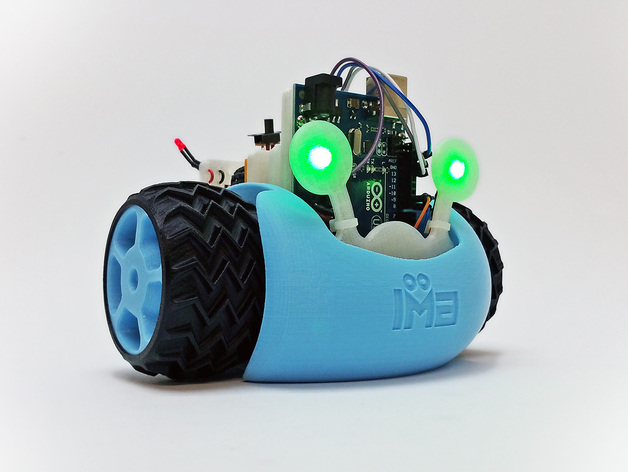
Juno is a blast to work with, full of charm and an excellent introduction to making! Unlike other robot projects, you don't need any prior experience with electronics or 3D printing to build Juno. Simply follow Juno's step-by-step instructions and learn about basic wiring, LEDs, Servo motors, and introductory Arduino code along the way. Juno's 3D printable parts are cleverly designed and optimized for success on any desktop 3D printer. If you're looking for a comprehensive 3D printing project, Juno is an excellent place to start! Juno doesn't stop - it's adaptable and expandable. Whether you're just starting out or want to take your skills to the next level, Juno has something for everyone. The design of Juno took many weeks of trial and error to ensure all the pieces fit together perfectly and print reliably and efficiently. One of the standout design features is the break-away support tabs used on the body. We left a 0.2mm gap between the support tabs and the body, which allowed us to hold the overhang layer in place while making it easy to remove after printing. The break-away tabs are also clearly marked with an "X" so they're easily distinguishable as removable parts. Juno is designed using SolidWorks, a powerful 3D modeling software. We've worked hard to create a step-by-step assembly guide with suggestions for extensions and resources section. Students can work in groups of 2 or 3, promoting teamwork and reducing material costs. One suggestion for homework is documenting their process. To get started, students will need the following materials: * 3D printed parts (available here) * Arduino Uno * HC-06 Bluetooth module * 2 servo motors * LEDs: 2 red for back, 2 green for front * Jumper wires – 4 male/female; 10 male/male * Small breadboard * Switch * 2 screws (12) * Battery holder for 4xAA batteries * Pin connectors * Shrink tube * Zip-ties * Double-sided tape * Phillips screwdriver * Wire stripper (optional) * Heat gun/hair dryer for shrink tape (optional) * Soldering (optional) * Glue/super glue (optional) By the end of this project, students will have gained valuable skills in documentation, design, Arduino, and circuitry. The duration of the lesson can vary depending on the number of students and their experience, but it's estimated to take several class sessions.
With this file you will be able to print Juno Rover: intro to electronics and coding with your 3D printer. Click on the button and save the file on your computer to work, edit or customize your design. You can also find more 3D designs for printers on Juno Rover: intro to electronics and coding.