K40 Laser lens alignment calibration tube
thingiverse
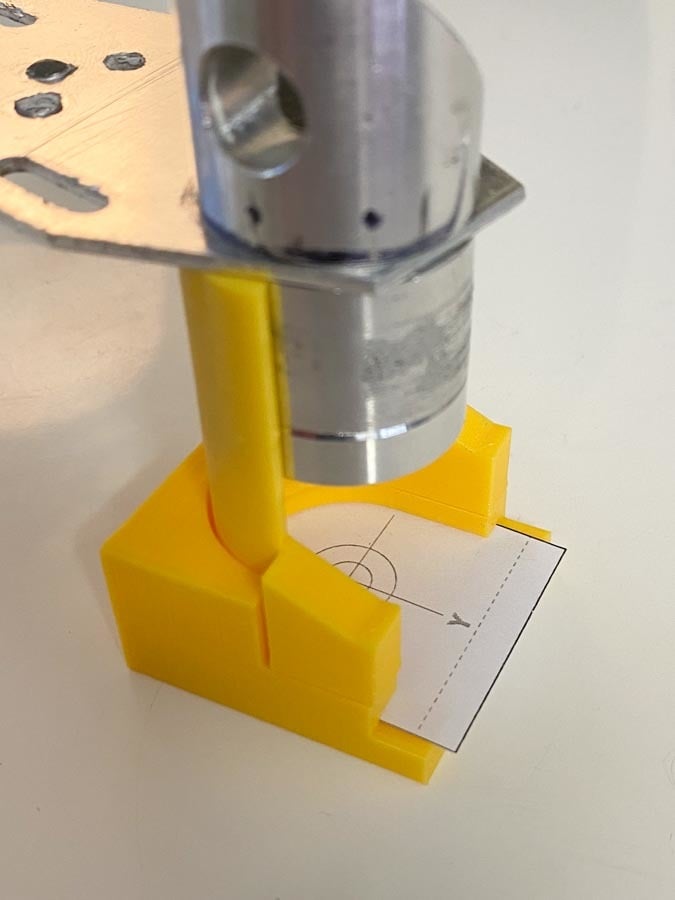
This is an accurate method that I use to line up a piece of paper under the laser head to determine where it is aiming. Instructions: 1) Use the attached Ai or EPS files to print out an A4 page with the alignment template. Cut the squares out using a steel ruler and craft knife for best results. 2) It is made up of two parts. The base and the tube. Slot your paper cutout (JPEG print file attached) into the base and then place it under the laser head. 3) I think it's best to unscrew and remove the small lens cover at the bottom for this calibration. 4) Slide the tube onto the base and ensure that the inside of the tube is flush with the laser head. Now you can close the safety panel and test fire the laser to see where it is hitting the piece of paper. You can safely adjust the laser head each time without worrying about your paper moving because the center is going to line up each time. NOTE: This is a work in progress. Try to keep the square edges of the base straight. so that you can use the X and Y lines accurately too.
With this file you will be able to print K40 Laser lens alignment calibration tube with your 3D printer. Click on the button and save the file on your computer to work, edit or customize your design. You can also find more 3D designs for printers on K40 Laser lens alignment calibration tube.