Kaleidocycle
thingiverse
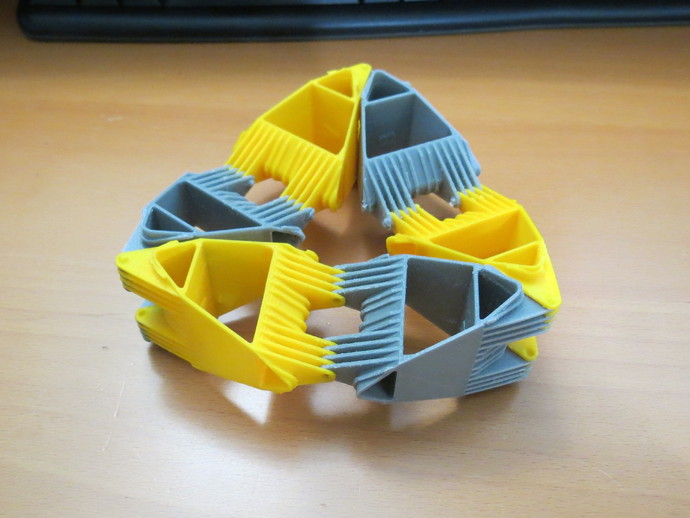
I designed a kaleidocycle using six pseudo-tetrahedra. The hinges are "snap joints". See the video: http://youtu.be/Qxe9ZNujcss Instructions PRINT: (3) "A" (3) "B" The arrows must be pointing UP when orientating for slicing. These are not symmetrical. Connect "A" to "B". Designed to print without support structures. I sliced at 0.1 mm layer height, 4 mm wall, 100% fill. The actual wall thickness of the object is 1.2 mm. Printed at between 90 mm/s and 125 mm/s on my Ultimaker and sliced with Cura. Printed with PLA. Assembling can be tricky. It is helpful to "press-stress" the hinges by moving them back-and-forth with your fingers first to make them more flexible. Make certain you have the "A" and "B" aligned properly (not one hinge off) and both arrows are pointing in the same direction. Start the hinge sort of like a zipper. You cannot snap all of the hinge joints at once. Start at an outside edge and work toward the opposite side. I found it easier to insert one set of hinge "dimples" behind the opposite side (sort of like an interlocking comb) and then wiggle back-and-forth until the outside dimple moves into position and the continue wiggling until the rest pop into place. I will plan to upload another model with fewer hinge connections to make this part easier. At first, it doesn't seem like it will work, but after you figure out the technique, it should not take longer than one minute per hinge joint. Enjoy!
With this file you will be able to print Kaleidocycle with your 3D printer. Click on the button and save the file on your computer to work, edit or customize your design. You can also find more 3D designs for printers on Kaleidocycle.