Kant twist clamp, fixed
prusaprinters
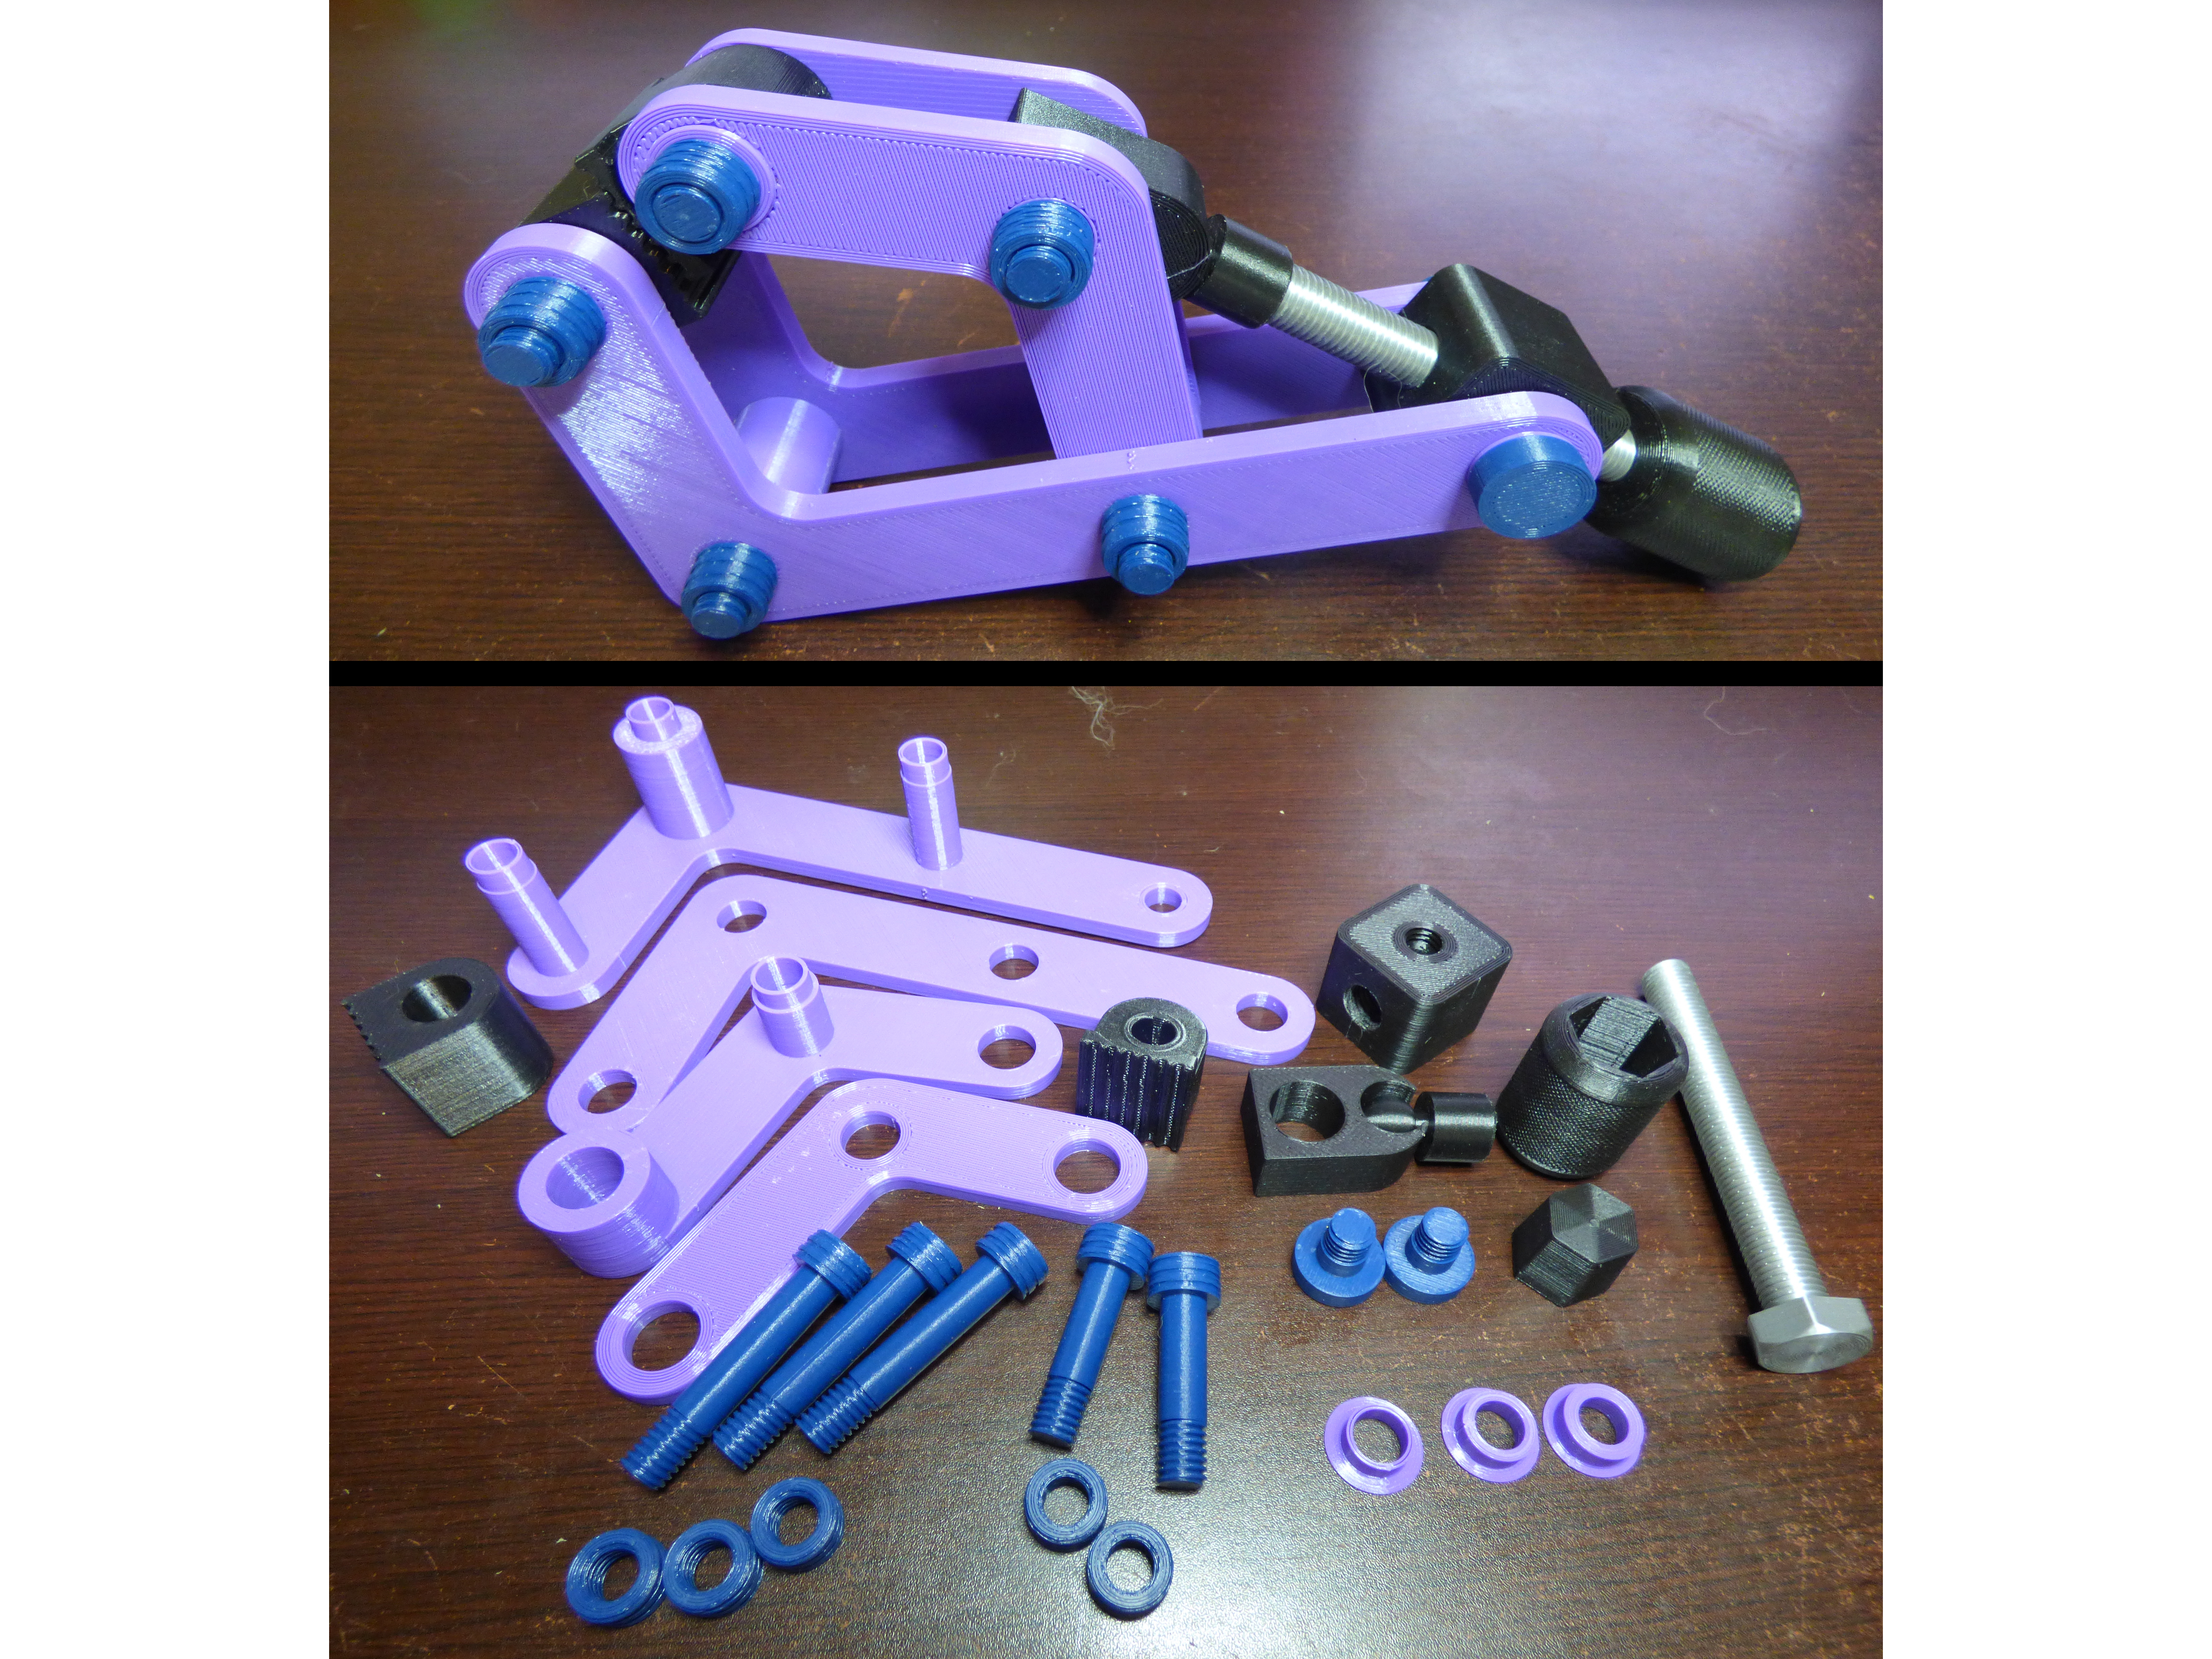
<p>The original project can be found at <a href="https://www.thingiverse.com/thing:3538259">https://www.thingiverse.com/thing:3538259</a></p><p>As a couple of people there mentioned, it's missing some files (namely the handle, the ball joint and the main 4-way block), and there were a few minor mistakes that made the printed model a bit loose. I've created new versions of the missing parts, using the original project photo as a guide, and maybe made an improvement or two.</p><p>In addition, the original model used a regular bolt or similar for the main screw. I've replaced it with a printed M12x1.5 bolt, making the project 100% 3D-printed.</p><p>I've also renamed some of the original files to correct typos and make things a little easier to understand.</p><p>I also omitted a couple of parts that aren't actually used in the final project (probably just leftovers from the initial design).</p><p>You will need to print the files as follows:</p><p>3 – bolt - 3\8 in, long.stl<br>2 – bolt - 3\8 in, medium.stl<br>2 – bolt - 3\8 in, short (4-way block mount).stl<br>5 – nut - 3\8 in, slightly larger threads.stl<br>1 – handle.stl<br>1 – handle plug.stl<br>1 – jaw - large.stl<br>1 – jaw - small.stl<br>1 – leg - large, lower.stl<br>1 – leg - large, upper.stl<br>1 – leg - small, lower.stl<br>1 – leg - small, upper.stl<br>1 – 4-way block.stl<br>1 – main bolt - M12x1.5, 100mm.stl<br>1 – main bolt ball endcap.stl<br>1 – pivot block.stl<br>1 – small jaw bushing A.stl<br>1 – small jaw bushing B.stl<br>2 – 4-way block bushing.stl <br><br>The photos should make it pretty self-explanatory how to assemble the clamp once you have all the parts.</p><p>Notes about the bushings mentioned in that list: The four legs have incorrectly-sized holes for the 4-way block and the small jaw, so I made bushings, that way I don't have to resize the holes in the legs. Since I had already printed them, this meant WAY less extra time and plastic to make the corrections. The two holes for the 4-way block are the same size, but for some reason, the two holes for the small jaw are slightly different, hence there are two separate bushings for those. All bushings go on the outside of the legs.</p><p>The handle plug is there to fix the bolt in the bottom of the handle, and it's meant to be a moderate friction fit. It should push in just with hand pressure, and remain fixed in place unless you use the bolt to force it back out. If you have to hammer it in, or if it just slips in with no effort, your flow rate or E steps/mm are not properly calibrated, or your slicer's X/Y perimeter compensation setting is wrong.</p><p>When you thread the main bolt into the ball joint, you'll want to torque it down a bit (but of course don't over-tighten it, this is still just plastic after all). That way the ball joint will rotate within the pivot block when you turn the screw. A little bit of oil or grease in the ball joint might be a good idea.</p>
With this file you will be able to print Kant twist clamp, fixed with your 3D printer. Click on the button and save the file on your computer to work, edit or customize your design. You can also find more 3D designs for printers on Kant twist clamp, fixed.