Kapton Tape spreader frame
thingiverse
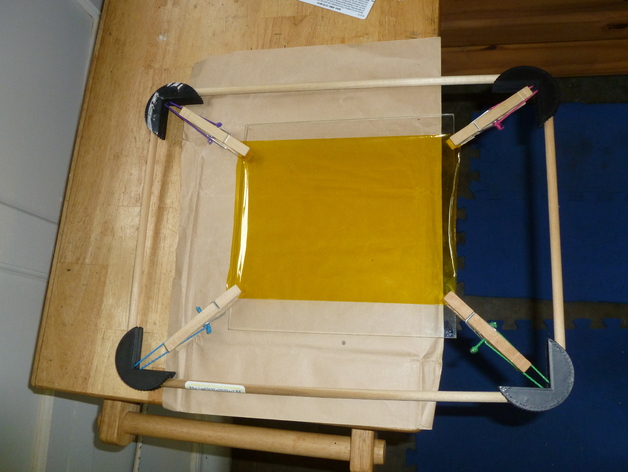
Having trouble keeping your wide kapton tape flat durring application? Need four extra hands? This tape spreader frame allows you to easily place a large expanse of kapton down with no bubbles or wrinkles. Instructions Vitamins needed: 4x clothespins (small or medium sized) 4x thin elastic bands or hair bangles 4x custom cut 5/16" or 8mm dowel rods or threaded rod Print 4 corner parts. (Or, you know, make them from simple blocks of wood...but where would the fun be in that?) Drill the holes out with a 8mm or 5/16" drill bit to clean them out. Push a small screwdriver or drill bit through the smaller elastic holes to clean them out. Cut two rods/dowels the width of your tape + 4 inches (e.g. for my 6" wide tape, I cut two at 10"). Cut the other two rods/dowels to the length you want +4 inches. (e.g. for my 8" build platform, I cut them to 12") Cut the metal parts off your elastic hair bangles or cut your elastic bands. Push the elastic bands through the small holes and tie them inside the spring of a clothespin. (To be super hardcore, pause your print job halfway through, and embed the elastic loop in the printed part, then "screw" it through your clothespin spring, with no cutting...) Assemble the frame. It should hold together with only friction unless you went wild on the drilling step. This allows it to be dissassembled for travel. (Alternatively, glue each rod into a single corner piece, which still allows for disassembly.) USAGE: Unroll an inch of tape. Clip two clothespins to the corners. Now unroll more until you have enough to clip the other two clothespins to. The clothespins don't have enough force to hold the end of the tape while you pull on it to unroll it, so use your hand in the middle between the two upper clothespins. I find it helps to hang the frame from some hooks, but you could probably do it horizontally with the frame on a table as well. After you have all 4 corners clipped, cut off the roll below the lower clothespins, and you are left with a flat piece of kapton tape held at 4 corners by the clothespins. Make sure the elastic is under tension to hold the tape flat/tight. Feel free to re-position one corenr at a time if needed to get the tape completely flat. Now you are ready to use the frame to apply the tape. I have tried two different methods, both work well for me: Method 1 - Start at the end: Lay one edge of the tape down on the edge of the glass and hold the other end up in the air. Use a plastic (credit) card to push air out from under the tape until you hit the other end, gradually lowering the frame. Be sure to do the middle of the tape first and work the edges outwards. Method 2 - Start in the middle: Lay the frame down on your glass with the clothespins touching the glass and holding the kapton tape above it. Push the middle of the tape down, and use a plastic (credit) card to work out from the center, making a bigger and bigger circle or diamond of tape attached to the glass. When you get very close to the clothespins, you can unclip them one by one and spread the kapton out to the edge/corner.
With this file you will be able to print Kapton Tape spreader frame with your 3D printer. Click on the button and save the file on your computer to work, edit or customize your design. You can also find more 3D designs for printers on Kapton Tape spreader frame.