KBricks -- quad and mini quad
thingiverse
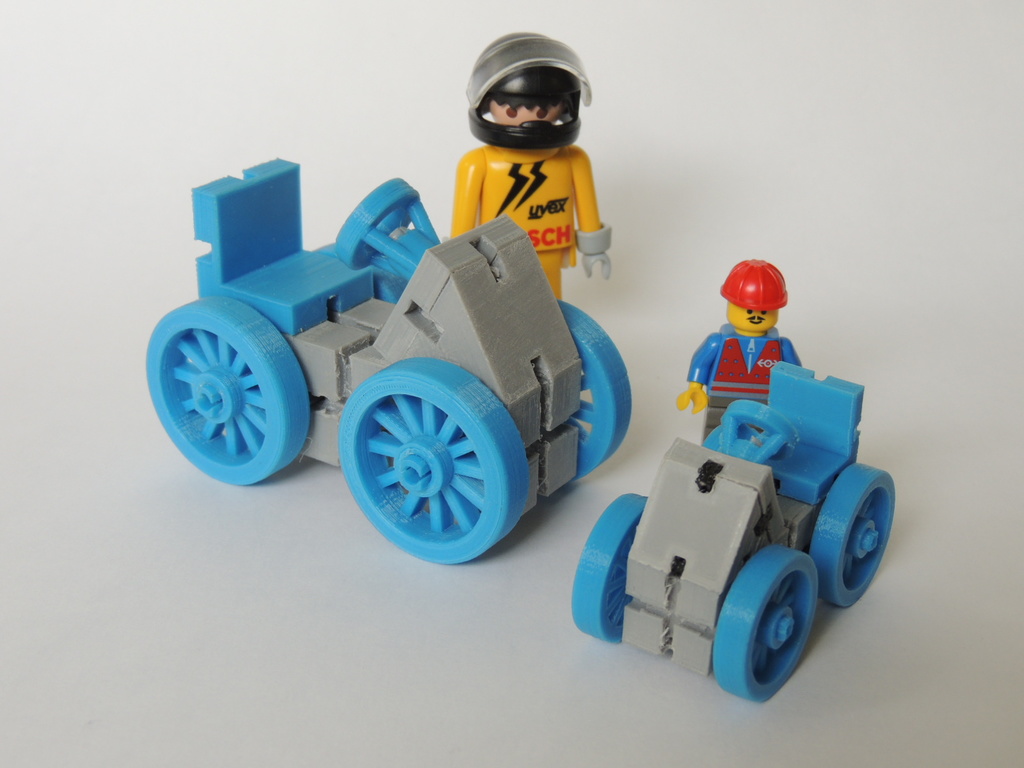
My first prints with the KBricks systems -- The Quad Demo and Quad Demo at 2:3 scale. Getting my first successful KBricks build was more of a challenge than I expected. Some of the parts and fit are fiddly, both to print and assemble. Lessons learned.: Print the connectors vertically. If you print horizontally, the grain of the print is such that they break easily along the long dimension. Print the pegs and axles horizontally, for the converse of the same reason. Here comes my first remix; I un-meshed the peg and created a flatted version that would print more easily on its side (without supports). I did this un-meshing and editing in FreeCAD. I guess I should go back and draw or modify it in OpenSCAD so that it can be posted back into the GIT repository. Axles and such were tight. I endied up printing my pegs about 3% undersized (except for length), and the steering wheel about 3% oversize (except for hieght) so that they would fit more easily. Everything printed easily with a .4mm extruder and .2mm layer height. The idea behind the mini version was that at 2/3rds size the basic modulus would be 16 x 16 mm -- the same as a 2x2 Lego brick. This print went pretty easily, after learning the lessons of the full-sized print. The one issue was that the wals of the connectors were too thin to print. Using the original stl as a guide I drew modified pegs with what would be 1.2mm walls at full size -- .8mm scaled. I also made these a little longer for more engaging surface. I printed the scaled-down pegs at .12 layer height. Again, I did this in FreeCAD, I should redo it in OpenSCAD.
With this file you will be able to print KBricks -- quad and mini quad with your 3D printer. Click on the button and save the file on your computer to work, edit or customize your design. You can also find more 3D designs for printers on KBricks -- quad and mini quad.