Kelvin Clamp / Kelvin Clip / Kelvin Probe
thingiverse
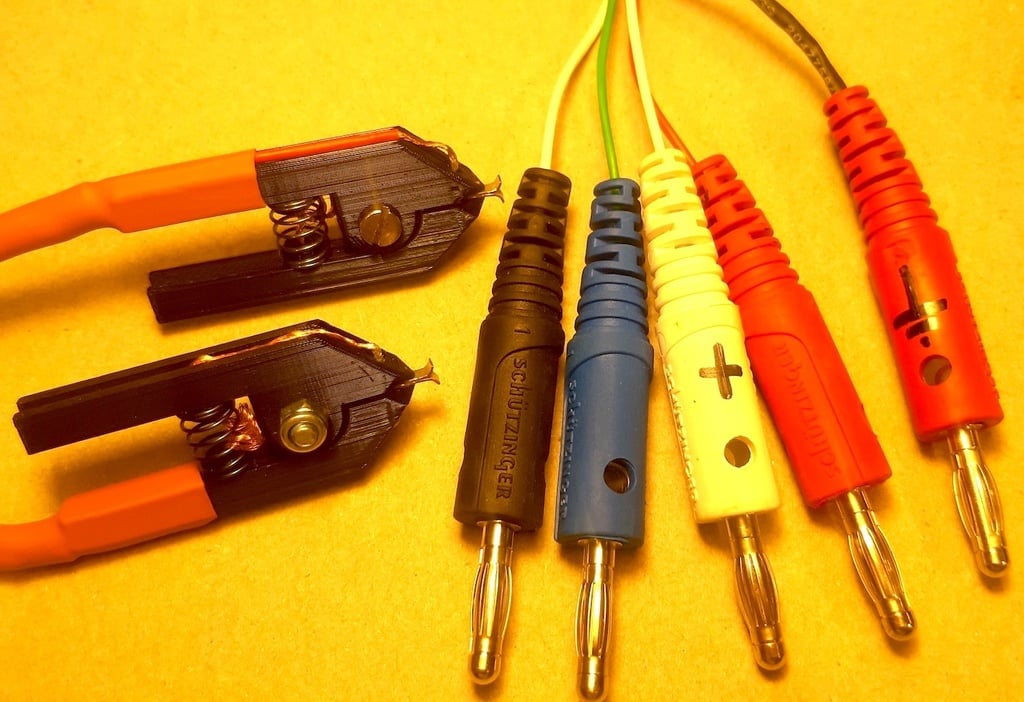
# Whats this? These are Kelvin-Clamps for 4-wire Impedance measurements. In the need for Kelvin-Clamps for my HP 4262A LCR/ESR meter, I made these. Also suitable fo 4-wire Ohms measurement. The 4-wire Impedance measurement method separates the voltage measurement path from current injection path. Thus it eliminates parasitic impedance effects of the wires between instrument and device-under-test. # Materials needed for unshielded pair: * 4x printed thing (half-clamp) * 2x spring 6mm inner diameter * 4x metal strip ~2.3mm x 10mm of 0.4mm thickness e.g. from sample bag clip. I took mine from a automotive plug contact. * 2x M3 screw 10mm (no Idea what fits in the US) * 2x M3 lock nut * 4x flexible wire AWG23 or AWG24 or 0,22mm2 * some heatshrink tubing 10mm diameter * 4x banana plug 4mm or whatever your instrument wants to connect * some drops of glue # Materials needed for shielded pair: * 4x printed thing (half-clamp) * 2x spring 6mm inner diameter * 4x metal strip ~2.3mm x 10mm of 0.4mm thickness e.g. from sample bag clip. I took mine from a automotive plug contact. * 2x M3 screw 10mm (no Idea what fits in the US) * 2x M3 lock nut * 2x shielded flexible cable, 2 conductors + shield AWG23 or AWG24 or 0,22mm2 e.g. "SommerCable Peacock MK2" * some heatshrink tubing 10mm diameter * 1x zip-tie 3mm * 5x banana plug 4mm or whatever your instrument wants to connect * some drops of glue # Assembly 1. Print stuff :D 2. Cut and then bend metal strips in L-shape as shown in the attached pictures. Check for fit in half-clamp - it shall barely not fit in 3. Tin one end of the metal strips on one side. 4. Strip and tin wire ends. 5. Feed wire ends through half-clamp tip, then solder quickly to metal strip. 6. Push the metal strip back in the half-clamp tip with a needle-nose plier. (works better when still hot from soldering, but be careful) 7. Add heatshrink and drops of glue to secure wires in place. Be careful with heating the heatshrink tube. 8. Add screw and lock nut. Tighten until just stays moveable. 9. Add spring (has to be threaded in when following the Pro-Tip). 10. Take care for the other end of the cable(s). # Pro-Tips * The half-clamps have a hole through where the spring resides. This enables to have the wire coming in at just one half-clamp, as shown in the pictures. Due to extra patience and dexterity needed, this is not for everyone ;) * Using plastic screws eliminates ~0.4pF variation in measurements, when screws touch each other. Otherwise have a look they don't touch and you're good. * Do "open" and "short-circuit" self-calibration of the instrument. When having some overhang of the metal strips, the "short-circuit" is best when voltage-path ends are between current-path ends.
With this file you will be able to print Kelvin Clamp / Kelvin Clip / Kelvin Probe with your 3D printer. Click on the button and save the file on your computer to work, edit or customize your design. You can also find more 3D designs for printers on Kelvin Clamp / Kelvin Clip / Kelvin Probe.