Kendama
thingiverse
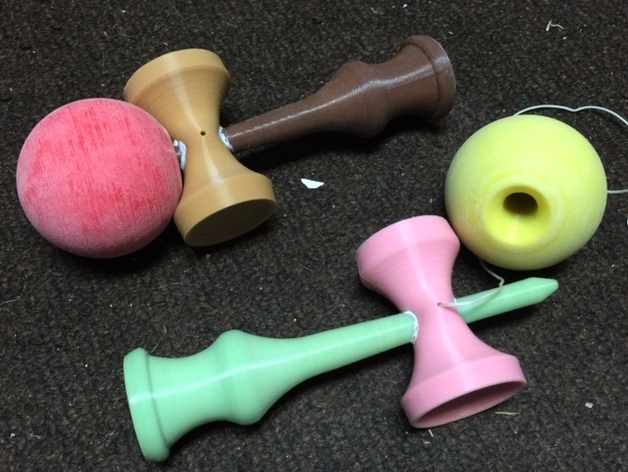
Kendama [UPDATE: 5/17/2015 -- there is a newer version of this that won't break while playing with it -- http://www.thingiverse.com/thing:833183) Virtually identical size as my son's purchased kendama (my reference). The last picture has got to be the most interesting failed print I've gotten to date (click on the "toggle largeview" button to see the entire thing)... Harry Potter wand anyone? UPDATE: 5/6 I uploaded a new BigCup/LittleCup .stl file; with a reduced "bulge". I found that the first version uploaded made some of the tricks more difficult due to the bulge affecting how the ball rests in the "frying pan" / "spatula" position... I removed the original .stl, so the newer one (30) is the only one here now. Instructions All parts should be printed with a brim (they have small plate footprints). The ball does not need support material; the other two do; for the cup facing the print bed, since it's rather horizontal. It probably won't be a real smooth surface, but it doesn't really need to be; it's curvature is slightly deeper than the ball itself. It can also be smoothed out some using acetone it you really want to. I printed my first one with all parts at 80% infill; I was after the weight for the ball, and strength for the other parts. (All printed with ABS) The ball printed with 80% infill weighed in at 84g, while my son's wooden ball weighs 72g. The handle weighs in at 73g, vs. the wooden handle at 63. I was actually surprised the printed one weighed more than the wooden one; I guess it's light wood. :) I printed a second ball at 70% infill; it weighed in at 79g. The string hole Big Cup / Little Cup part needs to be drilled after printing; there are dimples on each side where the hole should be (I did't make the hole all the way through for better strength; along with the "bulge" there). Slide the BigCup/LittleCup onto the Base Cup (it is tapered, and so is the hole, so make sure you slide it on in the correct orientation). Line up the hole(s) you drilled out in the BigCup/LittleCup with the printed hole in the Base cup/handle (I put a jeweler's screwdriver through), then glue it into position (that white stuff in the picture is because I used Zip Kicker super glue accelerant; it turns the glue white.) You can use a kendama replacement string (e.g., http://amzn.com/B00P4OILO4), or just use your own string; the ball should hang at least 38cm from the handle. When looking down holding the base cup in your hand, with the ball hanging, the Big Cup should be on your left (at least that's the way my son's purchased Kendama is). I found that the ball and cups were a little too slick compared to the wood counterpart, so I roughed up the ball and cups with sandpaper to give them a "matte finish"; that seems to better approximate wood in gameplay. Unfortunately, the best orientation for printing the base cup is vertical, but that makes the weakest bond (the layers) the cross section, which can lead to it breaking (the "spike", or just below the BigCup/LittleCup); I've had two snap, but super-gluing them back together worked, and neither have broken again.
With this file you will be able to print Kendama with your 3D printer. Click on the button and save the file on your computer to work, edit or customize your design. You can also find more 3D designs for printers on Kendama.