Kerfmaker Ultimate for Table Saw (Tenonmaker)
thingiverse
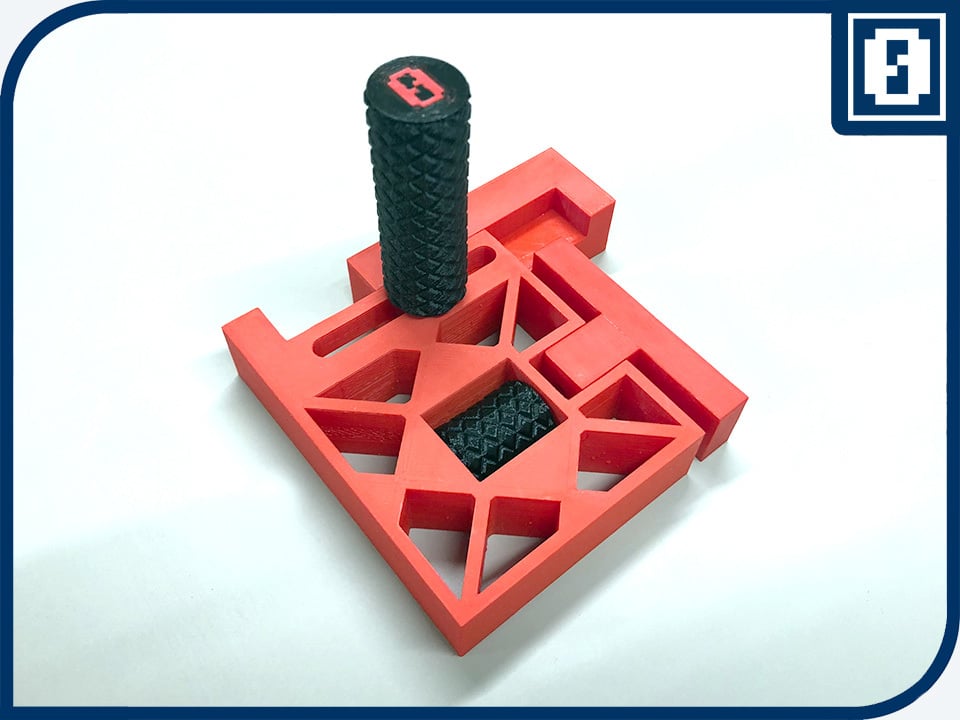
This is a kerf maker. A tool that simplifies the process of cutting kerfs into wood when used with a table saw. Especially helpful for repeatedly cutting kerfs of the same size. There are many kerf-makers available here on Thingiverse, most with a similar design. One maker refers to "the real McCoy" as the source of inspiration, but I found a commercially available one from Bridge City, known as KM-1 or KM-2. These designs are sleek and cleverly constructed, but there is room for improvement: after the first cut you have to turn the kerfmaker 180°, then do the second and subsequent cuts. I chose a design that utilizes a long handle which makes it very easy to grab and turn the kerfmaker. What you need: • all five parts printed • 1 x M6 threaded bar, 57 mm length • 1 x M6 threaded bar, 33 mm length • 2 x M6 nut • 1 x M6 self-locking hex nut If you want to make bigger kerfs, print the "EXTRA WIDE" base and sliding block. You'll then have a maximum kerf width of about 63mm. How to assemble: • Put a hex nut into the hole on the flipside of the sliding block. Glue it in place if necessary. • Glue a hex nut into one hole of the small knob and a self-locking hex nut into the other one. NB1: The holes have different depths to accommodate the different heights of a normal nut and a self-locking nut (which is usually higher). NB2: The self-locking nuts have a job, namely to lock on the threaded bar. While we do want friction, it might be necessary to get the threaded bar more free-moving by removing some plastic from the inside of the self-locking nut. You will have to experiment. • Glue the 57 mm threaded bar into the blade distance piece. • Lay the base on a table and put the small knob into the base. I recommend letting the normal nut face the blade distance piece, less of the threaded bar to screw through the self-locking nut. • Stick the blade distance piece's threaded bar through the hole and start screwing it into the small knob. Go on till you come to the end, then stop. • Glue the 33 mm threaded bar into the big knob (handle). Take care that the threaded bar is sticking out 19mm. • Join the sliding block with the base using the big knob (handle). Done! You can see my Kerfmaker How-to video on YouTube.
With this file you will be able to print Kerfmaker Ultimate for Table Saw (Tenonmaker) with your 3D printer. Click on the button and save the file on your computer to work, edit or customize your design. You can also find more 3D designs for printers on Kerfmaker Ultimate for Table Saw (Tenonmaker).