King Kamehameha I spear head
prusaprinters
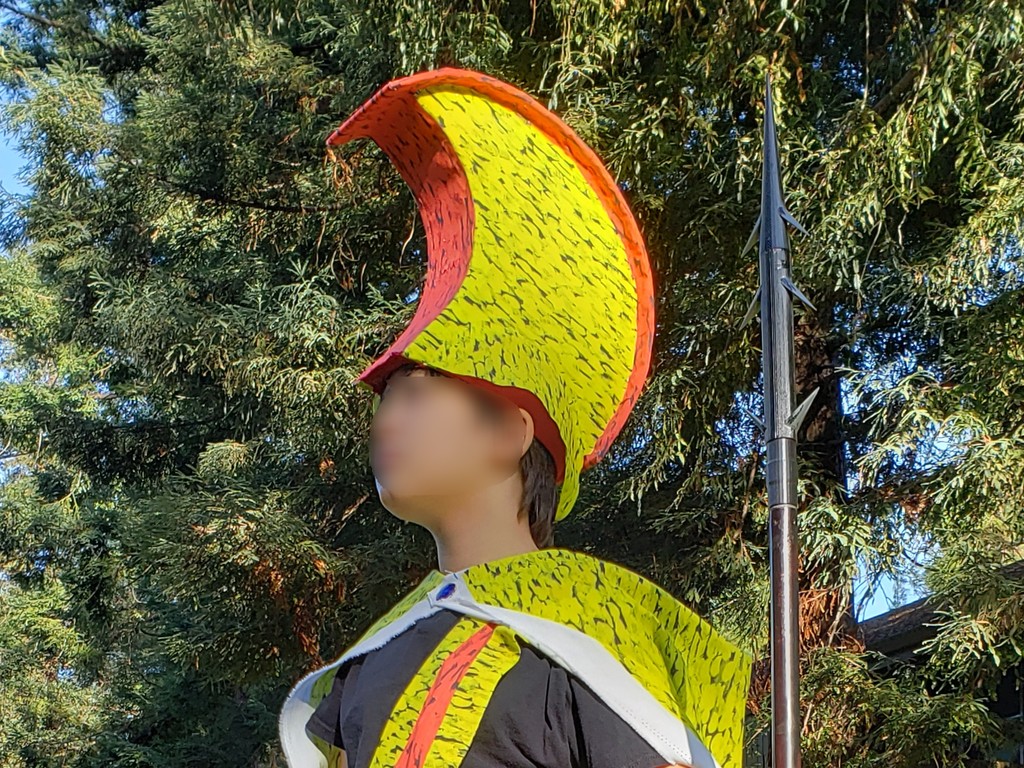
<p>This spear head was inspired by a statue of Hawaiian King Kamehameha I (pictured above) and used as a prop for the costume my son wore in his school's "historical Halloween" parade when he was in 5th grade.</p><p>Two of the eight barbs seen in the statue are not included in this model, so that things fit on the print bed. You'll need a build surface with about 185 mm of length.</p><p>The spearhead is designed to screw onto a standard broom handle. I printed this with PLA, did some filing for fit, and glued the pieces together with acetone. It was a fairly quick project including spray-painting.</p><p>Although the point is blunt, it can still cause serious injury, and the barbs are quite sharp, so take care and be safe! The school judged the spear too dangerous to be carried in the parade due to close proximity with other kids, although my son could pose for pictures with it.</p><p>This object was made in Tinkercad. Edit it online <a href="https://www.tinkercad.com/things/dDrz19zmtTU">https://www.tinkercad.com/things/dDrz19zmtTU</a></p><p>Attribution: The photo of the statue comes from Wikimedia Commons: <a href="https://commons.wikimedia.org/wiki/File:Kamehameha_I_head_to_waist_5111.jpg">https://commons.wikimedia.org/wiki/File:Kamehameha_I_head_to_waist_5111.jpg</a></p><h3>Print Settings</h3><p><strong>Printer Brand: </strong>Prusa</p><p><strong>Printer: </strong>I3 MK3S</p><p><strong>Supports:</strong> Doesn't matter</p><p><strong>Resolution: </strong>0.20 mm layers</p><p><strong>Infill: </strong>15% gyroid</p><p><strong>Filament:</strong> Prusament PLA Silver</p><p><strong>Notes:</strong></p><p>In hindsight, it would have been better if I had printed the large 4-barb parts with supports to avoid the bridging on the end that the spear point inserts into, but the bridging was easy to scrape out, and applying a flat file to the insertion pieces, everything fit nicely.</p><h3>Post-Printing</h3><p>After printing the parts, cut out any bridging from the spearhead body (if you printed without supports) until the two halves of the tip part can be inserted into it. Paint the flat surfaces of the spear point liberally with acetone, align carefully, and clamp together. Do the same for the spearhead body. Wait 30 minutes or so for the acetone to set, and then test fit all the parts: spearhead tip, spearhead body, and broom handle socket, using a flat file as needed to make sure the parts fit snugly together, and then use more acetone or any other glue to make the final assembly. Screw the spear head onto a broom handle and spray-paint as desired.</p><h3>How I Designed This</h3><p>This design is primarily made of cones and cylinders with some blocks subtracted. The most challenging part was creating the broom handle screw thread in TinkerCad, which required me to write a shape generator for a coil of the right dimensions to put into the socket.</p><p> </p><p>Category: Props</p>
With this file you will be able to print King Kamehameha I spear head with your 3D printer. Click on the button and save the file on your computer to work, edit or customize your design. You can also find more 3D designs for printers on King Kamehameha I spear head.