KINGROON KP3S Adjustable Lead Nut Mounter
thingiverse
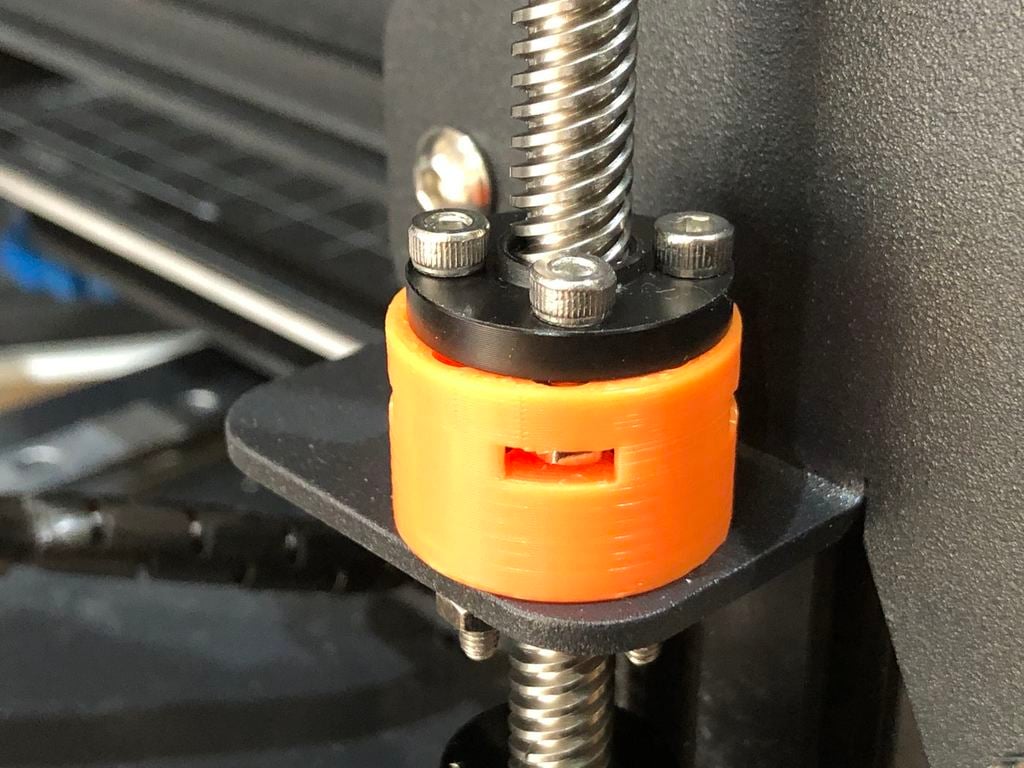
### Related Article **Japanese** "Z軸の不具合対策 – KINGROON KP3S情報" http://hitoriblog.com/kingroon_kp3s/docs/trouble_shooting/countermeasures_against_z-axis_problems/ **Google Translated** "Countermeasures against Z-axis problems - KINGROON KP3S Information" https://translate.google.com/translate?sl=auto&tl=ja&u=http://hitoriblog.com/kingroon_kp3s/docs/trouble_shooting/countermeasures_against_z-axis_problems/ ### Summary The machining accuracy of KINGROON KP3S is not high, and there are many units where the lead nut and the axis of the stepper are not aligned. If the fixed position of the lead nut is free, this problem can be solved.  So, I created a adjustable mounter that allows the fixed position of the lead nut to be freer than the standard state. <div style="text-align: center;"> <iframe width="560" height="315" src="https://www.youtube.com/embed/VEx_yYwCHdc" frameborder="0" allow="accelerometer; autoplay; clipboard-write; encrypted-media; gyroscope; picture-in-picture" allowfullscreen></iframe> </div> This should help to improve the quality of the molding process when the lead nut and the axis of the stepper are not aligned, resulting in ripples on the Z-face of the product.  # BOM (Build of Material)  - M3 Hexagon socket head screw * 12mm x 8 - M3 Hex Nuts x 8 - Lead nut with unthreaded screw hole x 1 (Must be unthreaded screw hole in order to be secured with a hex nut) [AliExpress](https://s.click.aliexpress.com/e/_Am2kia)  # How to adjust the lead screw and lead nut 1. Install the Adjustable Lead Nut Mounter with four screws.  2. Insert four Hex Nuts through the four slits on the side of the Adjustable Lead Nut Mounter.  3. Attach the lead nut to the Adjustable Lead Nut Mounter with four screws. Leave the screws loose in order to adjust the position of the lead nut.  4. When tightening the screw, insert a precision screwdriver into the slit beside the hex nut. You can't tighten it too hard, but if the lead nut doesn't move up and down, it's OK.  5. Insert the lead screw into the lead nut to reach the flexible coupler. Turn the lead screw to raise the gantry and apply a load to the flexible coupler.  6. Check that the lead screw is hitting the bottom of the hole in the flexible coupler. Tighten the first Set Screw while pulling on the upper side of the flexible coupler. Then, tighten the second Set Screw in the same way. This is a procedure to prevent the bottom part of the model from collapsing. (a.k.a. elephant foot)  7. Nothing is attached to the top of the Z-axis frame yet.  8. Measure the length of the lead screw and the Z-axis frame together with a caliper at the bottom of the leadscrew, around the flexible coupler.  9. Attach the [Adjustable Anti Z Wobble Hat](https://www.thingiverse.com/thing:4748680) to the top of the Z-axis frame. Do not tighten the screw, but leave the bearing position adjustable.  10. Measure the length of the lead screw and the Z-axis frame together with a caliper at the top of the lead screw, around the [Adjustable Anti Z Wobble Hat](https://www.thingiverse.com/thing:4748680), as close to the same length as the bottom as the lead nut can move. **Be careful not to bend the leadscrew** Tighten the screw on the [Adjustable Anti Z Wobble Hat](https://www.thingiverse.com/thing:4748680) to lock the bearing in position.  11. Gradually tighten the four screws in turn, taking care not to misalign the lead nut, and secure the lead nut as far as it will go.  12. Check the quality of the Z surface by test printing. 
With this file you will be able to print KINGROON KP3S Adjustable Lead Nut Mounter with your 3D printer. Click on the button and save the file on your computer to work, edit or customize your design. You can also find more 3D designs for printers on KINGROON KP3S Adjustable Lead Nut Mounter.