Kitchen plinth (Kickboard) fitting jig
thingiverse
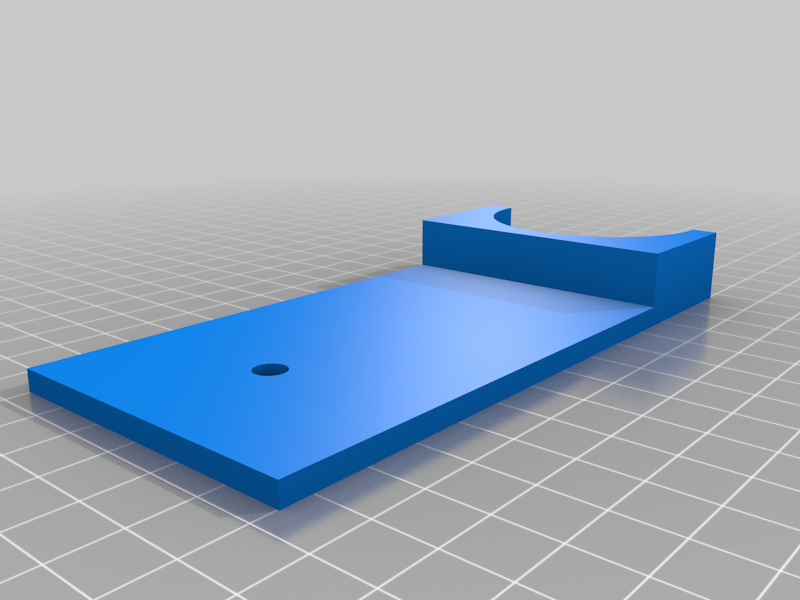
This was designed to line up the fixing brackets with the kitchen unit legs. Ok i guess its not too hard to measure it, but I had a lot to do, and more to the point, it let me play with the printer for an hour, while still "working" on my beloved's kitchen :) The kick boards I'm using are 150mm x 18mm thick, this jig let you mark the centre of the board, perfectly aligned with the leg. Although 1 jig can be used on its own, its probably easier to use for 2, especially for long lengths of kick board. Instructions for use - 1) Lay the kick board face down on the floor, with the ends lined up, in front of the unit(s) 2) Place the jig between the first leg, and the board and mark the hole position (If using 2 jigs then fit one at either end. 3) Mark each fixing hole with a fine point marker. 4) Drill a small pilot hole on each mark (Only a few mm deep !) 5) Fix clips to board, then push board onto unit legs.
With this file you will be able to print Kitchen plinth (Kickboard) fitting jig with your 3D printer. Click on the button and save the file on your computer to work, edit or customize your design. You can also find more 3D designs for printers on Kitchen plinth (Kickboard) fitting jig.