Kitchen/Workshop granule Dispenser - Wall Mounted
myminifactory
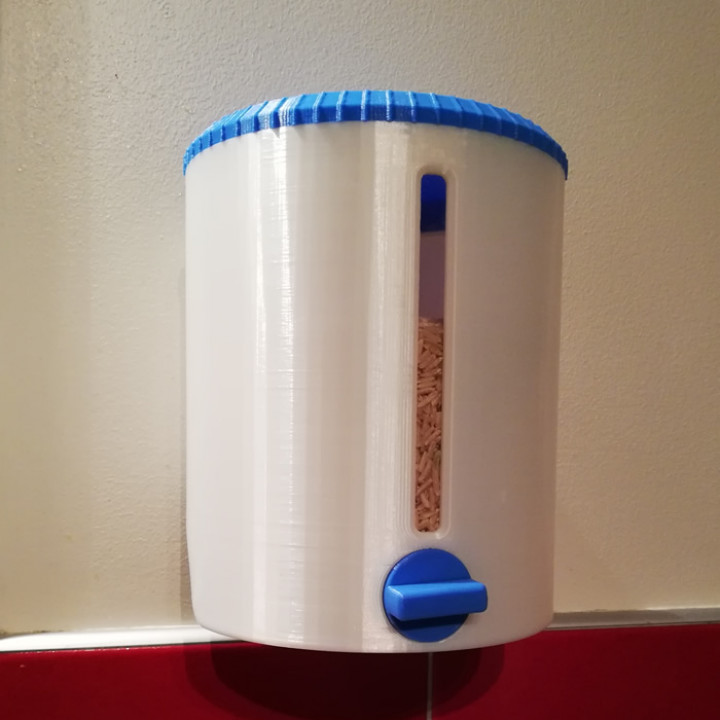
Wall mounted Kitchen/Workshop granule Dispenser with screw top lid for Tea, Coffee, Rice etc. in two hopper sizes: 620ml or 1000ml, with 3 removable cup types (Tap, Teaspoon, Tablespoon). Not suitable for liquids. You will need: 1. PLA or PLA+ Filament (other filament types e.g. PETG may also be suitable but not tested with this model). 2. 0.8mm thick clear acrylic for plastic view window (620ml hopper: 12mm x 95mm, 1000ml hopper: 12mm x 125mm for 1000ml hopper). 3. 4mm or similar sized screws suitable for drilling into your wall OR double sided foam tape suitable for attaching to your wall. Plastic view window Material: 0.8mm thick clear acrylic.Dimensions: 620ml hopper: 12mm x 95mm, 1000ml hopper: 12mm x 125mm. Mounting method 4mm or similar sized screws suitable for drilling into your wall OR double sided foam tape suitable for attaching to your wall. Assembly Once all parts have been printed, support material removed, and cleaned of debris: 1. Turn the hopper upside down. 2. Insert desired cup type (e.g. tap) into the cup hole, so the flange is flush with the gap at the end of the cup hole. 3. Carefully push a cup retainer ring into the gap - it should lock into place around the cup so that the cup can rotate 360 degrees without coming out. If you want to swap to another cup, first use the Cup retainer remover to help push out the retainer ring. 4. Cut out the plastic view window to size (see above). 5. Insert the plastic view window into the slot in the top of hopper - make sure to push the plastic past the bottom of the viewing area, otherwise granules will escape. 6. If storing food granules e.g. coffee, make sure inside of the hopper and the cups are sanitised prior to use. 7. Screw the lid onto the hopper. Tip: If the lid is tight/jams, use a paper towel to smear a small amount of vegetable oil onto the thread. 8. Slide the Wall mount all the way down onto the Hopper. Tip: If the mount is tight/jams, use a paper towel to smear a small amount of vegetable oil onto the rails. 9. Test position the Hopper with it's attached Wall mount where you want to place it, making sure to consider what size cups, containers etc need to be placed under the Hopper. Using a pencil or non-permanent marker, mark on the wall where you want the Wall mount to go. 10. If you decide to attach the Wall mount to the wall using screws, then place the Wall mount where you marked it and drill the holes. You can also use double sided foam tape or similar to stick the Wall mount in place. 11. Slide the Hopper onto the Wall mount, ready for use.
With this file you will be able to print Kitchen/Workshop granule Dispenser - Wall Mounted with your 3D printer. Click on the button and save the file on your computer to work, edit or customize your design. You can also find more 3D designs for printers on Kitchen/Workshop granule Dispenser - Wall Mounted.