Klein bottle (medium) NeoPixel base
thingiverse
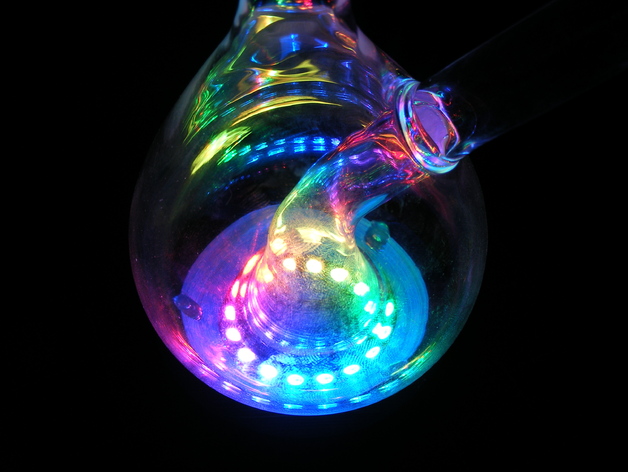
This is a 3D-printed base I made as a Christmas gift for a friend, which uses a NeoPixel ring and a Trinket from Adafruit to illuminate a glass Klein bottle from http://www.kleinbottle.com/. All of the electronics are integrated into a two-part 3D-printed base that can be fastened together using M3x14 screws. A spherical scallop cradles the Klein bottle, but matches the curvature of the bottle so perfectly that there is very little friction. To prevent the bottle from fall over, small dabs of hot glue are added on top of each M3 screw, holding the glass upright surprisingly well. A video of the completed piece in action can be seen at: https://www.youtube.com/watch?v=YRprDHtTOR4 Photos from the assembly process can be found at: http://www.flickr.com/photos/zenwebb/sets/72157638778949224/ More photos of the completed piece can be found at: http://www.flickr.com/photos/zenwebb/sets/72157638776800776/ You can also find an article about this piece (and another gift) on my blog at: http://jason-webb.info/2013/12/glassblowing-electronics-first-commission-and-klein-bottle-gift/ Instructions Apologies in advance for the lack of very clear documentation - this was created as a one-off gift for someone, not necessarily as an easy project for anyone to make. I hope I've provided enough for you to do it anyway! Parts needed One of each of the STLs for this Thing Medium Klein bottle from http://www.kleinbottle.com/half_pint_klein.htm 3 - M3x14 screws (McMaster #92005A124) 3 - M3 nuts (McMaster #90592A009) 4 - M2x4 screws (McMaster #92005A016) 4 - M2 nuts (McMaster #90592A004) NeoPixel ring (medium) (http://www.adafruit.com/products/1463) 5V Trinket (http://www.adafruit.com/products/1501) Assembly instructions Print out both of the STLs Press fit the four M2 nuts into the four captive holes in the bottom printed piece. This may be tricky, so be careful not to strip the holes! A very small dab of glue or epoxy may be used to keep them in place, making sure not to get any in the thread. Install the Trinket using the M2x4 screws, with the USB connector facing away from the base. Solder wires to the +5V, GND and DIN holes of the NeoPixel ring. I recommend soldering to the top of the ring board, not the bottom. Install the ring into the circular cavity of the top printed piece. You may want to lay down a little bit of hot glue to hold it firmly in place. Solder the wires from the NeoPixel ring to the Trinket (5V to 5V, GND to GND and DIN to 4). Press fit the three M3 nuts into the captive holes on the underside of the bottom printed piece. Attach the top printed half to the bottom printed half using the three M3x14 screws, screwing into the nuts from Step 7. Use hot glue to fill the holes on top of the M3x14 screws to prevent the Klein bottle from slipping. Upload the "goggles_noblink" sketch from the Adafruit NeoPixel library examples to the Trinket (may need to modify to use the correct pin). Photos from the assembly process can be found at: http://www.flickr.com/photos/zenwebb/sets/72157638778949224/
With this file you will be able to print Klein bottle (medium) NeoPixel base with your 3D printer. Click on the button and save the file on your computer to work, edit or customize your design. You can also find more 3D designs for printers on Klein bottle (medium) NeoPixel base.