Klipsch ProMedia Speaker Wall Mount
thingiverse
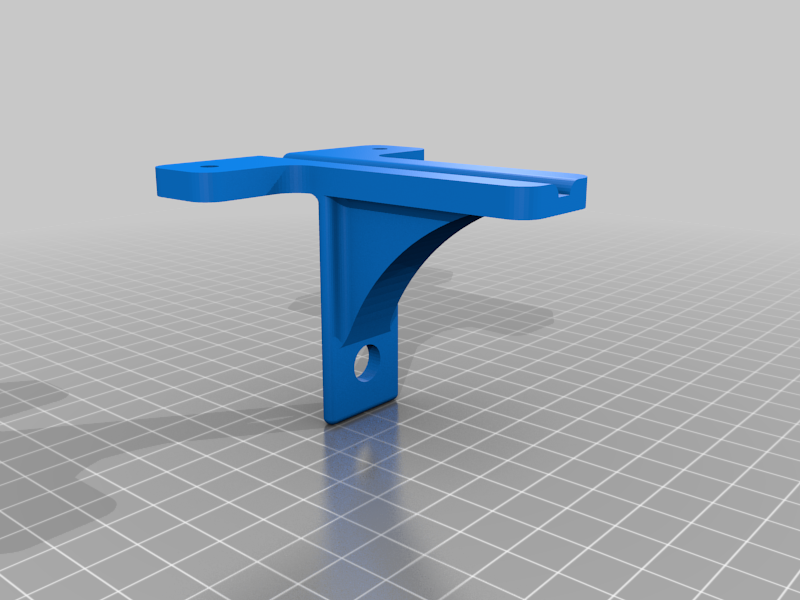
Replaces the factory stand on the speakers. Remove the 1/4" screw from the bottom of the speaker (be sure to save it!) to slide the factory stands off. I printed mine at .03mm with PLA, no supports. Orient the bracket on it's back so the speaker wire channel is facing down on the bed. To install: 1. Start screwing in one side of the mount to the wall, then slide the speaker wire behind the mount. Leave enough slack to allow you to leave the speaker on the floor or somewhere convenient. 2. Next, start the other wall screw. Before finalizing both screws, pull the slack in the speaker wire to move the speaker into place. 3. With the speaker ready to mount, finish tightening the wall screws. 4. Slide the speaker on the mount. 5. Put the 1/4" black screw that was holding the stand on, back into the speaker now. UPDATE June 29, 2020: Added a spacer for those of you that have the 3.5mm aux cord speaker.
With this file you will be able to print Klipsch ProMedia Speaker Wall Mount with your 3D printer. Click on the button and save the file on your computer to work, edit or customize your design. You can also find more 3D designs for printers on Klipsch ProMedia Speaker Wall Mount.