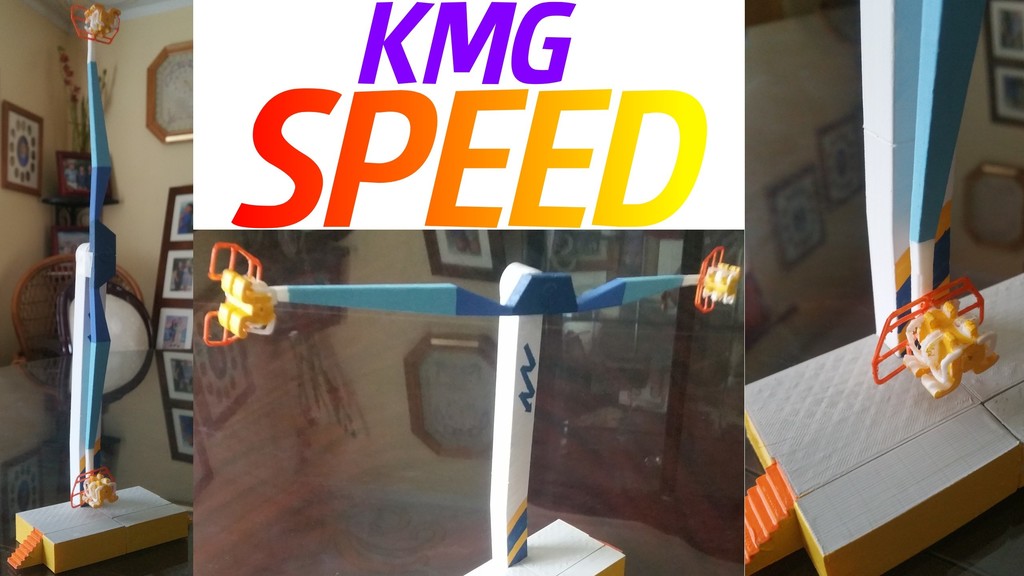
KMG Speed Model (w/ motor)
thingiverse
Last summer I visited the California state fair and having always want to ride those tall wind turbine style rides and was finally able to. And oh my god was it AMAZING! Sadly they're mostly traveling installations, but one installation will be permanent, this one. ;P So after a bit of research and scaling I was able to put together a fairly simple model of the ride. Now this one doesn't collapse for travel like the real ones, but that's not the point. Unlike most ride models: THIS ONE WORKS! After 2 failed tries I harvested a small motor from a 9g servo and made a second mount for it. You have two options for this model: a small vibration motor or one taken from a 9g servo. The file "KMG Speed Top Main Post.stl" is the vibration motor version. If you would like to the 9g servo motor one, print the above file and stop it 15mm from the top, then print "KMG Speed Motor Mount.stl" ---------------------------------------------------- DISCLAIMER: THIS BUILD REQUIRES MELTING A HOLE USING A NEEDLE. ALWAYS EXERCISE CAUTION WHEN USING HOT AND SHARP OBJECTS. TINY RIDES OR COASTER LABS ARE NOT RESPONSIBLE FOR ANY INJURY YOU MAY INCUR WHILE BUILDING THIS MODEL. BY DOWNLOADING AND BUILDING THE MODEL, YOU ACCEPT THESE TERMS AND CONDITIONS, INCLUDING BINDING/FORCED ARBITRATION. TLDR: BUILD AT YOUR OWN RISK. YOU'RE RESPONSIBLE FOR EVERYTHING, WE ARE NOT. HAPPY BUILDING! ---------------------------------------------------- How to put it together: -Start with the two base pieces and extension platforms left and right. Glue them together. There should be a spot in the middle back that the Bottom Main Post should slide right into. -Print the Bottom Main Post and glue it in making sure the wire guide outlet hole faces out. -Print the Top Main Post (see previous paragraph on when to abort print) -Sand and then Glue the Top Main Post, aligning it with the Bottom Main Post. It should have a bit of a lean to it. This is to keep the IRL ride stable and balance. -Mount the motor of your choosing. -Print the v3 arm splice and affix it to the front of the motor. Make sure it spins freely. -Print the Top and Bottom Arm pieces and slot them onto the splice. -Print 2 of the ride vehicles and prod a hole with a heated needle (held by plier, DO NOT USE YOUR HAND) through the end of each arm and then pass a cold needle through the hole on each vehicle with a dot of glue at the end. -Print the Hinge and stairs pieces left and right which should snap into each other and are glued on the side of the Bottom Main Post. Now you can paint the ride to your heart's content! ENJOY!
With this file you will be able to print KMG Speed Model (w/ motor) with your 3D printer. Click on the button and save the file on your computer to work, edit or customize your design. You can also find more 3D designs for printers on KMG Speed Model (w/ motor).
