
Knife, Scissors & Razor Sharpener - Leading Edge System
thingiverse
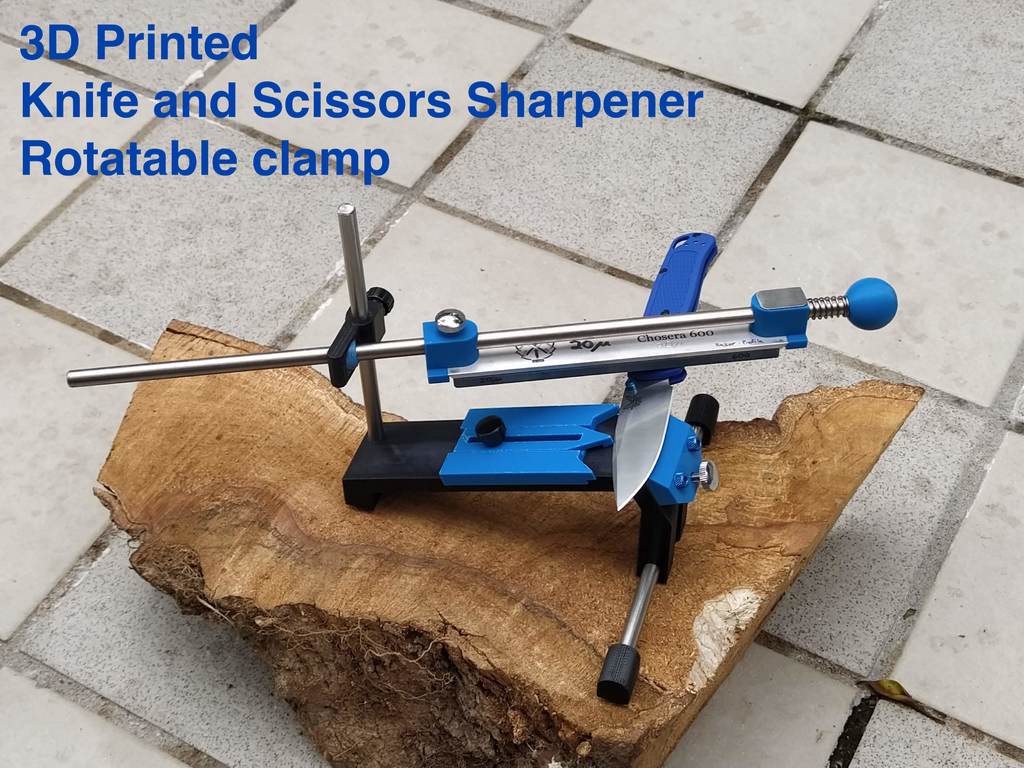
This is a detailed description of an open-source 3D printed sharpening system for knives, straight razors, and scissors. The design has undergone several updates since its initial creation in October 2019. Here are the key features and updates: **Key Features:** 1. Magnetic mount for stable knife positioning 2. Pivot bearing assembly for smooth rotation 3. Fine tuning adapter for precise angle adjustment (0.05° increments) 4. Straight Razor 2-point guide for low sharpening angles 5. Optional Stopper Ring to limit horizontal rod movement 6. Large platform stone holder for digital angle cube **Updates:** 1. Vertical blade support added for level knives with high flat grinds 2. Enlarged pivot bearing assembly for larger arc of movement 3. Fine tuning adapter redesigned and improved 4. Straight Razor 2-point guide added 5. Optional Stopper Ring added 6. Large platform stone holder added **Tips:** 1. Sand the ball of the pivot bearing for a smooth surface 2. Use silicone grease on the ball for smooth bearing action 3. Align the feet of the sharpener carefully and tap them onto the rod 4. Apply super glue to the feet if they loosen over time 5. Print the fine tuning adapter with no supports in the threads 6. Work the threads in and out properly and apply grease **Design Considerations:** 1. The base of the sharpener is set at 20°, so you can sharpen knives to exactly this angle without an angle gage. 2. The system is designed to tip over forwards when applying too much force during sharpening. **Additional Resources:** The designer has a collection of useful designs and information on how to use the system available on Thingiverse: https://www.thingiverse.com/leadingedge/designs
With this file you will be able to print Knife, Scissors & Razor Sharpener - Leading Edge System with your 3D printer. Click on the button and save the file on your computer to work, edit or customize your design. You can also find more 3D designs for printers on Knife, Scissors & Razor Sharpener - Leading Edge System.