Knife Sharpening Fixture
prusaprinters
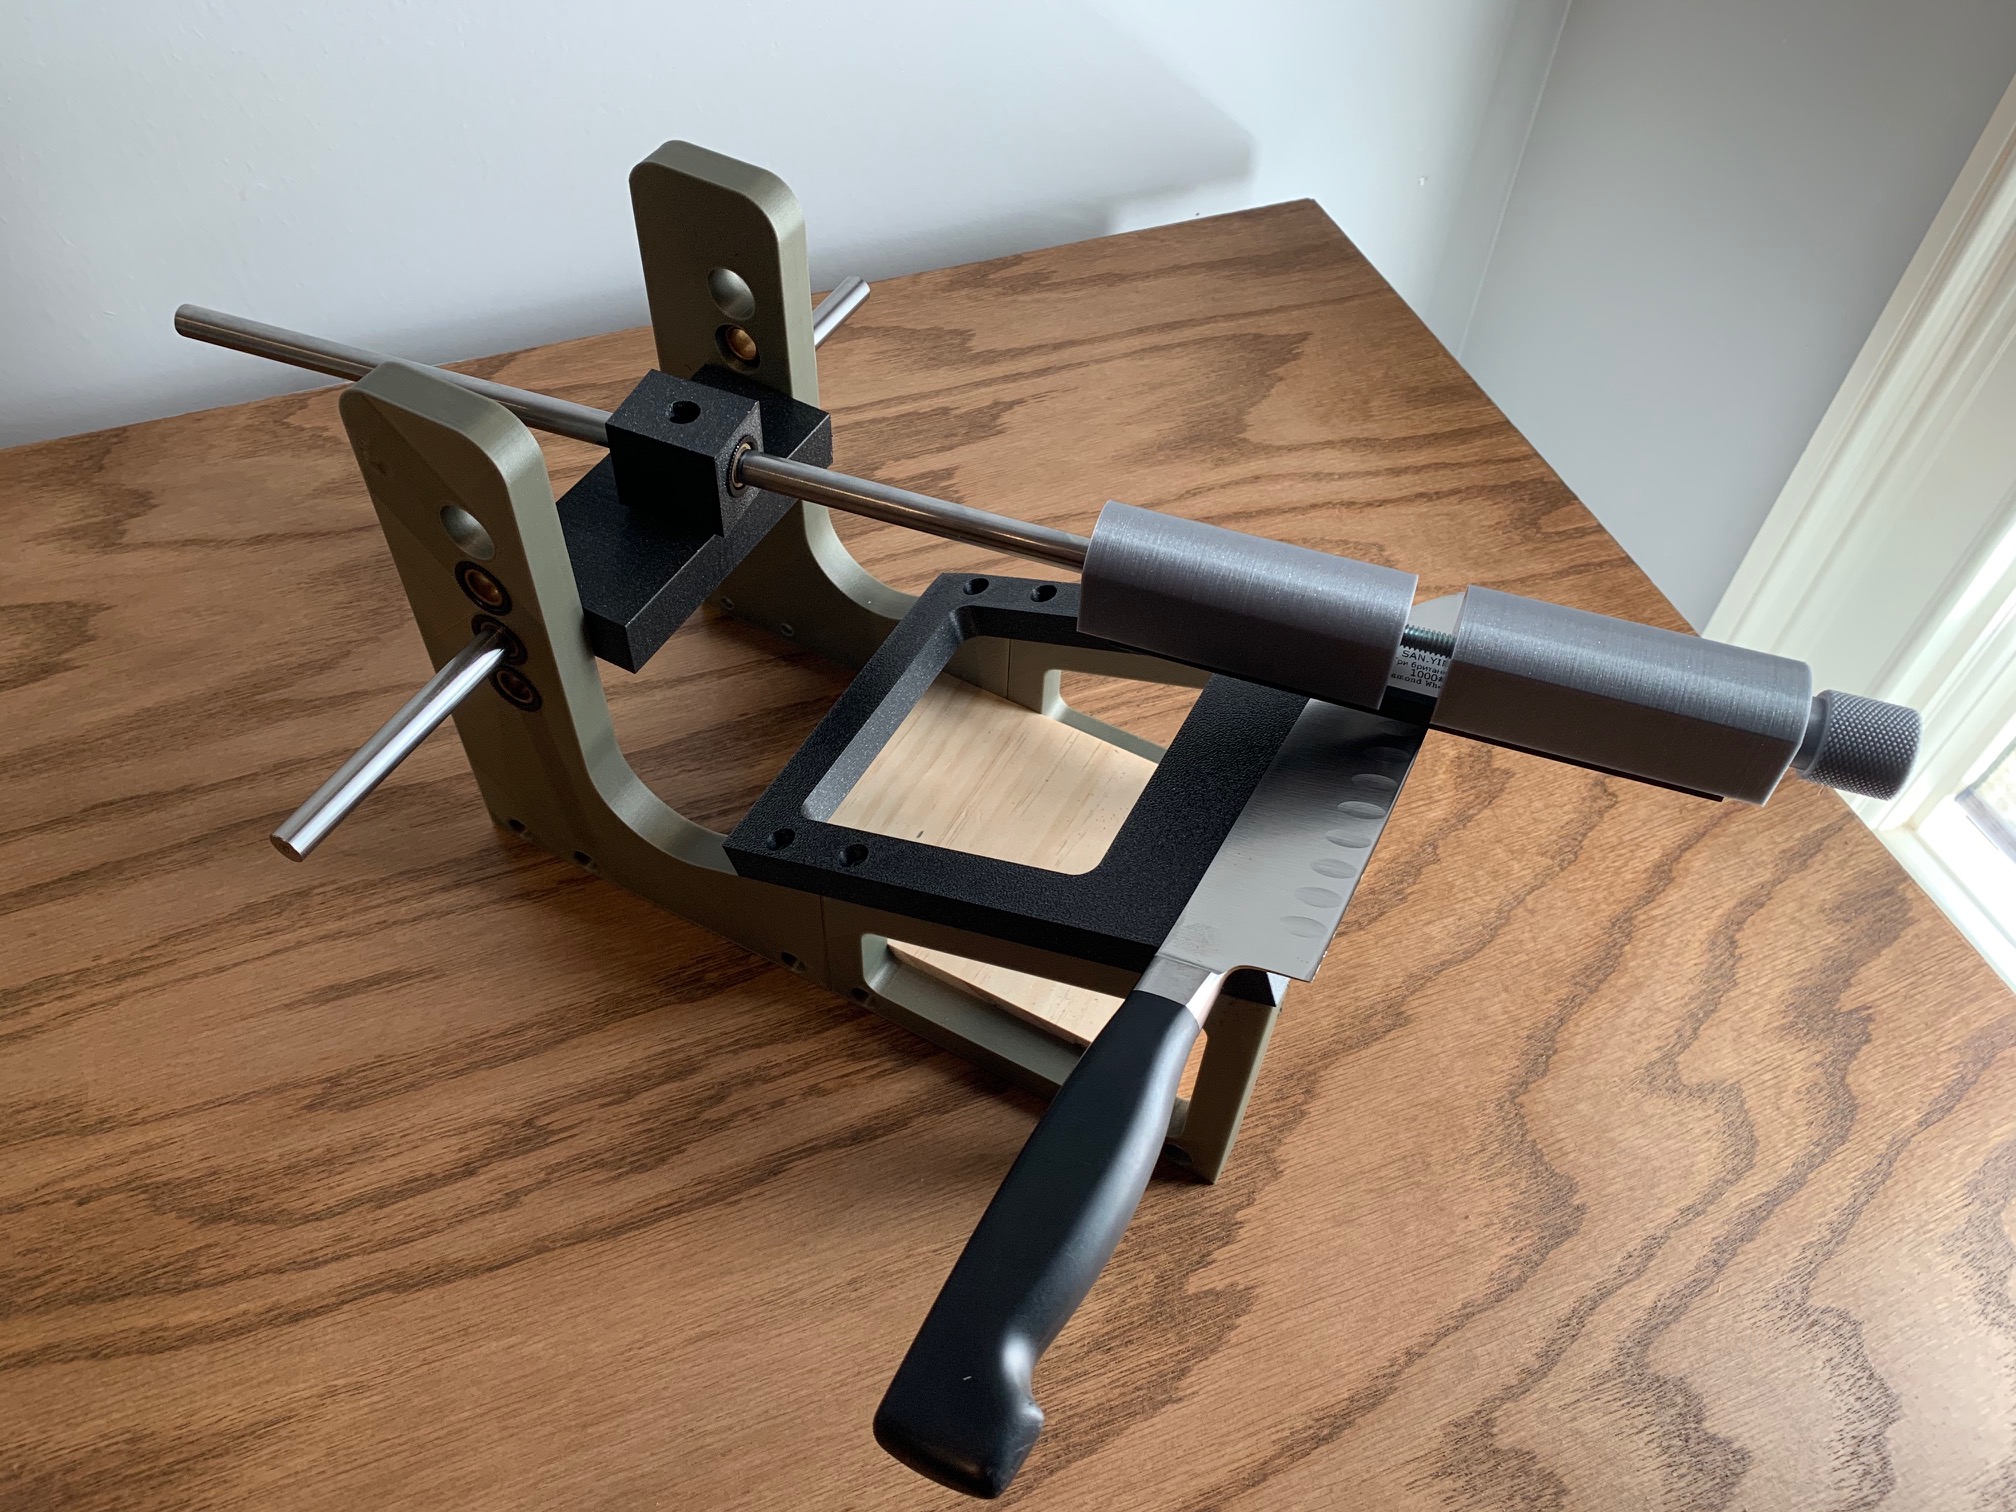
<p>The safest knife is a sharp knife!</p> <p>This print is a mostly 3D printed knife sharpening fixture. The fixture features a magnetic plate that securely holds your knife while sharpening, a sharpening stone holder with a sliding rod for sharpening at a repeatable angle, and adjustable sharpening angles for your different sharpening needs.</p> <p>Keep your fingers safe and enjoy cooking more with this practical kitchen must have!</p> <h3>Print instructions</h3><p>Print all file with your preferred filament. I chose Prusament PLA for all parts. Print with supports for best results.</p> <p>Additional materials required:<br/> 1 x 9.5mm steel rod, 150mm long or longer<br/> 1 x 9.5mm steel rod, approx 300mm long<br/> ~40 x 10mm x 1.75mm rare earth magnets (quantity can be fewer if you have longer magnets)<br/> 12 x M5 socket head cap screws 10mm or slightly longer<br/> 4 x M5 socket head cap screws 10mm long<br/> 1 x M5 socket head cap screw 40mm long<br/> 1 x M5 lock nut<br/> 2 x M5 washers<br/> 4 x M5 thermal threaded inserts<br/> 1 x 4" long 1/4x20 bolt<br/> 1 x 1/4x20 nut<br/> Set of "Sy Tools Pro" Diamond Sharpening stones from AliExpress or similar.</p> <ol> <li><p>Print the Knife Sharpener Sides. The model file includes the Left side only. Create the right side by using the mirror function in PrusaSlicer (right click on part > Mirror > Along Y Axis)</p> </li> <li><p>Print top magnetic plate, 3 x connector blocks, pivot block, slide block, stone holder 1, stone holder 2, and stone holder knob.</p> </li> <li><p>Assembly is pretty straight forward. Use the connecting blocks to connect the left and right side pieces using the 12 M5 screws. Insert the 4 thermal inserts (see pic 1). Super glue magnets in the holes on the under side of the top magnetic plate (note: I used 5 magnets per hole for a stronger hold on my knife). Attach the top plate to the sides using the 4 10mm M5 screws threading into the threaded inserts. Assemble the pivot block and the slide block using the 40mm M5 screw placing the 2 washers between the 2 pieces and securing the assembly with the lock nut. Assemble the stone holder. Place the 1/4x20 nut in the slot, slide the bolt thru the knob, slide stone holder 2 on the bolt and screw the bolt into the nut on stone holder 1 (see pic 2). See cover photo for the final assembly. The parts in the cover photo are slightly modified. I initially used slip bearings on the sides and in the slide block. Bearing work great on the sides but not so great in the slide block. For this design I removed all the bearings to make the design more accessible to everyone. Insert the 300mm steel rod into the end of the stone holder. This may or may not be need to be glued in place. Mine is a snug fit and stays put without glue. Using the other steel rod, slide the rod into one side of the fixture, thru the pivot block and thru into the other side of the fixture. Slide the stone holder into the slide block. At this point your new knife sharpening fixture it ready to use.</p> </li> </ol>
With this file you will be able to print Knife Sharpening Fixture with your 3D printer. Click on the button and save the file on your computer to work, edit or customize your design. You can also find more 3D designs for printers on Knife Sharpening Fixture.