KnobProbe - Z-offset probe between Z-probe and nozzle
prusaprinters
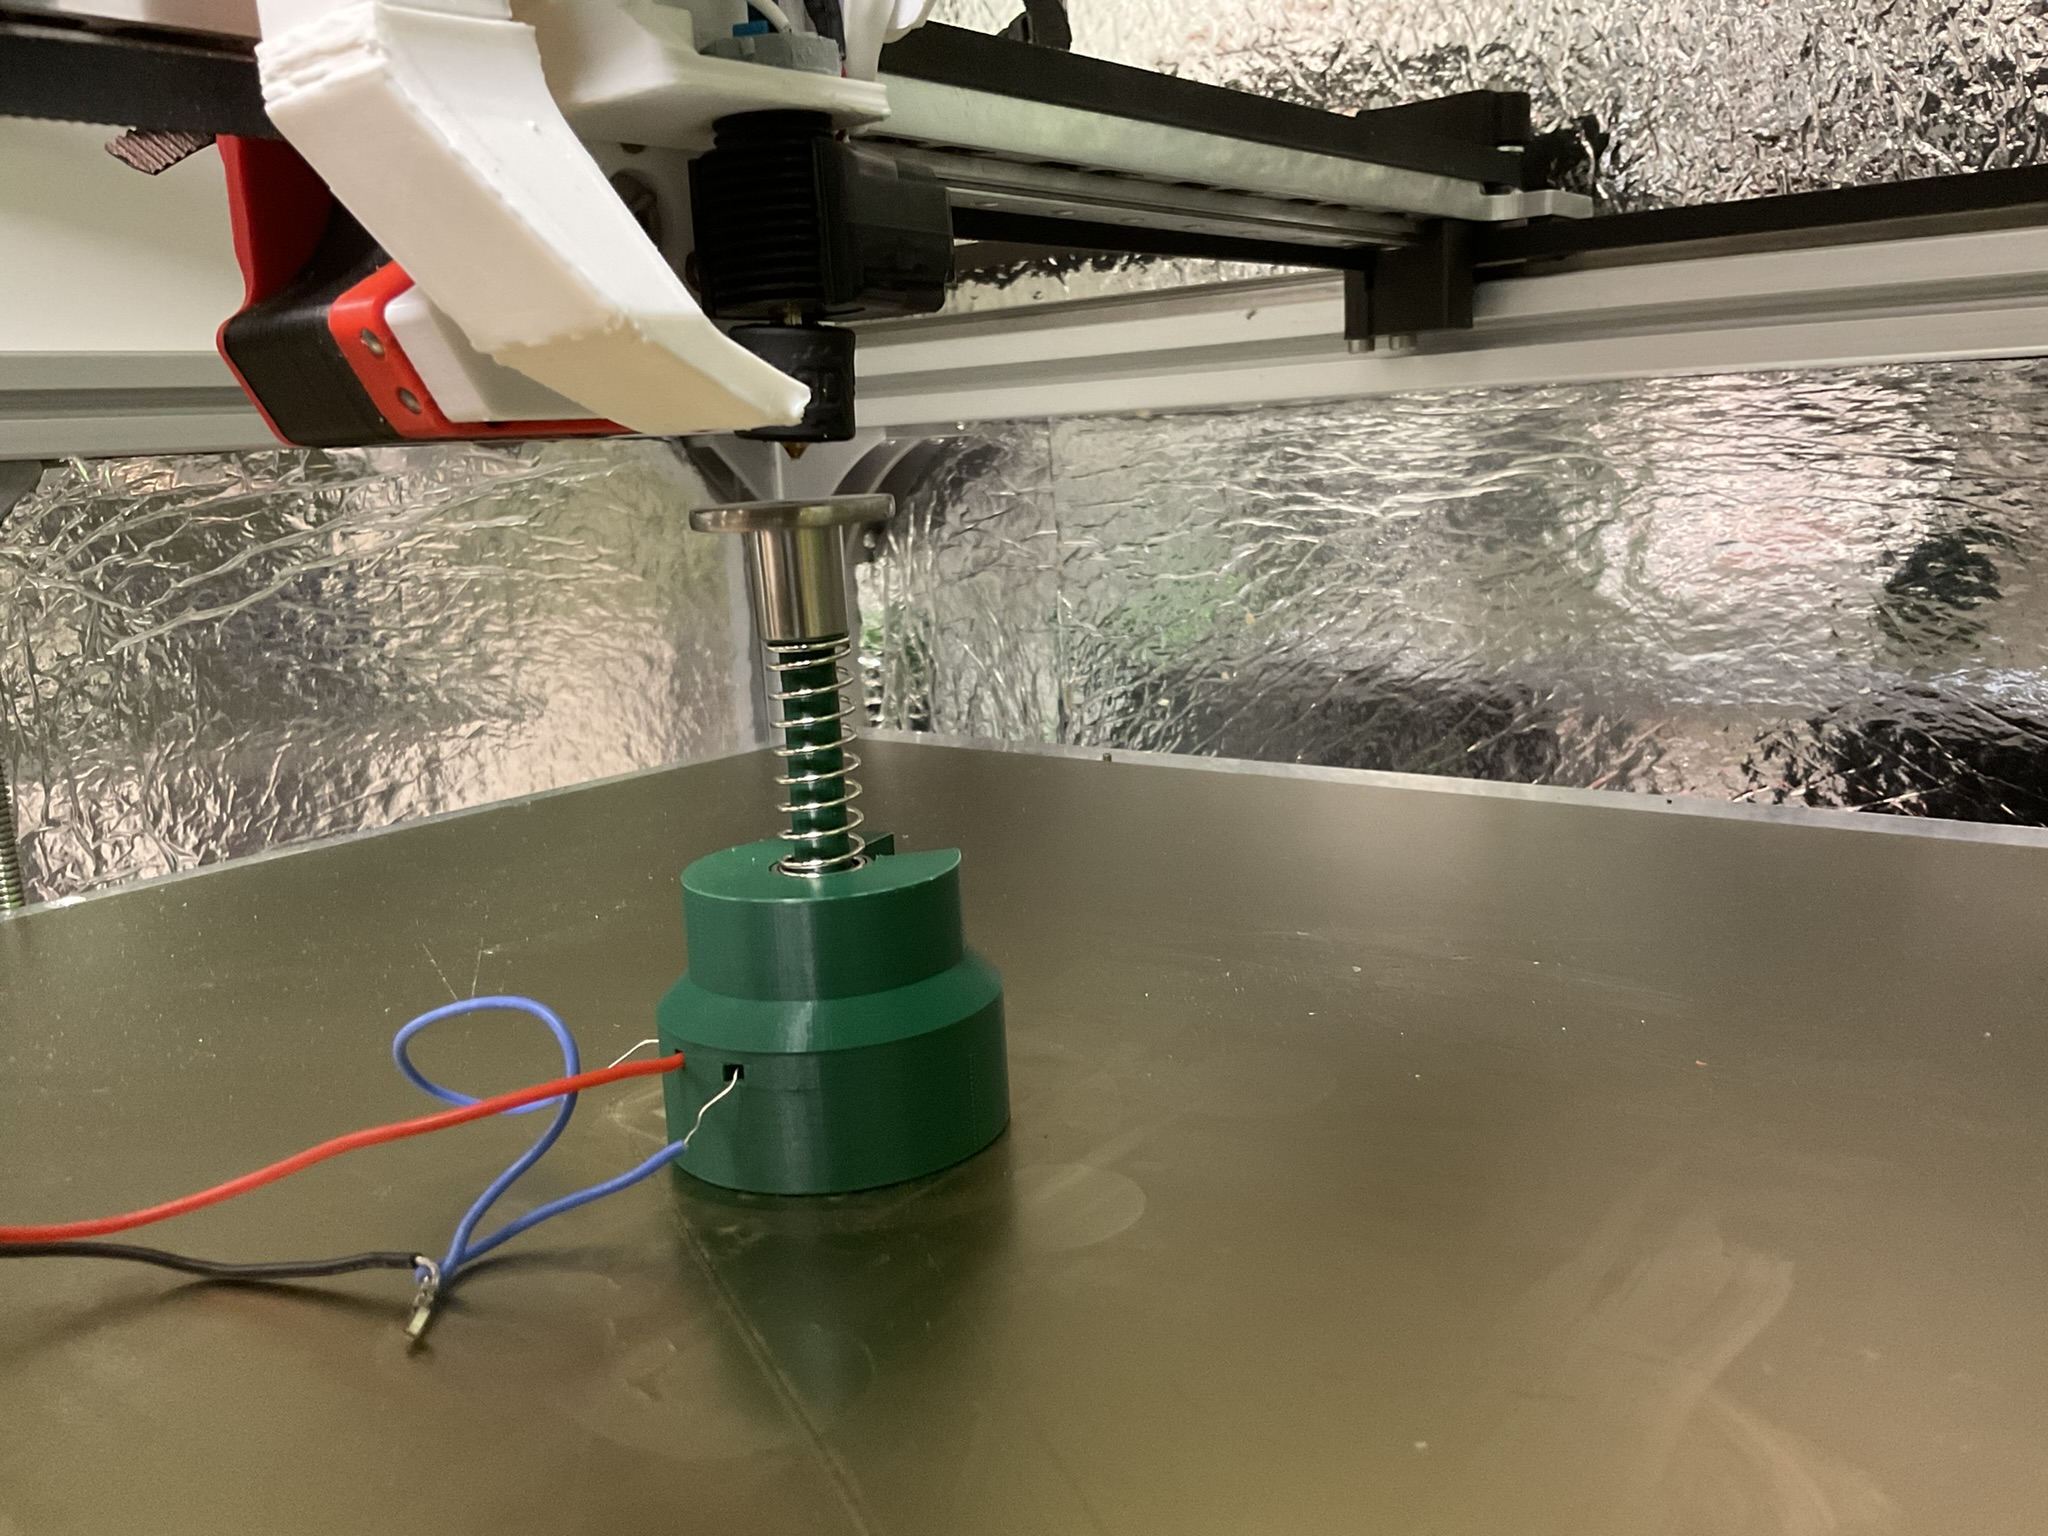
<p>Probe the Z offset between Z-probe and nozzle</p><p>This is for calibrating the tool offset between a Z probe and different tools such as a nozzle.</p><p>Simply home on the Knobprobe with a z-probe such as a Clicky probe, a BL-touch and many more. Then set the Knobprobe as your probe and probe the nozzle or tool on the Knobprobe.</p><p>Should work with a Prusa probe but I don’t have one to test with.</p><p>When probing with a nozzle, use a hot nozzle to account for thermal difference.</p><p>Here is a video of it in action on a Toolchanger: </p><figure class="media"><oembed url="https://youtu.be/fshmEMWxBHY"></oembed></figure><p><strong>BOM:</strong><br>- 1x Flat Cabinet Doorknob<br>- 2x Set screw M4x(10-30)<br>- 1x LM8UU bearing<br>- 1x M4 threaded 10mm steelball (Used for Kossel style printers)<br>- 1x Spring from a antibacklash TR8x nut, or some similar spring with a inside of more than 8mm. This are typically 10mm inner diameter.<br>- 3x M5x24-25 washers (T-nuts might also work)<br>- 3x M5x(8-12) screws<br>- Wire<br>- Optional resistors if using the alternative wiring</p><h3>Assembly </h3><p>Like in the image. Wire 2 of the washers to Signal and one to Ground.</p><p>Adjust the strength of the spring so it will not budge when probing with your Z-probe but will easily move when applying force by the tool so it won't stress the xbar and toolconnector.</p><p>You can adjust the length of the plunger by scaling it in height when printing and with the amount of set screw you screw into it.</p><p> </p><h4>Alternative wiring ( <i>working for me but needs more testers </i>)</h4><p>If you use a resistor on each washer going to the signal cable then the probe will trigger as soon as it looses contact with the first washer.</p><p>Use one wire for ground and the other two washers connected to a resistor each and then to the Signal cable.</p><p>The Duet3 uses 27k pullup resistor on IO input. You should use two 30k resistor. When both signal cables are connected then you have 15k resistance and the probe will not trigger. But loosing contact with one signal washer the resistance goes up to 30k and triggers.</p><p> </p><h3>G-Code example Duet3 3d printer (Probe at x125 y125)</h3><p>Modify this to suite you and use on your own risk. I do home on the probe once </p><p>M561 ; Disable any Mesh Bed Compensation<br>; %%%%% Your probe configuration line goes here %%%%%<br>G31 Z0 X5 Y5 ; XY offset from probe to nozzle and set probe height as 0.<br>G30 X125 Y125 ; Probe once with your Z-probe<br>M558 P8 C"io4.in" F60 H5 ; Setup the Knobprobe on IO4, Feedrate 60, Probe Hight 5mm.<br>G10 P0 Z0 ; Reset tool Z offset<br>G31 Z0 X0 Y0 ; XY offset from nozzle is 0 because we probe with it.<br>G30 X125 Y125 S-2 ; Probe the Knobprobe. When the probe is triggered, adjust the Z offset of the current tool to make the current position Z=0 for T0.<br>G10 P0 ; Print out the offsets<br>M500 ; Save offsets<br>; %%%%% Your probe configuration line goes here %%%%%<br>G31 Z0 X5 Y5 ; XY offset from probe to nozzle and set probe height as 0, same as above. </p><p>M118 S"If the last height isn't 0 as stated by probe height then the Knobprobe has moved during nozzle probes by this offset"<br>G30 X125 Y125 S-1 ; Probe the bed. When the probe is triggered, do not adjust the Z coordinate, just report the machine height at which the probe was triggered.</p><p> </p><h3>G-Code example Duet3 toolchanger (Probe at x255 y255)</h3><p>Modify this to suite you and use on your own risk. I do home on the probe once </p><p>M561 ; Disable any Mesh Bed Compensation<br>G30 ; Probe once<br>T-1<br>M558 P8 C"io4.in" F60 H5; Probe on IO4, Feedrate 60, Probe Hight 5mm.<br>G31 Z0 ; Set probe height as 0 because it activates when touching the probe<br>; ---------------- First Tool ----------------<br>G0 Z5 ; Go 5mm over probe.<br>T0 ; Load first tool.<br>G10 P0 Z-1 ; Reset tool Z offset<br>G0 X255 Y255 ; Move to the center of the bed</p><p>G30 S-2 ; Probe the bed at the current XY position. When the probe is triggered, adjust the Z offset of the current tool to make the current position Z=0.</p><p>G0 Z5<br>G10 P0 ; Print out the offsets</p><p>;Same as above but for the other tools.</p><p>M500 ; Save offsets</p><p>; ---------------- Final Check ----------------</p><p>T-1 ;Unload tools</p><p>; Carriage Z switch as probe again, your own code<br> </p><p>G0 X255 Y255 F24000 ; Move to the center of the bed<br>M118 S"If the last height isn't -1 as stated by probe height then the probe bed has moved during nozzle probes."<br>G30 S-1 ; Probe the bed at the current XY position. When the probe is triggered, do not adjust the Z coordinate, just report the machine height at which the probe was triggered.</p><p> </p><h3>Inspiration</h3><p>This was inspired by this projects:<br><a href="https://github.com/olby/jubilee_mods">https://github.com/olby/jubilee_mods</a><br><a href="https://jubilee3d.com/index.php?title=ZTATP">https://jubilee3d.com/index.php?title=ZTATP</a></p><p> </p>
With this file you will be able to print KnobProbe - Z-offset probe between Z-probe and nozzle with your 3D printer. Click on the button and save the file on your computer to work, edit or customize your design. You can also find more 3D designs for printers on KnobProbe - Z-offset probe between Z-probe and nozzle.