Konfigurierbare Box (incl. Fusion File) - configurable Box
prusaprinters
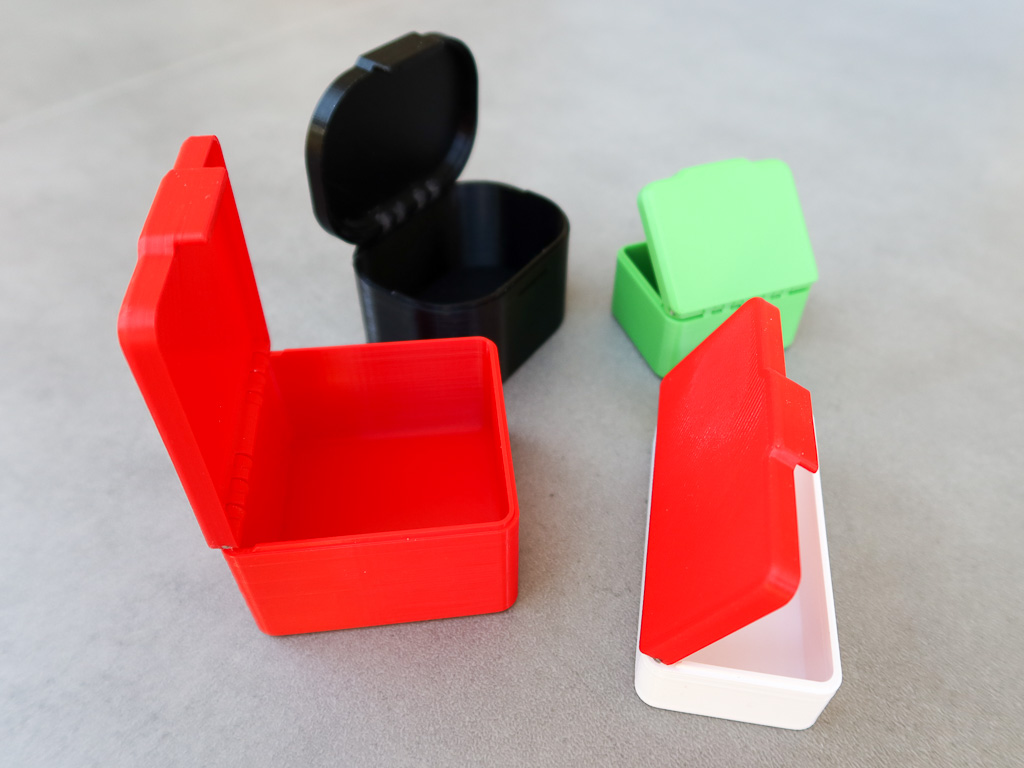
<p><i><strong>english text below</strong></i></p><p> </p><p>Sie brauchen eine Box mit 52,3 * 100,7 * 43,5 mm³?</p><p>Kein Problem: </p><ul><li>Fusion-Datei laden. </li><li>Parameter anpassen. </li><li>STLs erzeugen und </li><li>ab an den Slicer.</li></ul><p>Anpassbar sind natürlich: Breite, Tiefe, Höhe, Wandstärke, Deckel- und Bodendicke, Abrundungsmaß der Kanten. Intern werden die meisten unpassenden Eingaben abgefedert.</p><p>Und viele andere Parameter, welche das Aussehen und die Funktionalität beeinflussen.</p><p>Momentan ist es so eingestellt, dass als Achse ein Stück Filament verwendet werden kann. Damit funktioniert die Box ganz gut.</p><p>Aktuell gibt es beim Ändern der Deckelhöhe manchmal ein paar kleine Fehler. Aber da komm ich vielleicht noch dahinter.</p><p>Ich empfehle PLA oder PETG in Schichthöhe 0,2 zu drucken.</p><p>Fotos von gedruckten Boxen folgen noch.</p><p><i><strong>edit1</strong></i>: Fotos eingefügt. An der Nahaufnahme erkennt man, dass mein Drucker bei höheren Geschwindigkeiten (es waren 100 mm/s) zum Layershift neigt.</p><p><i><strong>edit3</strong></i>: Neue Version der Fusion-Datei eingefügt (v4). Die manchmal entstandenen Fehler beim Ändern der Deckelhöhe habe ich durch interne Restriktionen vermieden (Der Deckel darf z.B. maximal die halbe Gesamthöhe hoch sein). Gelegentlich treten noch Warnungen auf. Diese betreffen Abrundungen am Deckel in Scharniernähe und passieren, wenn sich zwei Kanten zu nahe kommen. Ich werde das so lassen, weil ich die Abrundungen mag. Es fällt maximal eine Rundung weg, wenn es zur Warnung kommt. Durch Setzen kleinerer Radien kann man das auch ganz vermeiden, wenn man will.</p><p><strong>Eine Anmerkung zum Fusion-File</strong>.</p><p>Die Konstruktion ist in mehrere Gruppen gegliedert. In der letzten Gruppe werden die Körper zu Komponenten gewandelt, damit die Rotation des Deckels nachgebildet werden kann.</p><p>Zum Erzeugen der stl's am Besten den Zeitleistenschieber vor die letzte Gruppe positionieren. Die vorletzte Gruppe ‘PrintPosition’ ist aktuell unterdrückt; hebt man die Unterdrückung auf, werden Box und Deckel in Druckposition gebracht.</p><p><i><strong>edit2</strong></i>: Vor allem die Breite der Box wird eine (berechnete) Mindestbreite nicht unterschreiten. Dies ist abhängig von der Größe, der Kantenrundung, der Anzahl und Breite der Scharnierkörper. Da ich lieber breite als lange Boxen mag, habe ich die Tiefe der Boxen maximal auf die Breite beschränkt. </p><p><strong>**********************************************************************************************</strong></p><p>You need a box with 52.3 * 100.7 * 43.5 mm³?</p><p>No problem:</p><ul><li>load Fusion file</li><li>adjust parameters.</li><li>generate STLs and</li><li>load into the slicer.</li></ul><p>Of course, the following can be adjusted: width, depth, height, wall thickness, top and bottom thickness, rounding of the edges. Internally, most inappropriate inputs are cushioned. And many other parameters affecting the appearance and functionality.</p><p>It is currently set up to use a piece of filament as an axis. So the box works quite well.</p><p>Currently there are sometimes a few small errors when changing the lid height. But maybe I can figure it out.</p><p>I recommend printing PLA or PETG in layer height 0.2.</p><p>Photos of printed boxes will follow. <i><strong>edit1</strong></i>: added photos.</p><p>The close-up shows that my printer tends to layer shift at higher speeds (it was 100 mm/s).</p><p><strong>A note on the Fusion file.</strong> </p><p>The construction is divided into several groups. In the last group, the bodies are converted to components so that the rotation of the lid can be simulated. </p><p>To create the stl's, it is best to position the timeline slider in front of the last group. The penultimate group 'PrintPosition' is currently suppressed; if you remove the suppression, the box and lid are brought into the printing position.</p><p><i><strong>edit2</strong></i>: Above all, the width of the box will not fall below a (calculated) minimum width. This depends on the size of the rounded edges, the number and width of the hinge body. Since I prefer wide boxes to long ones, I limited the depth of the boxes to the width at most.</p><p><i><strong>edit3</strong></i>: New version of the Fusion file inserted (v4). I have avoided the sometimes occurring errors when changing the lid height by internal restrictions (e.g. the lid may only be half the total height). Occasionally, warnings still occur. These concern roundings on the lid near the hinge and happen when two edges come too close to each other. I will leave it like this because I like the roundings. At most, one rounding is omitted when it comes to the warning. By setting smaller radii, you can avoid this altogether if you want.</p>
With this file you will be able to print Konfigurierbare Box (incl. Fusion File) - configurable Box with your 3D printer. Click on the button and save the file on your computer to work, edit or customize your design. You can also find more 3D designs for printers on Konfigurierbare Box (incl. Fusion File) - configurable Box.