Kontinuum Glide. The 3D-printable glidecam
thingiverse
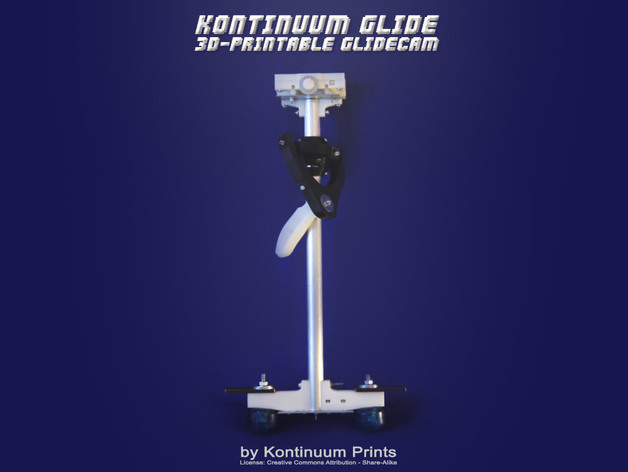
This is the prototype design of the Kontinuum Glide. "A glidecam is a hand held camera stabilizer, which, through a 3 axis gimbal and a counter weight system, separates the movements of the camera operator from those of the camera, providing smoother motion for the viewer." The Kontinuum Glide is all that, AND you can make it on your 3D printer. I made one for my Canon 60D, but it's suitable for all dslr's and other small cameras, thanks to its adjustable camera carriage. This first version is most of all a testing ground for several ideas, and while it is still not perfect, it is fully functional and ready to glide. The main innovations are: A 3D-printed, fully adjustable camera carriage (front/back, left/right), which fits a standard Manfrotto quick release plate. A 3D-printed 3 axis gimbal (the "Sfere") which uses felt bearings on 2 of its axes, and 6 small standard issue 688 bearings for the panning axis. A very strong and sturdy solution for attaching the end pieces, as well as a simple 2 piece handle assembly which is virtually unbreakable.. The whole setup is really remarkably effective. The felt bearings are 100 % perfect for this, but the central gimbal assembly still has a few kinks to work out, so sometimes the panning is unstable. UPDATE: I MADE AN UPGRADE WHICH FIXES THIS: http://www.thingiverse.com/thing:81486 is a new central gimbal assembly, which consists of 4 small printed pieces and a single bearing and which pans perfectly. The Kontinuum Glide is an all original design, although the use of felt bearings is inspired by Josef Prusa's work on the Prusa Mendel. Development on this model stops here, and work on the Kontinuum Glide Mark II has begun. You can watch some sample video from the first field test here: http://www.youtube.com/watch?v=NO7XK5C-RTc&list=UL DISCLAIMER< I offer no guarantees as to the safety of your camera or other equipment during use. So be careful, and tighten your screws twice... Instructions Sorry guys, but the instructions are going to be really basic. I am moving, and I really just want to get this out there before things get too hectic. Also, the Kontinuum Glide MarkII is where the action is and will be. To tell you the truth, this model is a bit of a pain to put together, and I had to cut a lot of screws, and drill quite a few holes in the metal plates to assemble it. The basic functionality is all there, and the whole assembly is very strong which is important, but honestly, I don't think your average videographer with a 3d-printer is going to make himself one of these... For the MarkII I am limiting myself to standardized bolt sizes and hole configurations, and I'll adapt the design to that. The (only slightly unrealistic) goal is to be able to assemble it with no cutting or drilling, while still making it as sturdy as this model. Early versions of this model had quick release switches in several places, but I was unsure of the strength of that setup, so I'm saving them as a possible addition to the MarkII. And now, with that out of the way, here are the instructions: Print out the 5 build plates. They each fit in a standard Prusa Mendel, or anything similar or even a bit smaller. I printed everything at 0,3mm layer height, in white and then black ABS (I ran out of white) and with no support material needed for any of the prints. Don't be cheap with the infill!! Remember, your DSLR's life will depend on the strength of your printed parts. I am using: 0.7 honeycomb for the "Sfere" as well as for the "Carriage" 0.6 honeycomb with 6 perimeters for the "Outer Gimbal and Handle" 0.9 rectilinear for the "Solid Parts" and 0.5 honeycomb for the "Base" (The roller supports for the central gimbal might work better if printed in PLA. I will test this when I get a moment) While It's printing, go to the hardware store and get the other stuff you need. 1/2 meter of 25mm aluminium tube (make sure it's cut off STRAIGHT at the ends, otherwise it's no good) M4 screws: 8 x 20mm, 4 x 25mm, 2 x 15mm, 2 x 40mm, 2 x 45mm, 1 x 50mm, 2 x 70mm, 1 x 80mm, and 1 x 100mm (As I didn't know from the onset what I would be needing, I simply got an M4 threaded rod, and cut off pieces with my dremel as I needed them) M3 screws: 4 x 15mm, 2 x 20mm, 2 x 25mm, 2 x 7mm, M8 screws: 2 x 70mm Lots of nuts. A box of M4 nyloc or normal nuts, a handful of M3 nuts and 2 M8 nuts. one normal spring from a pen, and some 7mm springs, 6 x 10-15mm. These are a specialty item, i know, sorry... The springs aren't really meant to carry any weight, they just center the gimbal and avoid buildup of slack, so I think even normal "pen-springs" should be strong enough, but you'd have to adapt the stl before printing. The ones I used are certainly overkill, and I am thinking of other options for the next version. 2 metal plates. Ideal measurements would be 100 x 70 mm and 100 x 20 mm. I'm using some 1.5mm galvanized plates I found at the hardware store in roughly these sizes. A bit of fine grain sand paper. A 4mm drill bit for metal. About 4 square centimeters of 1mm felt. Custom screws: These are for the central gimbal assembly, and they require some work. For the "Sfere" You'll need 6 pieces of M8 threaded rod cut down to 15mm and with a "flat" for a screwdriver cut out in one end. For the four felt bearings you will have to cut down four M6 screws. You need the kind which aren't fully threaded. The unthreaded part near the head will serve as the center of each bearing. Cut off the head, leaving 2 x 30mm and 2 x 25mm screws which are half and half threaded/unthreaded. Also make a flat for a screwdriver in the threaded end of these. Again, This is all too complicated, and I am trying to avoid the need for custom screws in the Kontinuum Glide MarkII 4. After you cut down all the screws and printed all the parts, you now need to drill the holes in the plates and aluminium tube and start the assembly. The (ejem..) instructive graphics in the "Assembly" jpg's contain the measurements for drilling, a few closeups, and very little else. I have explained some of the crucial parts there, and I hope that with the right screws in front of you, and the only 25 or so printed parts, you can figure it out. Otherwise you should wait for the Kontinuum Glide MarkII, which I promise WILL have a full set of assembly instructions. Once your Kontinuum Glide is assembled, mount your DSLR on top, and balance it. There are plenty of instructional videos on how to balance a glidecam on youtube, the Kontinuum Glide works just the same. Enjoy smooth shooting with your DSLR :-) Development on the Kontinuum Glide MarkII has begun. The main priorities for development are: Easier assembly, fewer tools needed. More standardized non-printed parts. Optimized panning axis and central gimbal system - "Sfere" MarkII. (optional) A version of the Sfere which uses standard 608 "skate" bearings. Optimized screw configuration in the camera carriage. Easily activated "close to the ground shooting" mode, by reversing and moving the gimbal. Decent documentation. Detailed list of parts and instructional video Sleeker design all round.
With this file you will be able to print Kontinuum Glide. The 3D-printable glidecam with your 3D printer. Click on the button and save the file on your computer to work, edit or customize your design. You can also find more 3D designs for printers on Kontinuum Glide. The 3D-printable glidecam.