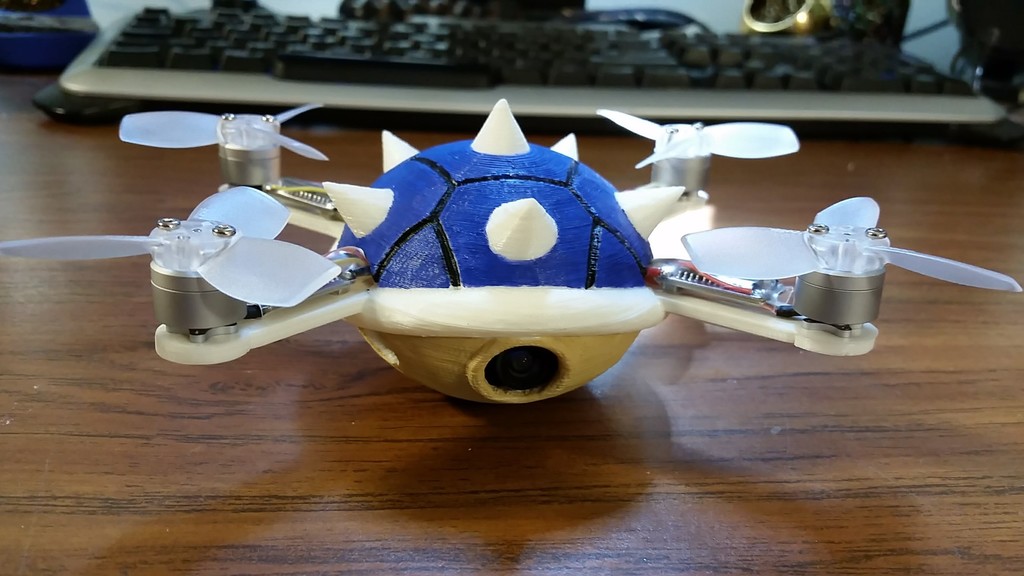
Koopaquad - FT Gremlin Frame
prusaprinters
<p>Update - 10/31/2017 - V3 is available! It has a larger "neck hole" for the camera and much better battery support and retention (no velcro needed now!). I've also made the tinkercad file available here: <a href="https://www.tinkercad.com/things/hiyoVDLKQSs">https://www.tinkercad.com/things/hiyoVDLKQSs</a></p> <p>Please feel free to remix and modify!</p> <p>Who wouldn't like to fly the blue shell from Mariokart?!?!?!</p> <p>This was designed to use the Gremlin power pack from Flitetest.</p> <p>For this build you will need these parts:</p> <ul> <li>A Gremlin power pack from Flitetest</li> <li>A tiny Flysky receiver</li> <li>2S batteries found here: https://www.amazon.com/gp/product/B07351J77T/ref=oh_aui_detailpage_o04_s00?ie=UTF8&psc=1</li> <li>4 x 8mm neodymium magnets (I found them from Harbor Freight)</li> <li>FPV Camera - https://www.amazon.com/gp/product/B06XYTV18M/ref=oh_aui_detailpage_o01_s02?ie=UTF8&psc=1</li> </ul> <p>The batteries on this build use xt30 connectors. The gremlin comes with JST, but I have found that the xt30s are more durable and are better able to handle the current the gremlin pulls when flying hard.</p> <p>Be sure to share your builds or questions! Enjoy!</p> <p>Flight footage!!!!! <a href="https://www.youtube.com/watch?v=9qrm1r6DJ8I&t=5s">https://www.youtube.com/watch?v=9qrm1r6DJ8I&t=5s</a></p> <h3>Print Settings</h3> <p><strong>Printer:</strong></p> <p>XYZ Davinci Flashed to Repetier</p> <p class="detail-setting rafts"><strong>Rafts: </strong> <div><p>No</p></div> <p><strong>Supports:</strong></p> <p>Yes</p> <p class="detail-setting resolution"><strong>Resolution: </strong> <div><p>.2mm</p></div> <p><strong>Infill:</strong></p> <p>20%</p> <p><br/> <p class="detail-setting notes"><strong>Notes: </strong></p> </p><div><p>Print this with the top right side up, and the bottom upside down. 20% seems to be plenty strong enough and is light enough to fly well. The strength of the quad is in the "ring" where the flight controller and arms are located. If you are using Simplify3D, you can also set the ring to be in a higher infill and the rest in a lower infill by using the Print Process settings.</p></div> Post-Printing ============= <p>After printing, set the magnets in place and make sure you have plenty of clearance for wires to pass through. For the battery, I use a small bit of velcro secured to one end of the battery with a corresponding piece attached the the vertical piece behind the FPV camera.</p> </p></p> Category: R/C Vehicles
With this file you will be able to print Koopaquad - FT Gremlin Frame with your 3D printer. Click on the button and save the file on your computer to work, edit or customize your design. You can also find more 3D designs for printers on Koopaquad - FT Gremlin Frame.
