Kossel magnetic z-probe mount with zero X-Y offset to avoid effector tilt problems/errors. Tested 100%.
thingiverse
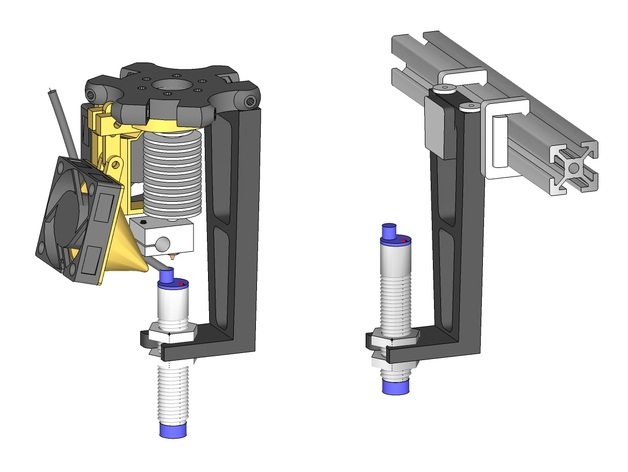
After having a first disappointing experience with an inductive z-probe that was originally mounted with a high X-Y offset from the extruder tip, I decided to dismount it and design another E3D mount for additional filament cooling. However, I recently decided to give it another try and designed a magnetic mount that holds the z-probe right under the tip, eliminating any offset or tilting errors. Now, it works perfectly! Using David's online calibrator took only 10 minutes to level the bed. You will need six neodymium disk magnets, about 9-10mm thick (like these) and some epoxy (I used a five-minute epoxy) or crazy glue. Tip: The power of magnets depends on their alignment with each other. Even a small misalignment, just 0.3mm, can reduce the power significantly. So, to attach them correctly, you should first glue two magnets to the printed mount, then add one magnet to the bottom of the effector using several magnets on top to hold it in place (pay attention to magnet poles). Then, stick a fourth magnet to the glued one on the mount and let everything cure. To ensure that they won't bond together, use some waxed or parchment paper between them. Don't forget to adjust your z-probe height in the firmware! Set the Z max height at X0 Y0 Z0 using paper testing, save it to Eeprom. Home your printer using G28. Attach the probe and manually move it down until it triggers. Read the Z value - that's your probe height. Save it to Eeprom (in Repetier, it's in the Eeprom configuration window). When you're not using the probe, you can easily attach a screw-less mount that clicks onto the 2020 extrusion. There are clips that lock it securely into place by applying a bit of pressure. You should hear them snap when they lock properly. To use an inductive probe with a glass bed, just print this adapter from Thingiverse.
With this file you will be able to print Kossel magnetic z-probe mount with zero X-Y offset to avoid effector tilt problems/errors. Tested 100%. with your 3D printer. Click on the button and save the file on your computer to work, edit or customize your design. You can also find more 3D designs for printers on Kossel magnetic z-probe mount with zero X-Y offset to avoid effector tilt problems/errors. Tested 100%..