Kossel Pro Fan Part Fan Upgrade
thingiverse
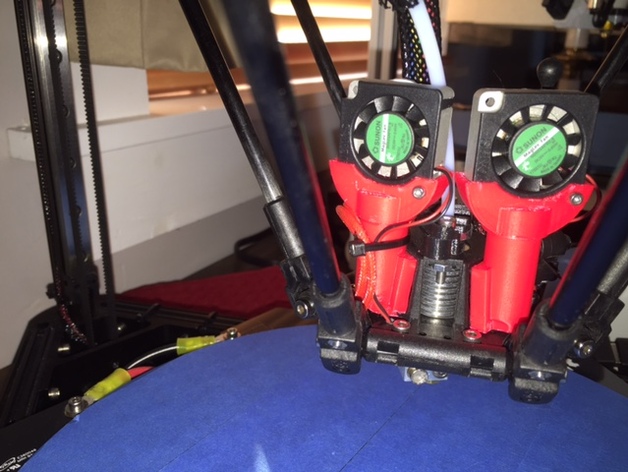
UPDATE: I have uploaded a base for a 30x30x10mm fan, renamed the base for a 35x35x10 fan to fan_adapter_base_35.stl. This is a fan upgrade for the Kossel Pro delta printer or the Kossel RepRap variant that uses the same stock effector. The stock effector comes with three diminutive 10mm 5V fans; one for the hot end and two for part cooling. Sadly, these fans are adequate for most smaller prints but larger prints with small areas require fan settings adjustments to print well. In fact, they have to be run wide open most of the time. However, there is a solution: use bigger fans! This adapter mounts two 30x30x10mm 5V radial fans to replace the two smaller axial fans. With this upgrade, you no longer have to run the fans wide open to get decent prints for parts with smaller details. Print Settings Printer Brand: SeeMeCNC Printer: Rostock MAX Rafts: Doesn't Matter Supports: No Resolution: 0.30 Infill: 20% Notes: Print with ABS. PLA will become soft on longer prints. Clean all parts and test fit them before assembly. Post-Printing Installation - moderately difficult Parts Needed: Two 30x30x10mm 5V fans, yes, five volts. Two 1.5x15mm bolts Two 1.5mm nuts Zip ties (optional) Googly eyes (optional) Notes: The best way to install these is to remove the effector and the hot end. You will need to get inside the effector to get to the small nuts that hold the fans. Unload the filament. Allow the hot end to cool. Power off the printer. Remove the hot end. Place it aside and wrap a cloth around it to protect it. Disconnect the wire loom to the effort. Move the wire loom to the side and out of the way. Disconnect the delta arms at the effector. You do not need to remove the arms themselves. Be sure to capture the bolts, grommets, and any bearings that drop out. Set these aside. Place the effector on a static-free cloth or on a workbench with a lip (to keep those pesky small parts from rolling away). Remove the two 5V axial fans and disconnect the wires. Remember which one is the red (positive) wire! Just loosen the bolts for the wires - don't remove them completely. Install the fan adapter risers in place of the fans. For this you will need needle nose pliers to hold the nuts in place. It's a bit tricky but you can do it with some patience. Install the new fans in the base. Use the 1.5mm bolt and nut to secure them. Coat the top of the riser and the inside of the base where the riser fits with a generous amount of acetone using a small brush or similar applicator (but not enough for it to run all over - be careful there!). Wait about five to ten seconds, then press the parts together, orient them as shown in the photos, and hold them for about thirty seconds until the acetone evaporates. Thread the wires for the fans through the same holes from the old fans, cut the wires to length and connect them. Install the effector. Be careful not to over-tighten the arm bolts. Note: this would be a good time to install shims to correct the bolt length issue if you've been wanting to do that. Reinstall the hot end. Reconnect the wire loom and PTFE tube. Zip tie the loose ends and apply googly eyes (optional). Power on the printer and load the filament. (Optional but highly recommended) Calibrate your printer. Change the settings in your software to lower print fan speeds on first layers (they're way more efficient now and may cause problems if turned on 100% on first layers). How I Designed This Designed with Openscad If you find other-sized fans (you can use up to 35x35x15mm fans but not much larger - no room), let me know and I'll make and upload a version for you.
With this file you will be able to print Kossel Pro Fan Part Fan Upgrade with your 3D printer. Click on the button and save the file on your computer to work, edit or customize your design. You can also find more 3D designs for printers on Kossel Pro Fan Part Fan Upgrade.