Kritzlerbot Polargraph (printable)
thingiverse
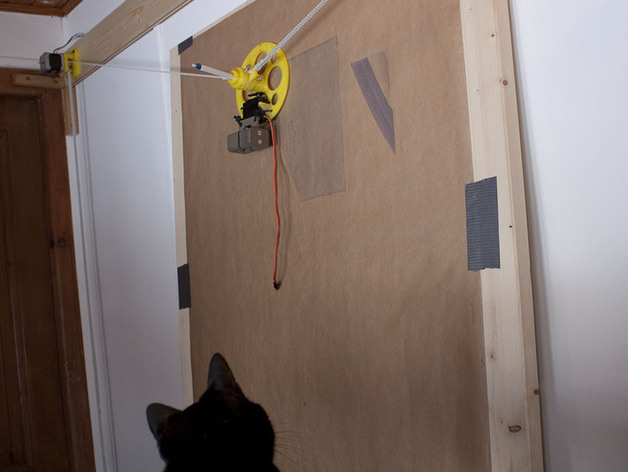
More pictures: http://www.flickr.com/photos/lanthan/sets/72157629185958843/with/6823716121/ Inspired by the amazing Kritzler http://tinkerlog.com/2011/09/02/der-kritzler/ and Polargraph http://www.polargraph.co.uk/ plus some itch to make my own. Also see AS220s:http://www.as220.org/labs/drawbot/ I liked the polargraph rotating axial mount, but since I do not have the suitable bearings, I printed sliding rings from pla. The fit is quite close, and with some Teflon spray they appear to work great! This has still to be mounted and tested. Notice the tidy desk ;-) Other available sources are Makerblock's build http://www.thingiverse.com/thing:16384 JohnA's gondola:http://www.thingiverse.com/thing:12557 Instructions The machine was commissioned early february, the mechanics work as expected. The firmware (see below) is now working perfectly with the controller. If you download the current files, double-check in particular the distance between the servo mounts on the hub, they lack maybe 1mm. An improved model is in the works. You will need to print: 2 x stepperbase 2 x plate1 1 x hub 2 x hubspacer 2 x hubring 1 x hubcap You will need some form of T5 pulley, either printed or metallic (I went with metallic ones) and as in kritzlerbot, 6m of T5 belt. Alternatively, you substitute that with a small spool and nylon monofilament, for a much more affordable solution. You can also use ball chain instead. See http://www.thingiverse.com/tag:ball_chain The 2xNEMA17 motors are totally overkill but I had them around. Each one is fastened with 3 m3x35 bolts. I added a m4 washer between pieces to gain in height, this will be added to next version. The stepperbases and plates are symmetrical to simplify part multiplication and printing. You can optionally fit 3 small 624ZZ bearings on an m4 bolt to provide more contact between the belt and the pulley. A thin m4 washer between the plastic and the bearing may be of some use. The hub or gondola's axis hosts: one spacer, two rings, one spacer, one cap fastened with one or two m4 bolts. Near the tip of the pen set three m4 nuts and bolts to fasten the pen. I killed a boarduino by plugging simultenously two 5v power sources, so I settled for an on-the-test-board ATMega328 and two stepsticks. Modified firmware using step/dir drivers: http://www.thingiverse.com/thing:17051
With this file you will be able to print Kritzlerbot Polargraph (printable) with your 3D printer. Click on the button and save the file on your computer to work, edit or customize your design. You can also find more 3D designs for printers on Kritzlerbot Polargraph (printable).