Kyber Crystal Holder - Star Wars Galaxy's Edge - 3, 6 and 7 Slot Variant
thingiverse
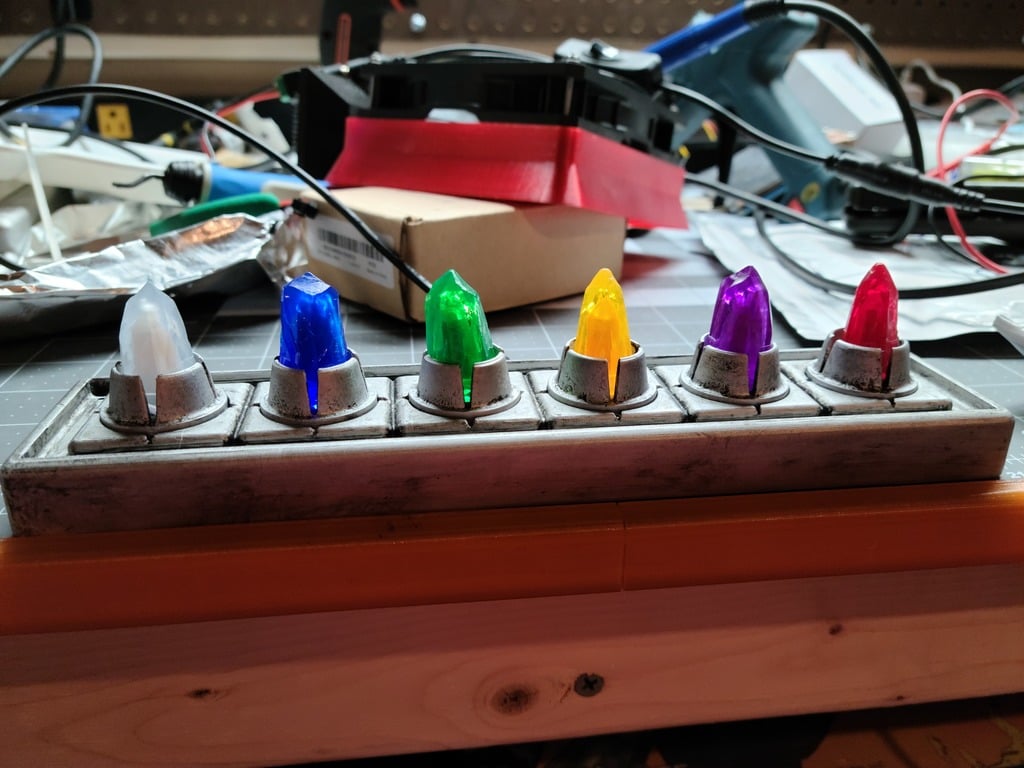
Final Update: Finally finished painting on my print of the animated LED stand. Pictures have bee uploaded. Short video of it here: https://www.youtube.com/watch?v=O81I9WMjPQw Looks better in person. Phone camera makes the colors look weird. Finished using Smooth-On XTC3D, then wet sanded with 240 grit. Then primed with Rustoleum 2X Ultra Cover Primer Spray. Low spots an scratches filled with 3M Acryl-red spot putty. Then wet sanded, primed, filled,sanded primed, and so on until smooth. Given a few coats of MTN PRO Metallic Spray Paint in Metallic Aluminum. Then weathered by slightly watering down some basic black acrylic paints. Smeared all over it with a brush, sat for a 30 seconds and then wiped off until I achieved this final look. It was then sealed with several coats of MTN PRO Acrylic Spray Varnish in matte finish. All electronics were removed. All parts were painted and weathered individually. I opted to glue the crystal holders in with super glue. Update 5/19/20: Updated Arduino code to use for both 6 and 7 crystal variants. Assumes you use pin 2 for LED data line and wired to make the left most pixel your first. Pick 6 or 7 based on your number of LEDs and then flicker or solid depending on what you want. Figured the solid would be a nice fallback if flicker is buggy on your nano. Place contents of the zip file into your Arduino folder. Update 5/18/20: By request I have added a 7 slot variant of the Arduno animated RGB base. Update 4/18/20: Added 3 slot variant by request. Update 3/11/20: Ok that actually didn't take as long as I expected. I have uploaded a variant for use specifically with an arduino nano and neopixel mini button PCBs. Also attached is the ino file containing the code used to animate the pixels. Video preview of the animation: https://www.youtube.com/watch?v=s6TjHLMvfag (Color looks way better in person. My phone cant seem to deal with the brightnness of the leds) Neopixels can be bought here: https://www.adafruit.com/product/1612 of here (best bet it adafruit is out of stock): https://www.digikey.com/product-detail/en/adafruit-industries-llc/1612/1528-1196-ND/5353656 Unofficial 3rd party Arduino Nano can be bought here: https://www.aliexpress.com/item/32242048437.html?spm=a2g0o.productlist.0.0.3f7d2dcfBBv1Ct&algo_pvid=a6a42fb4-6725-46c9-be40-c63bd5d8252b&algo_expid=a6a42fb4-6725-46c9-be40-c63bd5d8252b-2&btsid=0be3743615839410513216926e2f2d&ws_ab_test=searchweb0_0,searchweb201602_,searchweb201603_ Note: Cant vouch for the quality of these. I bought 5 of them a while ago from another source on Banggood. I think one ended up being a dud but the one I have left that I am using works fine still. The redesigned base i sized to provide a press fit for the leds and the arduino. You printer variances may result in too tight or too loose a fit. Send me a message and I can tweak it if need be. There are spots in the board slot that are designed to accept M1-M1.5 self tapping screws if you want to screw the board down. But this hasn't been tested since mine is a really tight friction fit already. The hole covers are optional and are intended to be printed twice to slot into the space where the leds sit to cover them. Again, be advised that even though I got it working it may not work for you. As i explained below, this seesm to work on the Nano and failed on the Trinket M0 and Arduino Micro and I stil really have NO clue why. You may be better off using the stock base and a plain LED strip but figured I'd share my mod if you wanted to try it. ---------------------------------------------------------------------------------------------------------------------- Update 03/10/20: Sorry for taking so long. Making RGB lights work has been more frustrating that I expected. Good news and bad news. Good news is I have it working finally. The bad news is I can't get it to work properly on anything but the knockoff arduino nano i originally used. In an effort to slim down this model height I've tried an Arduino Micro and an Adafruit Trinket M0. In both cases the LEDS color glitch very badly. As they flicker they show random incorrect colors. Even worse if I just opt for white which either also color glitches or fails to even reliably light up. Code is the same in all boards and nothing needs to be tweaked per board. I used a number of power sources up 3.5A supply capacity. Adafruit forum mods who helped me troubleshoot seem to have settled on the fact that the clock signal produced by the arduinos is not very accurate and that it may be dumb luck I get this work on the one I did. SO, at this point I think what I'll do is post two versions of this remix. A standard 6 slot stand otherwise unmodified from the original and a version made for this arduino + neopixel buttons approach. I think I can actually shave a few mm off the one I originally posted with some reorientation and adjustment. I'll also post the INO file. However, doing the arduino method will be at ones own risk and expense because I have no idea if it can be replicated. Still, maybe someone will figure out where I went wrong. A stock 6 slot variant is posted now. One with the original wire hole placement and one where I moved it to the back. I will follow up soon (within maybe a week or so) with the final arduino+neopixel version. ----------------------------------------------------------------------------------------------------------------------- Edit: Changed to "work in progress" because I honestly haven't finalized my design. If you just want a basic stand with room to maybe stuff leds in it this should work fine and as i said below a crude method to trim the height down to your needs would be to just cut it short it in your slicer but you may or may not lose the power lead hole. I just realized an Adafruit Trinket M0 is perfect for this and would allow me to trim the height down substantially. So when I get that figured out I will upload a second updated model. ----------------------------------------------------------------------------------------------------------------------- Just modified the original slightly to reduce the number of crystal slots to 6. Didn't get a black one when i went to galaxies edge and dont plan on paying for one off ebay. I also changed up some of the internal features underneath to fit my still in progress approach to lighting using neopixels and an arduino nano to make them flicker. So this may be a bit taller than the original. I also removed the inner recessed slot for led strip because i could never get the supports off but still very much useable with whatever your led of choice is and you can use your slicer to cut it shorter. However, leave a comment if you'd prefer I revert my file to the original design. I print this with supports printed at 45 degrees to the model. Make sure you enable supporting bridges or else slic3r may not ever generate them.
With this file you will be able to print Kyber Crystal Holder - Star Wars Galaxy's Edge - 3, 6 and 7 Slot Variant with your 3D printer. Click on the button and save the file on your computer to work, edit or customize your design. You can also find more 3D designs for printers on Kyber Crystal Holder - Star Wars Galaxy's Edge - 3, 6 and 7 Slot Variant.