Lack MMU2S enclosure 3rd table addition with spool holders
prusaprinters
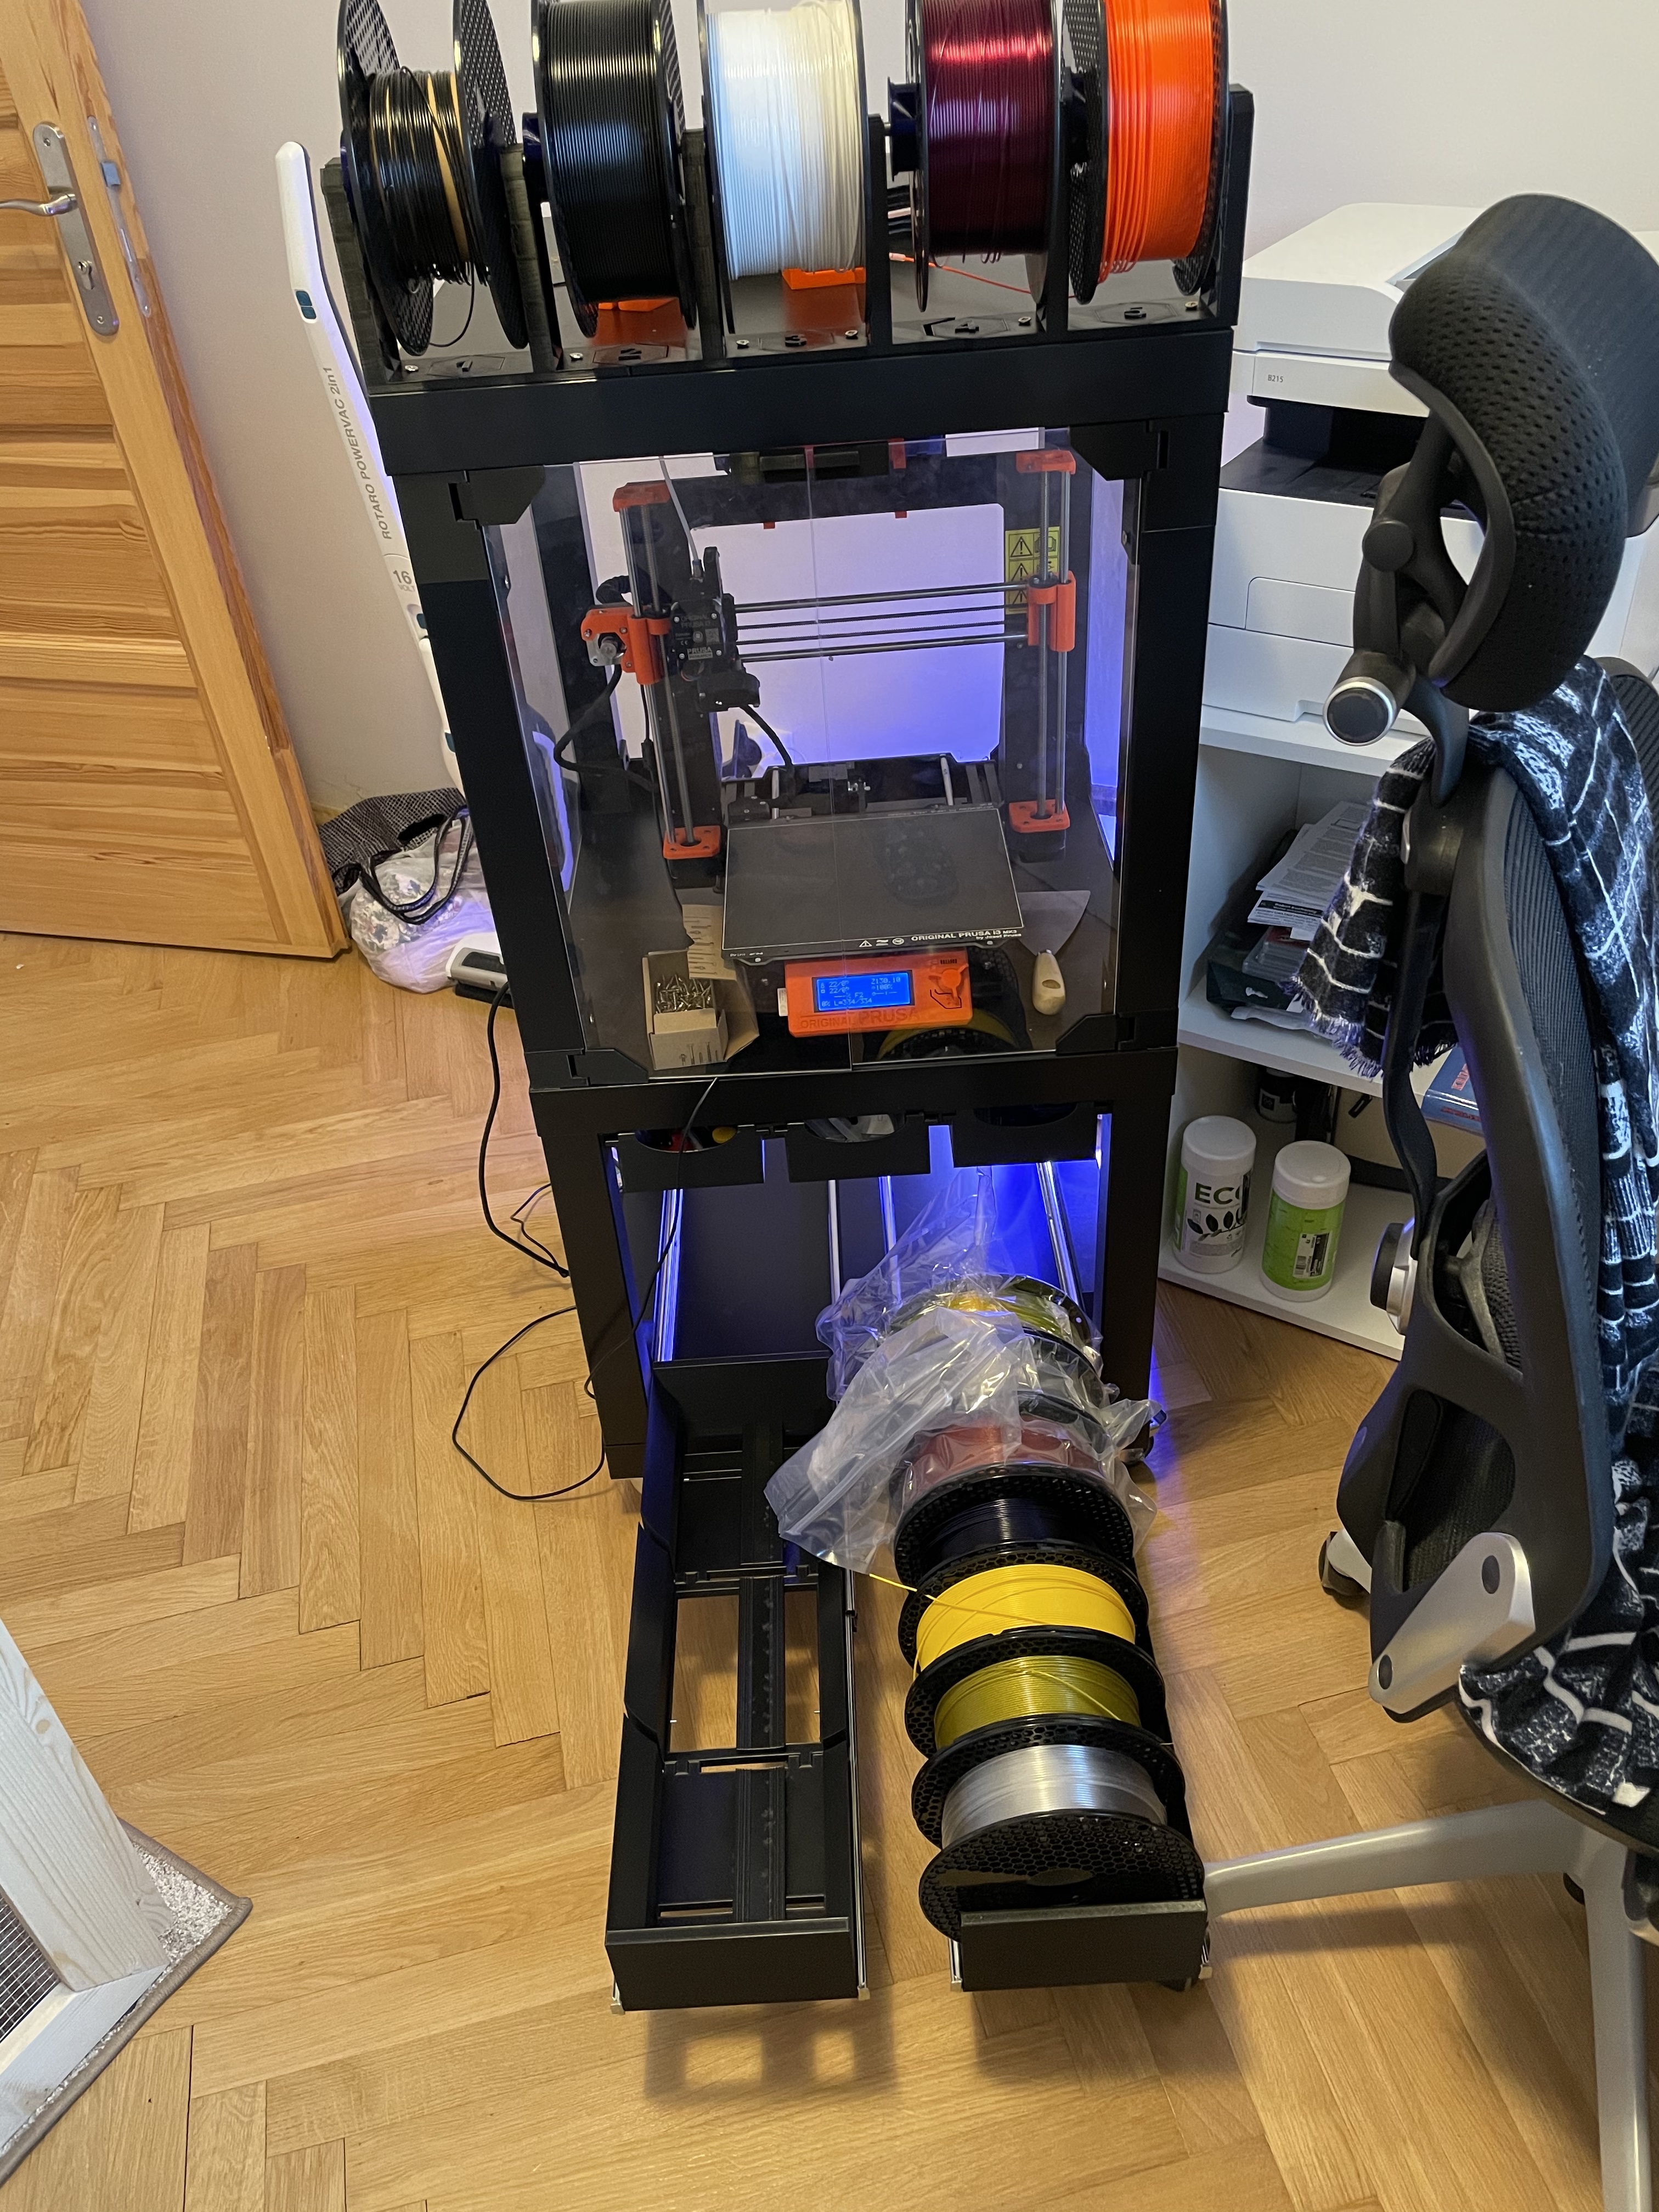
<p>This process will add additional lack table to standard MMU2S enclosure from Prusa (original: <a href="https://blog.prusaprinters.org/cs/jak-vyrobit-box-na-3d-tiskarnu-original-prusa-i3-s-mmu2s-kompletni-navod_30215/).">https://blog.prusaprinters.org/cs/jak-vyrobit-box-na-3d-tiskarnu-original-prusa-i3-s-mmu2s-kompletni-navod_30215/).</a></p><p>Shopping list:</p><ul><li>IKEA Lack table</li><li>4 wheels (<a href="https://www.hornbach.cz/shop/Nabytkove-kolecko-50-mm/2464097/artikl.html">https://www.hornbach.cz/shop/Nabytkove-kolecko-50-mm/2464097/artikl.html</a>)</li><li>30 pan head screw 4,5x20</li><li>2 pan head screw 4,5x50</li><li>20 screw M3x30</li><li>2 ball bearing full extension slides 550/45 (my selected ball bearing has some rubber protection at the end so it's little bit harder to open it, so I decided to remove the rubber completely) It's important to have full extension in case you don't have access from the sides otherwise you won't be able to take spool that are stored in the back of the drawer.</li></ul><figure class="image image_resized" style="width:50%;"><img src="https://media.prusaprinters.org/media/prints/63120/rich_content/f3f1303d-3921-4354-9519-0ab28dac8a7b/img_1985.jpg#%7B%22uuid%22%3A%220bad95e0-4839-4665-89af-e38b1bc98be1%22%2C%22w%22%3A3024%2C%22h%22%3A4032%7D"></figure><p>The main reason is to add wheels so you can freely move the whole printer and get easier to the back of the “printing station” when needed. I have used standard freely moving wheels with brakes so I can fix them in position whenever I need. I have used the standard wheels which you can buy from almost any hobby market (<a href="https://www.hornbach.cz/shop/Nabytkove-kolecko-50-mm/2464097/artikl.html">https://www.hornbach.cz/shop/Nabytkove-kolecko-50-mm/2464097/artikl.html</a>) Key characteristic:</p><ul><li>size 50 mm</li><li>maximum load at least 20 kg</li><li>freely moving</li><li>with brake</li></ul><p>Keep in mind the bigger wheel you'll get the higher it will be. The 50 mm wheel + table + some additional stuff will make the whole printing enclosure higher about 120 mm which mean that the top table is still accessible without major issues.</p><p>First buy additional Ikea Lack table and 4 wheels. Attach all wheels to this new table in each corner.</p><figure class="image image-style-align-center image_resized" style="width:50%;"><img src="https://media.prusaprinters.org/media/prints/63120/rich_content/9b8b859a-02b6-4291-b158-9e86c95894a1/img_1983.jpg#%7B%22uuid%22%3A%22fd5b3f51-8a41-406c-98a2-0961c37f65bf%22%2C%22w%22%3A3024%2C%22h%22%3A4032%7D"></figure><p>Print drzakv1, drzakv2 (both of them 2 times - 0,2mm 30 % infill) and drzak middle. Drzakv1 and v2 are for the sides. Each of them has different side covered so it should look like better when looking at the enclosure from the sides. Once you'll add the wheels move whole printing enclosure on the new table and add drzakv1 or drzakv2 to each corner.</p><figure class="image image_resized" style="width:50%;"><img src="https://media.prusaprinters.org/media/prints/63120/rich_content/ad3f89d4-6d70-41d9-9474-dea688b42912/img_1978.jpg#%7B%22uuid%22%3A%229b39ef87-b031-4f7f-a753-6c23479cc562%22%2C%22w%22%3A3024%2C%22h%22%3A4032%7D"></figure><p>Each holder (except the middle one) will require 3 screws 4,5x20. You'll need to screw them into table leg, to the bottom table and to the new table leg which is laying on the side of the box. You can see the alignment of the additional legs from the new table where they should be positioned. Drzak middle is used hold the middle leg in the front of the table. It's important that the leg is exactly in the middle of the table so you can print same drawers. The holders should be size to handle the side legs from the bottom and from the upper side as well. It won't fit perfectly so just use the force Luke. Use 4,5x20 to attach the middle holder to the table and 4,5x50 to the middle leg.</p><figure class="image image_resized" style="width:50%;"><img src="https://media.prusaprinters.org/media/prints/63120/rich_content/baaf16e8-7a91-450d-bd4e-38bd10ca7cd3/image.png#%7B%22uuid%22%3A%22b11c462a-be4b-404a-aa97-4f3ff4809f90%22%2C%22w%22%3A966%2C%22h%22%3A756%7D"></figure><p>After you attach all legs to the table add ball bearing to the legs (at least 3 screws on sides and 2 screws to the middle leg). Do not try to keep them flying over the bottom table the print itself is hanging above it. </p><figure class="image image_resized" style="width:50%;"><img src="https://media.prusaprinters.org/media/prints/63120/rich_content/d9510547-e272-46b1-ab8e-e805602ed5ab/img_1979.jpg#%7B%22uuid%22%3A%2200f09d05-b709-4b80-978c-6a5022c762c7%22%2C%22w%22%3A3024%2C%22h%22%3A4032%7D"></figure><p>Here is picture for the alignment in the front. Honestly I don't care how it looks in the back but with the size of the ball bearing and the table you should be safe :)</p><figure class="image image_resized" style="width:50%;"><img src="https://media.prusaprinters.org/media/prints/63120/rich_content/d7d3a5d2-2131-4a66-9a7a-0465ab185433/img_1981.jpg#%7B%22uuid%22%3A%22028935b2-d12f-4fa1-afd9-cd153b2edf0d%22%2C%22w%22%3A3024%2C%22h%22%3A4032%7D"></figure><p>Final installation</p><figure class="image image_resized" style="width:50%;"><img src="https://media.prusaprinters.org/media/prints/63120/rich_content/20937a8c-7a0b-433b-846d-856d6f4b50c1/img_1986.jpg#%7B%22uuid%22%3A%2233ded2f0-86da-4cc2-9c77-91f4aa589d40%22%2C%22w%22%3A3024%2C%22h%22%3A4032%7D"></figure><p>Print drawer parts (suplik1,2,3 - 0,3mm 10 % infill) and screw them together with 4x M3x30. You'll have basic structure. Now the higher side is on the side of the table (if not then the spools can block opening/closing because of the table legs. Check the following pictures.</p><figure class="image image_resized" style="width:50%;"><img src="https://media.prusaprinters.org/media/prints/63120/rich_content/58e61012-be7f-4508-8461-ee524ea6292c/img_1991.jpg#%7B%22uuid%22%3A%22f8497c3a-6843-466e-9b71-24a981b9adb9%22%2C%22w%22%3A3024%2C%22h%22%3A4032%7D"></figure><p>Now put it into the table and add spools you want to have there</p><figure class="image image_resized" style="width:50%;"><img src="https://media.prusaprinters.org/media/prints/63120/rich_content/4578e9bd-9487-4778-8038-4d2bc058c0b2/img_1995.jpg#%7B%22uuid%22%3A%220b2b2300-1dac-47cc-9f11-374aa4e4a3d5%22%2C%22w%22%3A3024%2C%22h%22%3A4032%7D"></figure><p>It holds up to 7 spools on one side, now I'm printing suplik1,2,3 again for the second side (they are mirrored so no adjustments needed). If you like the small drawers it's from <a href="https://www.prusaprinters.org/cs/prints/53078-table-lack-drawers">https://www.prusaprinters.org/cs/prints/53078-table-lack-drawers</a> slightly updated for better printing.</p><p>Do you see it usable for you? Can you make it better? This is my first try to even publish some of my work so please comment to help me my 3D printing knowledge.</p><p> </p><p>Next plans: Raspberry PI4B holder with camera and display holder + still thinking about some rack size smart UPS - any idea? experience?</p><p>Thanks a lot</p>
With this file you will be able to print Lack MMU2S enclosure 3rd table addition with spool holders with your 3D printer. Click on the button and save the file on your computer to work, edit or customize your design. You can also find more 3D designs for printers on Lack MMU2S enclosure 3rd table addition with spool holders.