Langstroth bee hive with locating pins
thingiverse
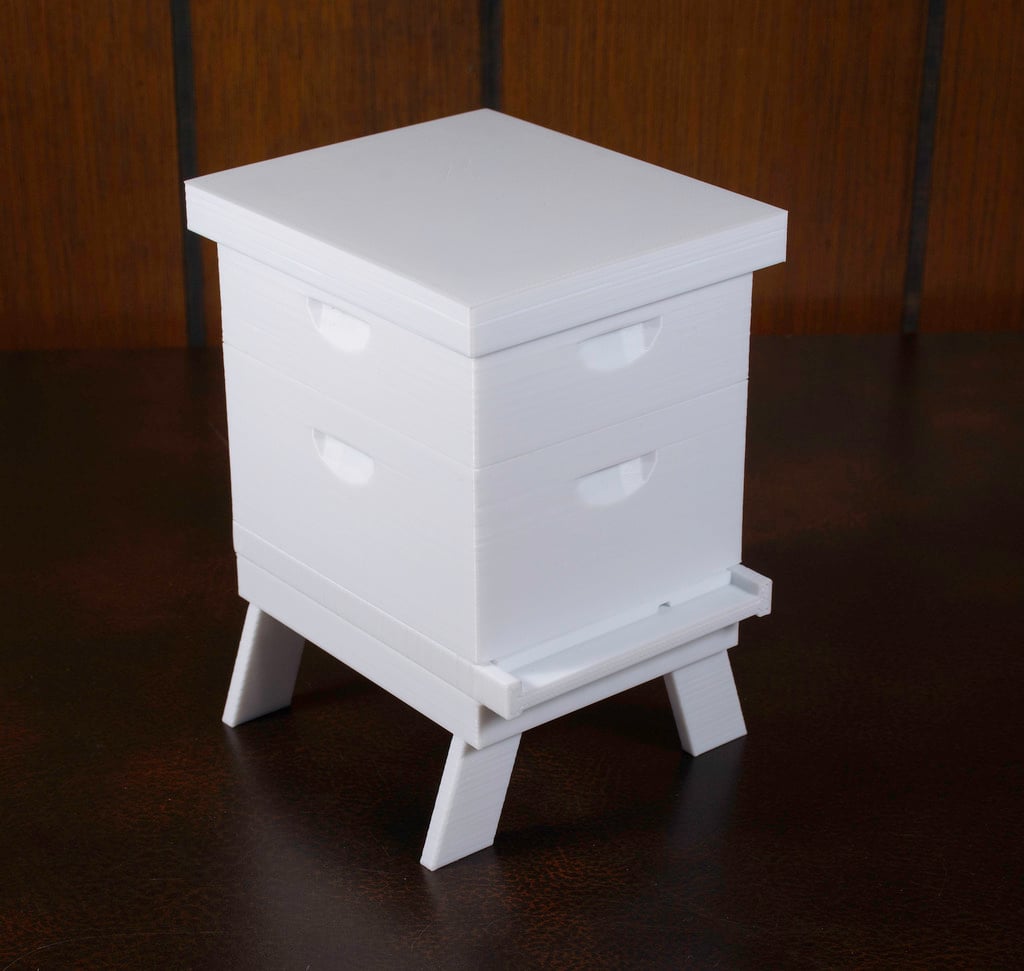
The Langstroth bee hive by Lay3rWorks is a fantastic educational tool that I find extremely cool. It's also ideal for someone like me, who isn't yet a seasoned beekeeper, to have a hive to play with and experiment with. I printed the hive in PLA, but it was so slippery that I kept knocking it over and scattering the parts everywhere. To solve this problem, I simply added small holes through all 4 corners of each part. Then I glued a short piece of 1.75mm filament into some of the holes to act as locating pins. This keeps the hive components aligned and securely locked together. Now I can easily carry the assembled model without it falling apart and scattering parts everywhere. The holes printed slightly too small for me, so I had to enlarge them with a drill to fit the 1.75mm filament. Super Glue (CA glue) works great to secure the filament in place. You don't actually need all 4 pins for each part - 2 diagonal pins work just fine. To assemble the hive, put the pins on top of each part, not on the bottom. Starting from the bottom of the hive: insert pins into the hive stand (check out the pictures). Next, set the bottom board onto the stand and insert pins into the top of the bottom board (make sure it's facing up or your entrance reducer won't fit). Now place the brood box onto the bottom board and insert pins into the top of the brood box. Finally, put the medium super on the brood box and add pins to the top of the super. That's all there is to it - you don't need pins in the inner or outer cover.
With this file you will be able to print Langstroth bee hive with locating pins with your 3D printer. Click on the button and save the file on your computer to work, edit or customize your design. You can also find more 3D designs for printers on Langstroth bee hive with locating pins.