Laptop motherboard case
prusaprinters
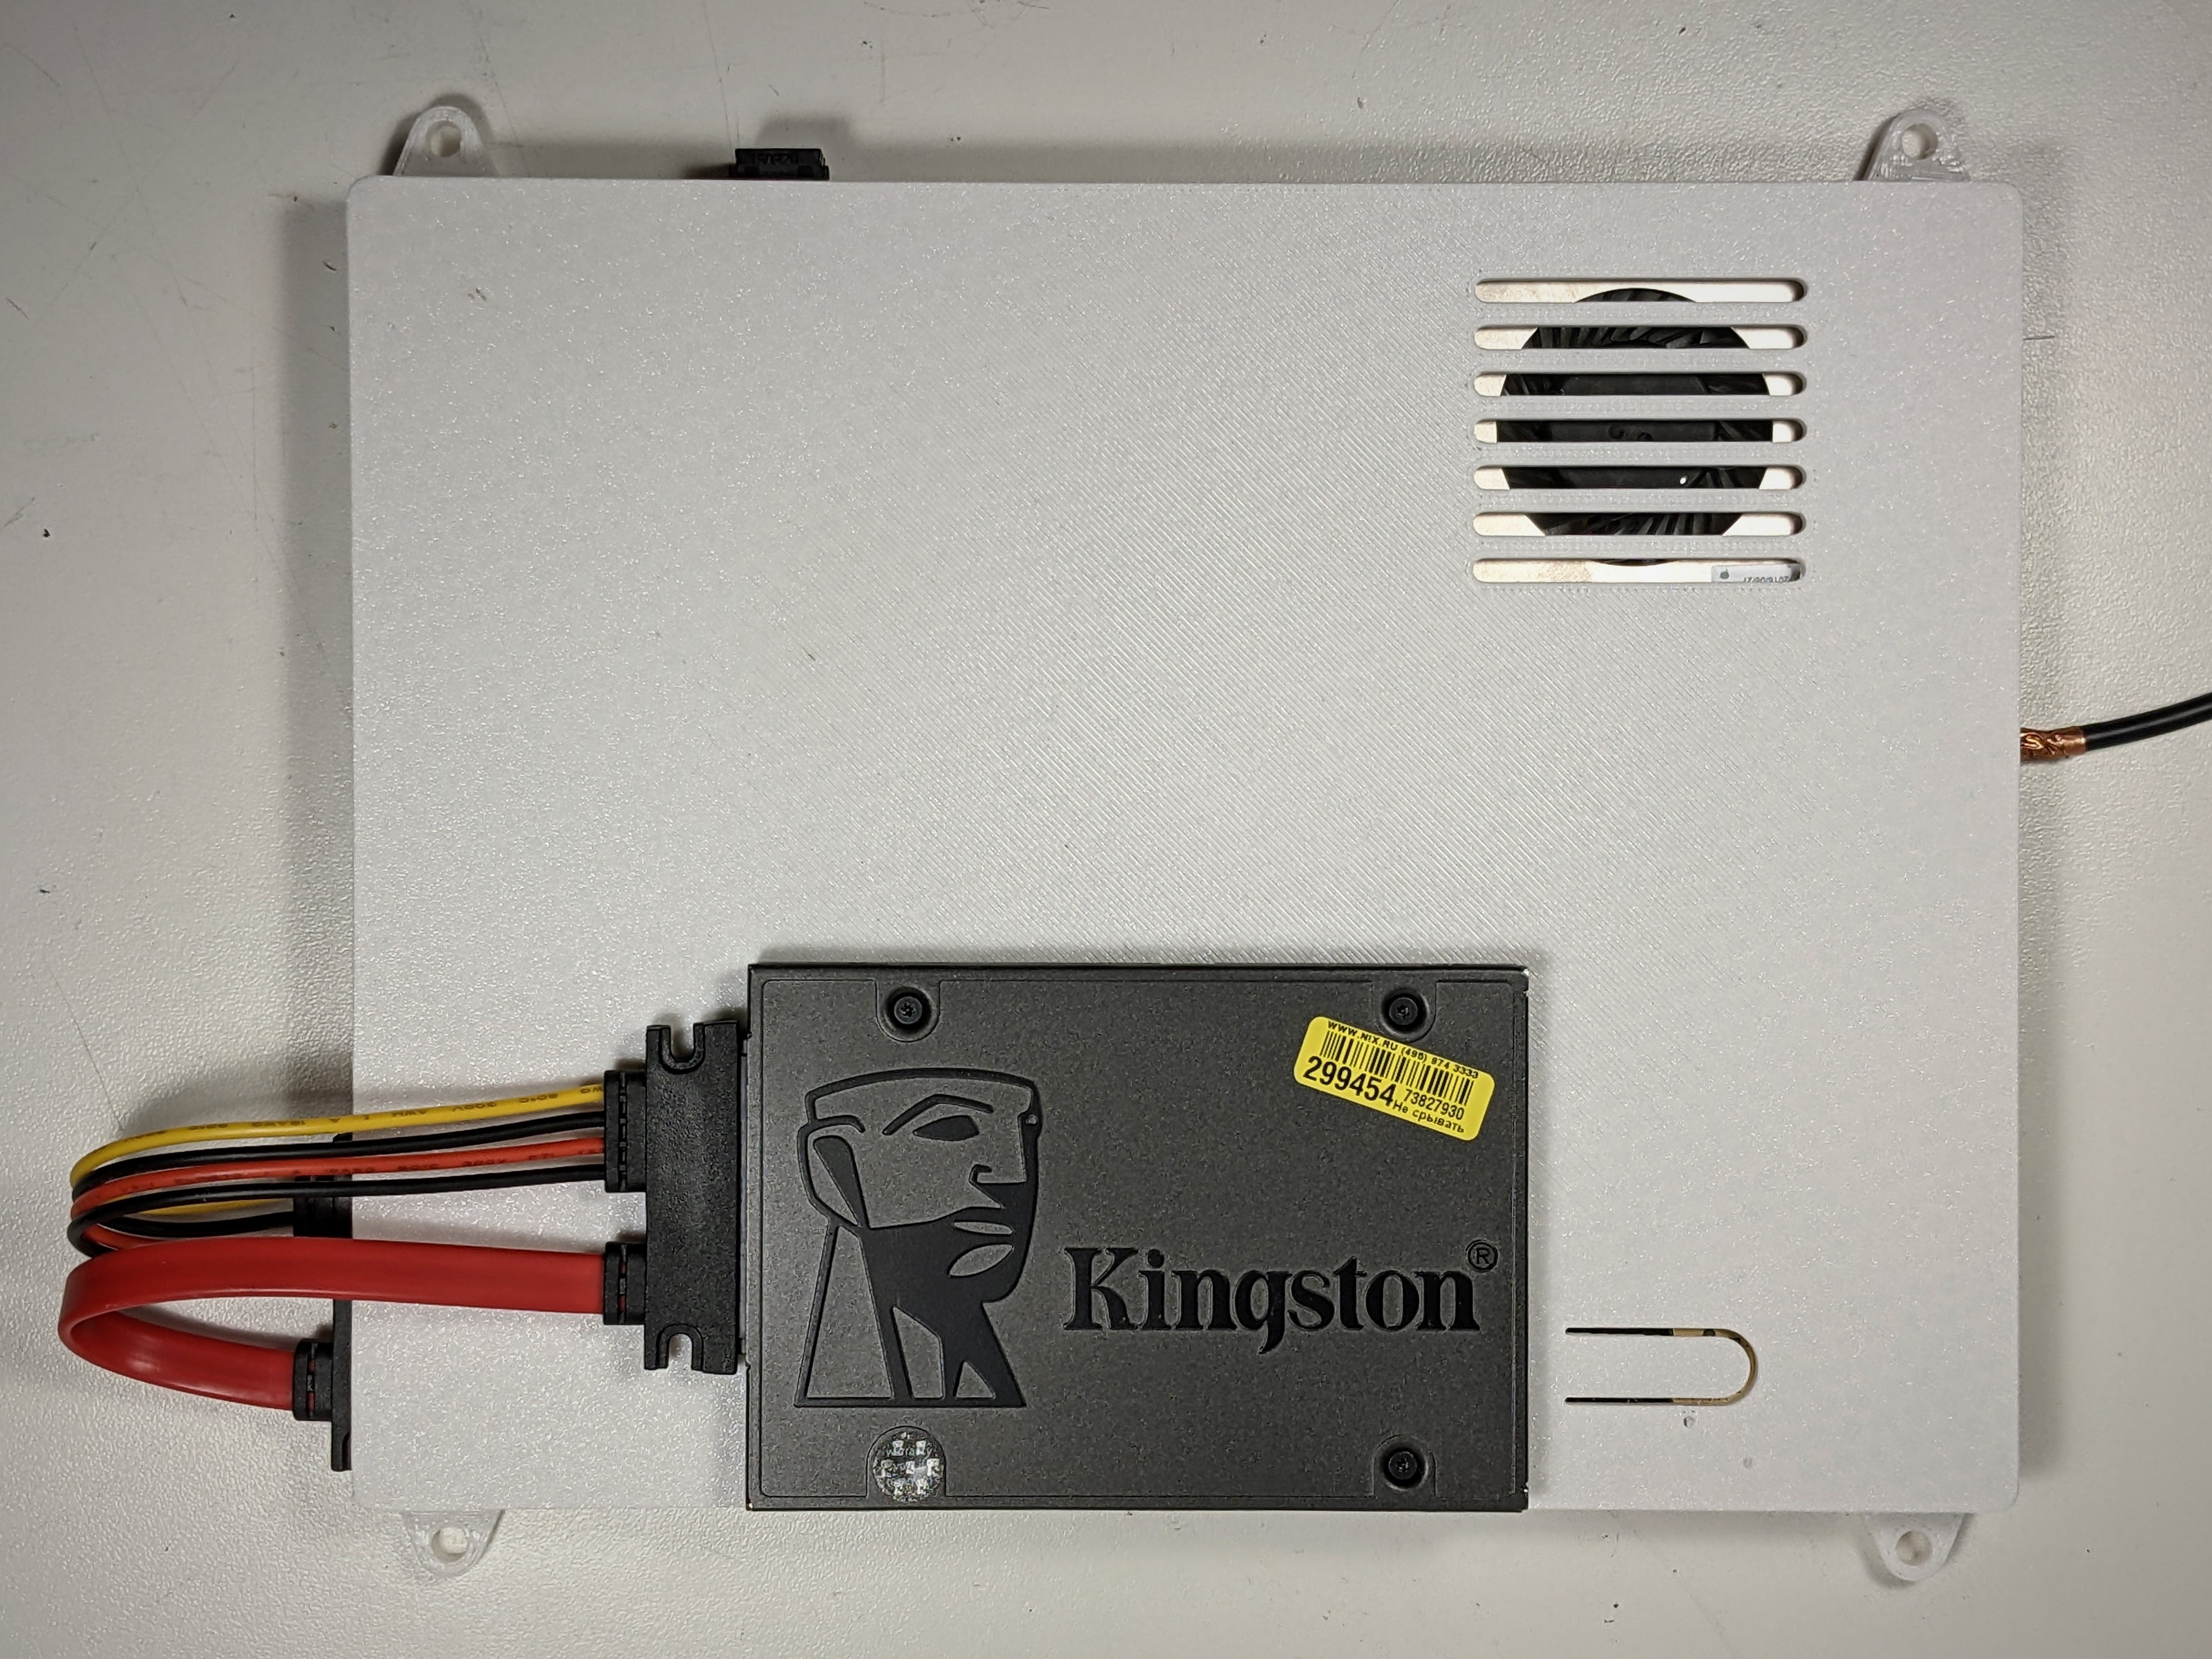
<p>With it being currently almost impossible to buy a Raspberry Pi, I was faced with a problem of finding a machine on which to host an Octoprint server for my brand-new Prusa Mini+. Since almost any old laptop can run it, I took the one my daughter has recently replaced due to it being “too slow” and “old and ugly!”. Since I've never liked the idea of permanently leaving a full-sized laptop next to my 3D printer, I ripped it apart and made a case for the motherboard alone. It is extremely low-profile and can be screwed to the bottom of a desk, leaving my workshop tidy and clean! (You can say anything on the internet, as long as people can't verify it ;))</p><p>This model was created for a Cedar Intel 13269-1 motherboard, taken from a Dell Inspiron 15 3542 laptop. If you use the model as is, please check that you have the same motherboard, otherwise the standoff and cutout positions might not line up.</p><p>PETG is recommended for its temperature resistance, since motherboards can get quite hot. Supports from the build plate are required for the attachment brackets. The print fits onto a Prusa i3 build surface, but you would need to cut it into parts and glue if you have a smaller printer.</p><p>Here is a list of materials I used for the build:</p><ul><li>The motherboard is screwed into place using the M2.5 screws from the Dell laptop and M2.5x5x3.5 threaded inserts from the following kit: <a href="https://www.amazon.de/dp/B09B7F2XM3">https://www.amazon.de/dp/B09B7F2XM3</a></li><li>The wi-fi module clips onto its own standoffs and is held in place by the motherboard. Just don't forget to connect the antenna before you screw it down :)</li><li>The power button has a place for it on the shell and is attached using tiny M2x3 screws (I cut longer M2 screws to get the correct length). The cut-out flexible portion of the case acts as the power button then</li><li>The power connector press-fits into the appropriate case cut-out without the need of any additional fasteners </li><li>An optional 2.5 inch HDD or SSD can be attached to the underside using some M3 PC screws and separately printed spacers and connected using the following SATA extension cable: <a href="https://www.amazon.de/dp/product/B07NSMDSV4">https://www.amazon.de/dp/product/B07NSMDSV4</a></li><li>The case is meant to be attached to a flat surface, such as the underside of a desk or a wall, but if you don't want to do this (or if you need the IO ports to be more easily accessible), you can print the included top lid and attach it using M3 screws. The holes in the bottom shell brackets are sized to accept M3x4x5 threaded inserts</li></ul><p>If you want to try this case but you have a different laptop motherboard lying around, feel free to modify the included Fusion 360 file. It is fully parametric and the standoff positions can be adjusted to fit your motherboard. It is a good idea to create a drawing of the model and print it out on a sheet of paper before finalizing the model to verify that the standoffs line up with the motherboard holes.</p><p>Happy printing!</p><p>Update 02/11/2022:<strong> </strong>added STEP file.</p>
With this file you will be able to print Laptop motherboard case with your 3D printer. Click on the button and save the file on your computer to work, edit or customize your design. You can also find more 3D designs for printers on Laptop motherboard case.