Laser beam aligner
thingiverse
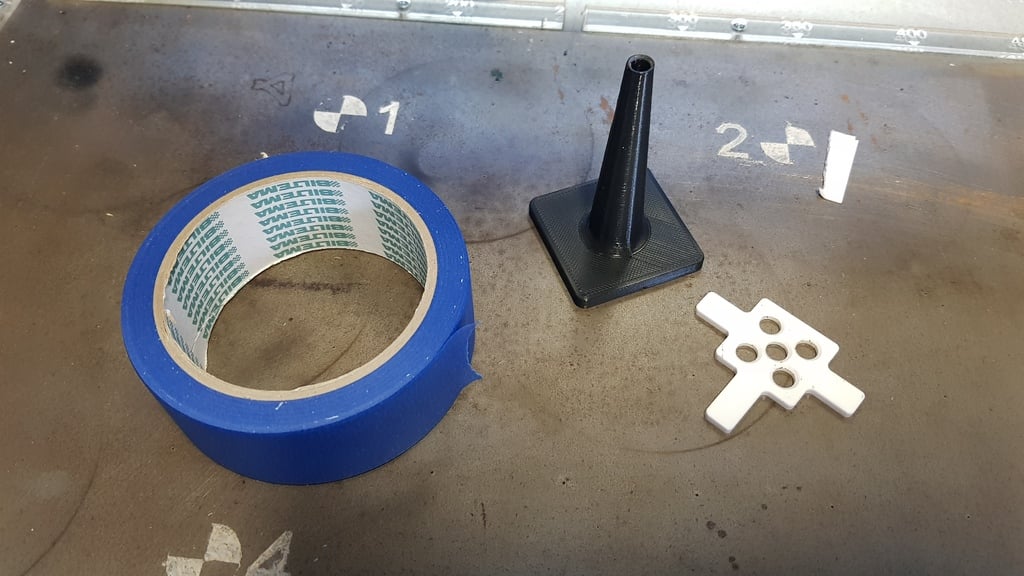
When you have aligned your lasers beampath to perfection, you now need to be sure the beam is 100% vertical to make a straight cut through the material. Here you have a simple tool to make this alignment. -First make sure you hit the nozzle in the middle by adjusting your mirrors. (for this I use a homemade gauge with some painters tape) -Put a piece of painters tape under the cone. -Place the cone directly under the nozzle and raise the table until the cone centers gently on the tip. -Fire a short pulse. -Now it's easy to see if the spot is in center using the aiming lines under the cone. If not, you need to move the cutting head a little bit, and then try again until you hit dead center. (Remember to check and adjust also at the nozzle every time you move the head) -PEPSI-
With this file you will be able to print Laser beam aligner with your 3D printer. Click on the button and save the file on your computer to work, edit or customize your design. You can also find more 3D designs for printers on Laser beam aligner.