Laser Collimator
thingiverse
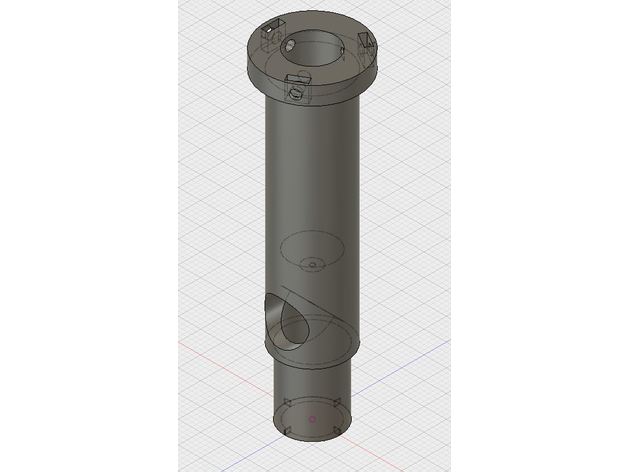
I used the "Laser Collimator for Telescope by Gyrobot" concept 101030 as a starting point and adapted it to use a laser boresighter that I inherited from my father. See the link below for a model that looks like the one I have. If I didn't have the laser boresighter, I would have chosen a cheap laser pointer in the $5 range or a cheaper boresighter in the $15 range. Perhaps I would have simply purchased a laser collimator for $20 rather than spend $15. I adapted this design for my printer by reducing the OD of the 1.25" tube by .013" based on a test print of a hollow 1.25" cylinder. It was out of round and the worst oversize dimension was 1.258". My eyepieces seem to be .005" undersized, so I reduced it by .013" to 1.237". The laser hole was too closed after the print and I had to drill it out with a .125" bit. I would open it up more if I were to modify the design. The hole was a little hard to reach with a drill bit, so I had to grasp the bit with only a short section in the chuck. If you try it, I would recommend making a custom cylinder to center the tail rather than the screws as I think it would be easier to take the boresighter in and out that way. The cone that the boresighter rests in seems to work fine as long as the scope is oriented with the focus tube mostly up. If the boresighter slips out of the centering cone, collimation will be off. I turn the boresighter on and off by pushing down and twisting the tail of the boresighter. Collimating instructions: Be careful pointing a laser toward your eye. I take no responsibility for damage that could occur to your eye. Do this at your own risk. Insert the boresighter in the collimator and center the tail. Insert the collimator in the focusing tube of your scope in the eyepiece position. You might as well orient the viewing window on the collimator so you can see it while adjusting the primary screws. Adjust the secondary mirror until the laser dot is centered in the primary mirror center (it helps to have an annulus/donut center mark on your primary). You will have to look down the tube to see the dot on the primary. Flip the telescope so that you're looking at primary adjustment screws. You should be able to see the sight window in the collimator. Adjust primary adjustment screws until the laser dot in the sight window is centered. If your primary is so far out of alignment that you can't see a dot, you might have to pull the collimator out and adjust the primary until your eye is visible when you look into the focusing tube. That's it. It's MUCH faster than what I used to do with a pinhole sighting jig that I made. I can collimate now in about a minute. One thing that really stands out to me now that I have this working is that I can easily change the collimation by rotating the scope on the mount. i.e. Gravity is taking my scope out of collimation when the scope changes orientation. While I'm not sure how much it affects my viewing, I suspect it's fairly significant and is an indication that I should tighten up the tolerances on the parts that are moving or perhaps manipulate them while viewing to see if I can get better views. Pretty cool! Laser Boresighter https://www.amazon.com/Bushnell-Bushnell-Laser-Boresighter-22-50-Cal/dp/B0105RMBEA/ref=sr_1_8?ie=UTF8&qid=1488716474&sr=8-8&keywords=laser+boresighter Print Settings Printer: A8 Rafts: No Supports: No Resolution: .2mm height Infill: 10% Notes: This was printed in PLA on an Anet A8 (Prusa I3 clone). Extruder: 200°C Bed: 60°C See attached profile.ini file for more detail.
With this file you will be able to print Laser Collimator with your 3D printer. Click on the button and save the file on your computer to work, edit or customize your design. You can also find more 3D designs for printers on Laser Collimator.