Laser Cut Christmas Tree
thingiverse
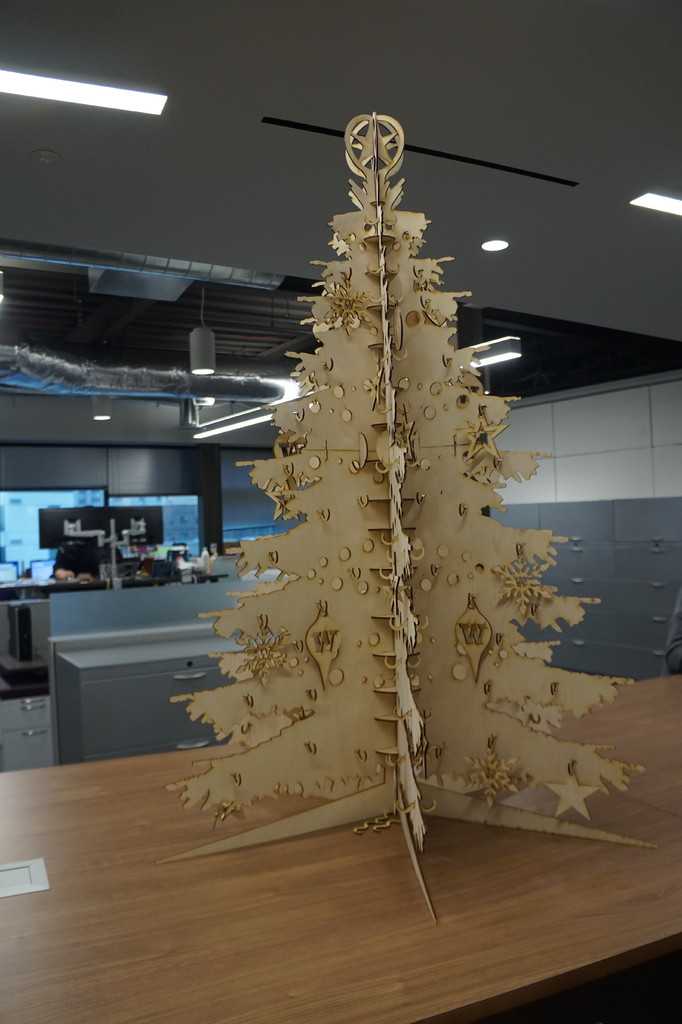
This is the tree I designed for the UW CoMotion office. It was designed to be laser cut on a 18x24" 3mm wood sheets. Assembly instructions: Cut 3 of each PDF The ornament holders (optional) are the moustache shaped things. Those slide in horozontally to the slots and then are rotated like a key. The circles with 2 inlets are for connecting the top and bottom pieces. There should be 12 total. The tiny one below those is for the very top of the tree. The large connecting discs (there should be 9) are for the bottom part of the "trunk" and the medium ones (6 in total) go in the middle. I'd reccomend starting with the bottom (larger pieces) of the tree. Make sure you are alternating between #1 and #2 so the garland pattern matches up. Take one bottom tree piece and slide the connecting trunk circles in starting from the bottom. once all the slots are filled, slide in another bottom tree piece into the next avalible slot in the connecting circle. Repeat until all 6 bottom pieces are installed around the center connecting circles. Then build the top half seperatly following the same methodology. Next, take the connecting circles with the 2 notches and connect one of their notches to the vertical notches on the bottom tree part. gently slide the top piece's corresponding notches into the connectors and you're all done!
With this file you will be able to print Laser Cut Christmas Tree with your 3D printer. Click on the button and save the file on your computer to work, edit or customize your design. You can also find more 3D designs for printers on Laser Cut Christmas Tree.