Laser cutting test for 3mm plywood
thingiverse
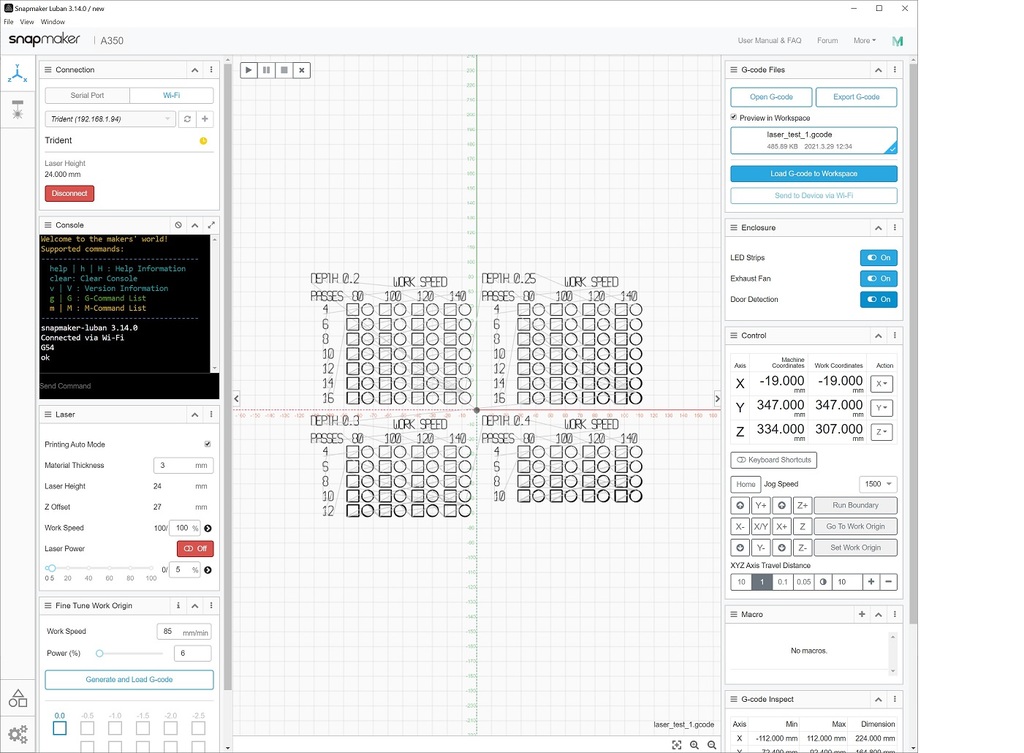
Gcode file to vary number of passes, depth and workspeed to find optimal values to cut 3mm plywood. This was has been used on a Snapmaker 2 A350. A couple of examples are provided which shows the variation within, and between, two different boards from different suppliers. **Important notes:** * Template is set to limit passes so that the laser drops no further than 4mm, make sure there is sufficient clearance between the laser starting position and board * The template is set for landscape printing (see image on bed) * You can ignore the layout.svg file as this was included as a "Thing" needs include at least one file of a specific type (gcode is not in the list even though it's sufficient to create something) * Each depth is done in turn starting from top left with 0.2 working up to 0.4 Once the machine is calibrated, you can test using gcode in Luban: 1. Align plywood board landscape on laser bed (see picture) 2. Drag and drop gcode file (or open gcode file) into Luban workspace 3. Set material thickness to 3mm 4. Set work origin in the centre of plywood board 5. Optionally run boundary test to correct alignment 6. Run gcode (press run/play button top left of the Luban workspace) You can also run from USB memory stick which will show percentage complete. You may need to change the the file extension to .nc so that it appears in the file list. Then follow the on screen process (setting thickness and work origin).
With this file you will be able to print Laser cutting test for 3mm plywood with your 3D printer. Click on the button and save the file on your computer to work, edit or customize your design. You can also find more 3D designs for printers on Laser cutting test for 3mm plywood.