Laser Engraver Rotary Riser/Stabilizer (3D Printed or Laser Cut)
prusaprinters
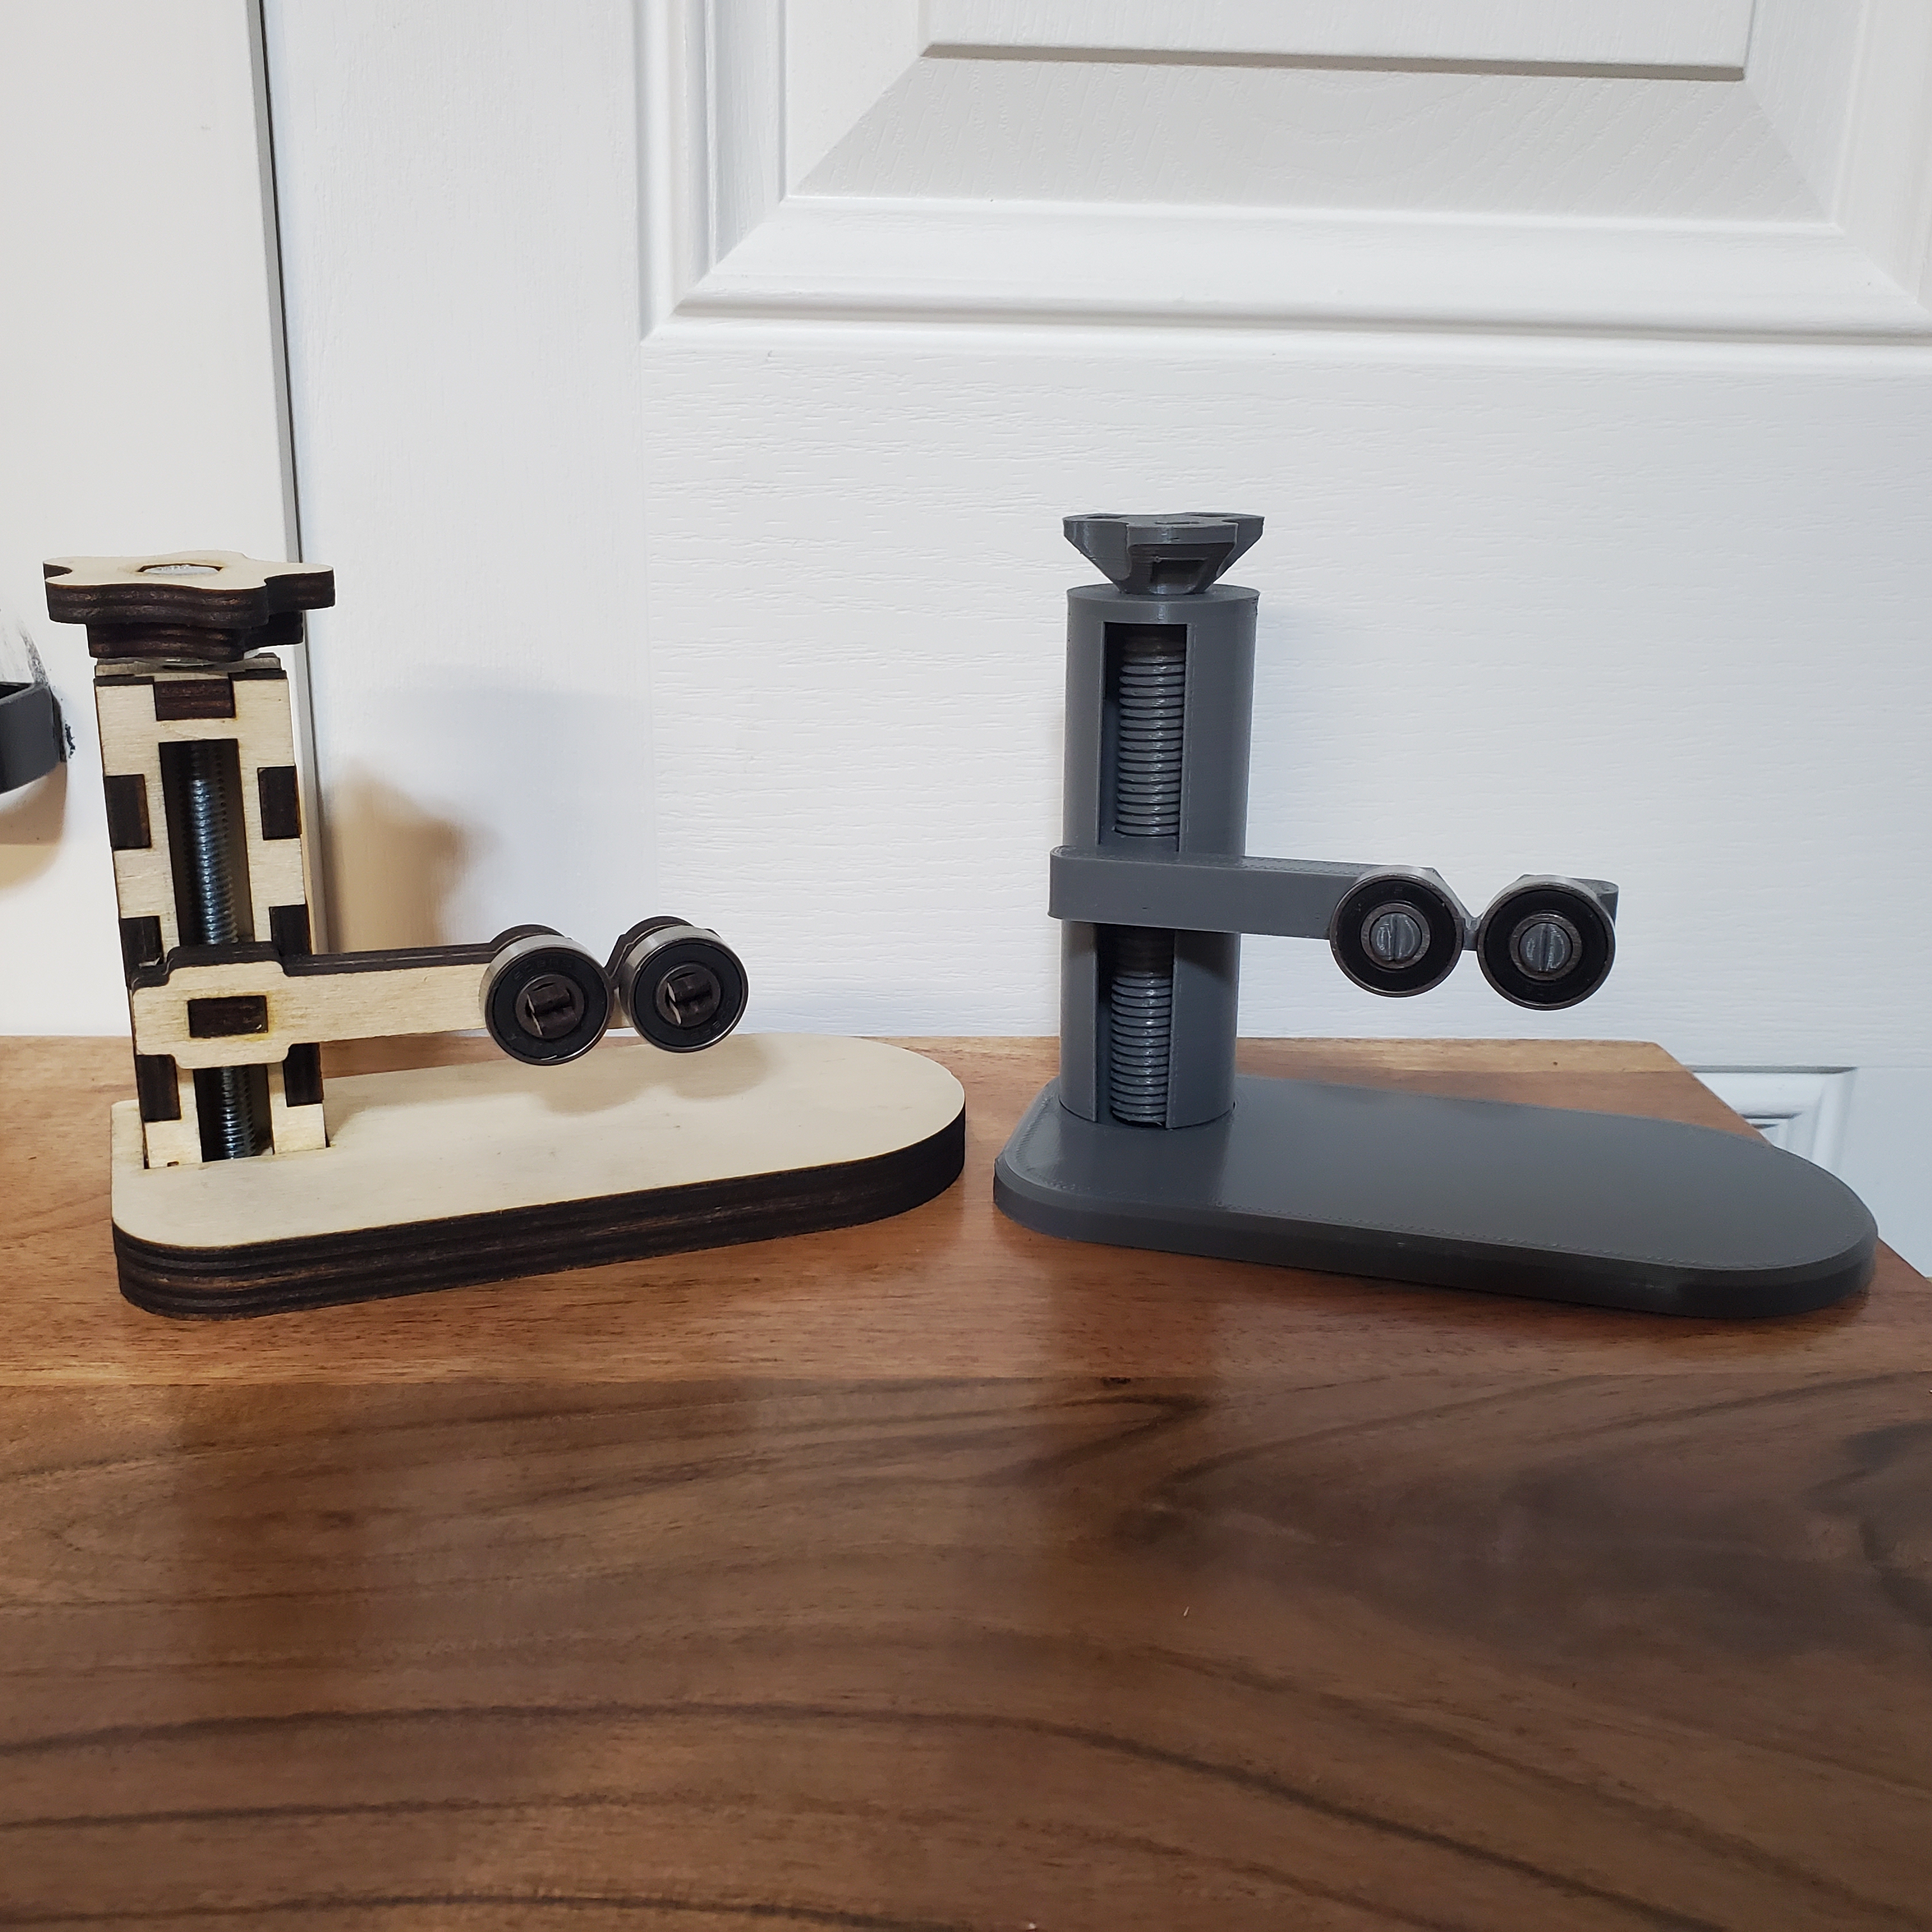
<p>Laser Engraver Rotary Riser/Stabilizer<br><br>2 Options Available: (3D Printed or Laser Cut)<br><br><strong>3D Printed Version:</strong></p><figure class="image image-style-align-center image_resized" style="width:59.89%;"><img src="https://media.printables.com/media/prints/321511/rich_content/6bbe0c82-b7e5-46a1-908b-35124a2a3d20/riser.jpg#%7B%22uuid%22%3A%226d03d15e-7d1c-4635-88ba-e151f57c4290%22%2C%22w%22%3A711%2C%22h%22%3A598%7D"></figure><p>Printed in PLA+</p><ul><li>I used a .6mm Nozzle, however you can use a .4mm as well</li><li>With a .6mm Nozzle 2 Outer Walls. With a .4mm Nozzle 3 Outer Walls</li><li>Top & Bottom Layers: 4 </li><li>20% Infill (Grid)</li><li>No Supports Required</li><li>Print each part separately to avoid stringing </li><li>Orient printed parts as follows<br><img src="https://media.printables.com/media/prints/321511/rich_content/d5f3b64a-7ccf-4d9f-ae02-c4247f234bd1/orientation.jpg#%7B%22uuid%22%3A%223ebff06e-bb92-4b60-ace2-763c027fc47f%22%2C%22w%22%3A636%2C%22h%22%3A428%7D"></li></ul><p>Assembly as follows:</p><p>Requires 2x 608-RS Ball Bearing available on Amazon.<br><img src="https://media.printables.com/media/prints/321511/rich_content/18d55199-9421-476b-8275-761e2b5f8c5d/riser2.jpg#%7B%22uuid%22%3A%224d754adf-4a4a-4f46-b977-d44419ae0601%22%2C%22w%22%3A590%2C%22h%22%3A564%7D"></p><ol><li>TEST ALL THREADING BEFORE PROCEEDING.</li><li>Secure Both Ball Bearing to Arm. Heat up pegs slightly to allow bearings to slip on.</li><li>Insert Arm with V slot oriented up into Shaft.</li><li>Insert Threaded Portion of Shaft into Base thread and rotate until shaft opening is parallel to base front. It would be a good idea at this point to use some SuperGlue to secure shaft into base.</li><li>Insert Screw into top of shaft and thread into arm.</li></ol><p> </p><p><strong>Laser Cut Version:</strong></p><p>(Used the X-Tool M1 To Cut. Job Time approx 1hr for cutting and 20min assembly)</p><figure class="image"><img src="https://media.printables.com/media/prints/321511/rich_content/511644a8-9de4-4b63-a491-afd3ddec053e/wood-assembly.jpg#%7B%22uuid%22%3A%22827bd421-6458-462e-835c-916026e662d7%22%2C%22w%22%3A696%2C%22h%22%3A606%7D"></figure><p>Requires a 265x200mm (Approx 10.5in x 8") piece of 6.35mm (¼") Plywood</p><p>Hardware Required:</p><ul><li>2x 608-RS Ball Bearing available on Amazon.</li><li>1x 5/16" x 4in Hex Head Bolt</li><li>1x Matching Hex Nut</li><li>1x Matching Washer (optional)</li></ul><p>Cut Overview:</p><figure class="image"><img src="https://media.printables.com/media/prints/321511/rich_content/82307278-609a-4fcd-a4be-cc877d416eb9/635mm-wood-rotary-v3.jpg#%7B%22uuid%22%3A%225490b4a8-54c5-4d68-8627-0ecd031ea4d6%22%2C%22w%22%3A567%2C%22h%22%3A751%7D"></figure><p> </p><p>Assembly as follows:</p><figure class="image"><img src="https://media.printables.com/media/prints/321511/rich_content/d712b7ca-41a4-4e4c-8e63-32aac0f3ba40/screenshot-2022-11-20-140242.jpg#%7B%22uuid%22%3A%229a682348-a68a-493f-a116-b05ed9f81452%22%2C%22w%22%3A632%2C%22h%22%3A592%7D"></figure><p>Prep:</p><ol><li>Press fit & use glue to insert/embed Nut into arm receiver</li><li>Press fit & use glue to insert/embed Hex Bolt head into top knob piece</li><li>For Ball Bearings: First insert pins into ball bearing prior to Glue up of arm</li><li>Glue Up all parts as shown above.</li></ol><p> </p><p> </p><p><strong>If you download and use please like this model and upload a make picture.</strong><br><strong>Thanks</strong></p>
With this file you will be able to print Laser Engraver Rotary Riser/Stabilizer (3D Printed or Laser Cut) with your 3D printer. Click on the button and save the file on your computer to work, edit or customize your design. You can also find more 3D designs for printers on Laser Engraver Rotary Riser/Stabilizer (3D Printed or Laser Cut).