LaserCut Fairytale: Puppet Theater "Little Red Riding Hood"
thingiverse
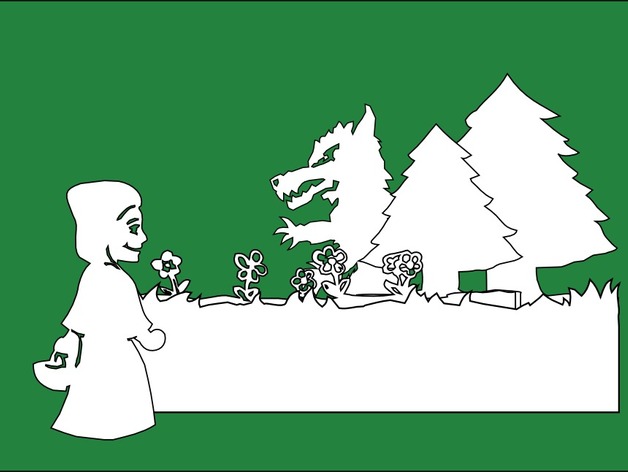
Upcycling-Project: Puppet Theater in A Drawer Make Your Own Stick Puppet Theater Take an old drawer and transform it into a little theater. All the puppets and the scenery can be put back into the drawer. And even the drawer itself can be put back into the cabinet. If you want you can make a whole fairytale cabinet. The puppets and the scenery are cut out by a laser cutter. Every puppet consists of two views: one figure shows the front, the other one the side. Cut in a small gap and put the 2D figures together to create a 3-dimensional puppet. Instructions Converting the Drawer into a Theater: Disassemble an old wooden drawer. Pull out the base plate. Saw a part of. The part should be at least 15 cm wide - big enough to reach through the gap in the base plate. Then put the cropped base plate back into the drawer. Screw four small eye bolts into the inside of the drawer. One eye bolt into each corner. Measure your drawer and saw two wooden boards. These boards partition the drawer into three segments: I) Gap in the base plate for playing, II) Compartement for storing puppets and scenery, III) Compartement for tucking in the scenery. Attach the boards to the drawer with adhesive tape, nails or screws. Cut two pieces of rope, e.g. nylon thread, that have the same lenght (about 1m). Tie the nylon threads to the eye bolts. Now you can suspend the theater everywhere you like. Cutting the Puppets and the Scenery: Measure the compartements of your drawer. The size of your Storage Compartement defines the maximum size of the puppets. The scenery can be cut in halfs or thirds in order to fit into the compartement. Open the inkscape-file. Define the size of the figures as desired. Set a proper document size that corresponds to your laser cutter, too. Sometimes you have to rotate the figure 90° in order to fit onto your board. Set the proper stroke width (black, 0.01 mm). TIP: I made the figures out of cardboard, but I would recommend to use wood and to integrate the gap for sticking together the two figures into the inkscape-model. The gap has to be as wide as your wood is thick. Let the laser cutter cut out the figures. Cut the scenery in half if it's too big. Joint it together simply via tape or with another kind of hinge-joint, so it can be folded together. Stick the puppets together and tuck in the scenery. Have fun playing "Little Red Riding Hood".
With this file you will be able to print LaserCut Fairytale: Puppet Theater "Little Red Riding Hood" with your 3D printer. Click on the button and save the file on your computer to work, edit or customize your design. You can also find more 3D designs for printers on LaserCut Fairytale: Puppet Theater "Little Red Riding Hood".