Lasercut Sliding Puzzle
thingiverse
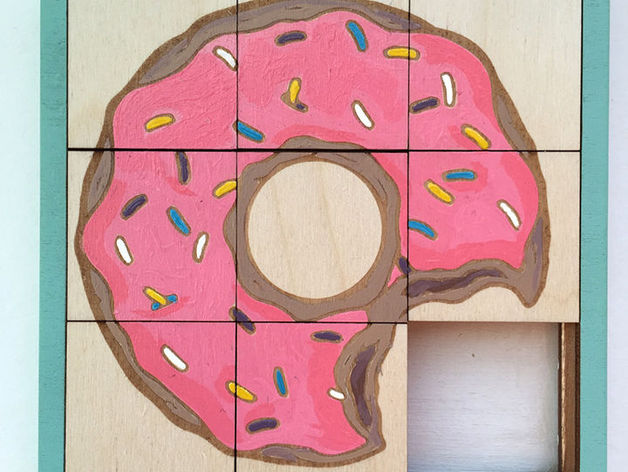
Here's a cool idea! How would you like to make your very own slide puzzle! We'll show you the steps to do it all. We used a Trotec Laser Cutter. How I Designed This Step 1: Layout your pieces to cut We've included the illustrator file for you to work with. We used baltic birth plywood (1/8") as our choice of material. Step 1: Layout your pieces to cut Step 2: Time to cut it out! Cut out the pieces. For ours, we used an etched image as our designs. Feel free to use text or even just numbers for your tiles, whatever suits you. Once all of the pieces have been cut, sand out all of the pieces for a nice smooth finish. Step 2: Time to cut it out! Step 2: Time to cut it out! Step 3: Assemble the back Assemble the back as it will help you piece together the individual tiles. On the square back, add the square frame and the thicker "L" shaped piece with an etched lip. Wood glue would be the best option here. make sure to get rid of excess glue Step 3: Assemble the back Step 3: Assemble the back Step 4: Make the tiles Slide one of the square tiles shaped as an L on the base you previously made. The etched edge of the tile should rest right under the lip you've made. Stick the pieces with the corners cut off (middle pieces) with glue for all of the 8 tiles. Step 4: Make the tiles Step 4: Make the tiles Step 4: Make the tiles Step 5: Oil and Sand pieces Take the half assembled tiles and give it a quick sand . Also add a tad of danish oil (if you have some) to prevent catching of the pieces. If you're still having problems, round out the corners. Step 5: Oil and Sand pieces Step 5: Oil and Sand pieces Step 6: add your design Whether you're painting a design or just placing an image on the tiles, this is the time to do so. We used acrylic paint, but if you have pieces of masking tape to cut, you could spray paint them. Step 6: add your design Step 6: add your design Step 6: add your design Step 7: Final assembly We've provided two ways to finish off the puzzle: 1: Glue all the tops of the tiles together and put them into the puzzle. Glue the skinny "L" shaped piece with the final square into the frame. This way, all the puzzle pieces are locked before the final square is placed. (We used this technique in the video). 2: Finish assembling the frame and add half of the tiles you have. Glue the tops of the tiles into place. Make sure to be centered as if the pieces aren't even, it may be wayside. But it does allows you to paint the frame. Tip: If you are considering to paint the back of the tiles, make sure to sand it t'ill it's extremely smooth as one bit of rough paint could make it stick. Step 7: Final assembly Step 7: Final assembly Step 7: Final assembly Step 8: Voilà! Ta Daa! Now you've made your very own puzzle! Enjoy! Step 8: Voilà!
With this file you will be able to print Lasercut Sliding Puzzle with your 3D printer. Click on the button and save the file on your computer to work, edit or customize your design. You can also find more 3D designs for printers on Lasercut Sliding Puzzle.