Leaf Blower Attachment for Line Trimmer
prusaprinters
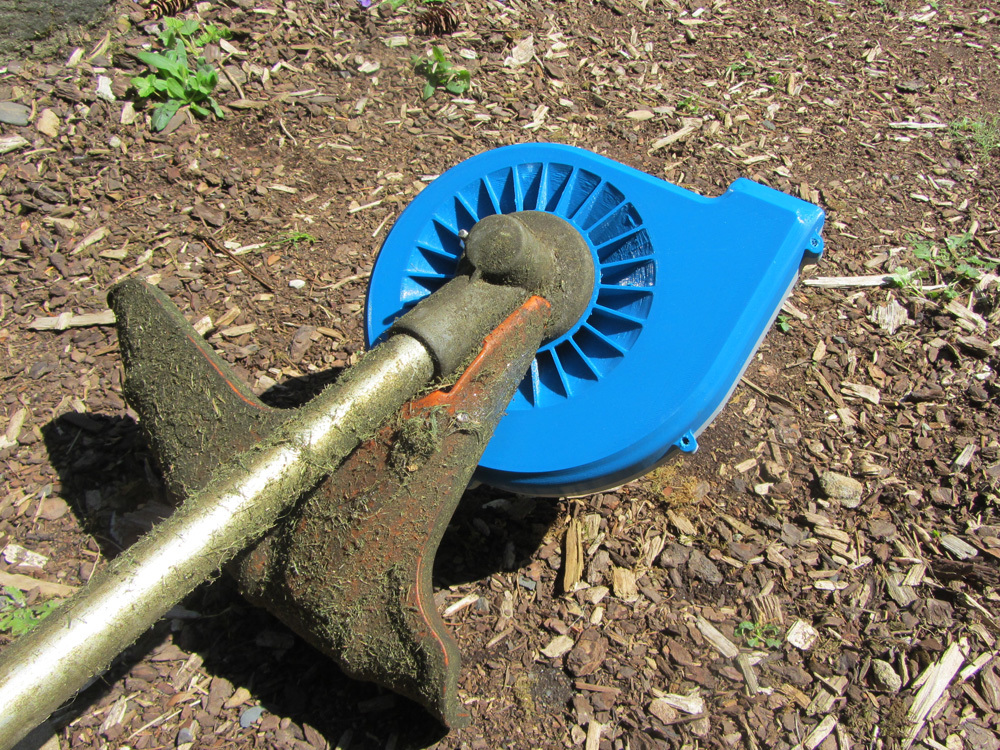
<p>This leaf blower attachment is designed for standard Stihl line trimmers (mine is an FS 56). It doesn't have a ton of power, but it is good for light duty blowing tasks. I don't really know anything about designing blowers - this was very roughly modeled after an old Toro electric leaf blower, but it doesn't blow nearly as hard (the electric motor runs much faster than a trimmer engine). I've included CAD files for anyone who wants to make improvements.</p> <p>CAUTION: Do not run the impeller without the housing fully attached - if your impeller print fails it will<em>explode</em> everywhere!</p> <p>Watch it go: <a href="https://youtu.be/tFOtBASdfvo">https://youtu.be/tFOtBASdfvo</a></p> <h3>Print Settings</h3> <p><strong>Printer:</strong></p> <p>UDIO</p> <p class="detail-setting rafts"><strong>Rafts: </strong> <div><p>No</p></div> <p><strong>Supports:</strong></p> <p>Yes</p> <p class="detail-setting resolution"><strong>Resolution: </strong> <div><p>0.2mm</p></div> <p><strong>Infill:</strong></p> <p>35%</p> <p><strong>Filament:</strong></p> Inland PLA <p><br/> <p class="detail-setting notes"><strong>Notes: </strong></p> </p><div><p>If your slicer lets you edit supports, the housing top really only needs supports for the center circular section. If you enable supports for the entire part, they are a bit of a pain (but not impossible) to remove from the top intake vents.</p></div> Post-Printing ============= <p>To complete the assembly, you will need:</p> <p>Six 8-32 x 1/2" socket cap screws</p> <p>One 10-32 x 1 1/2" socket cap screw</p> <p>One 10-32 nut</p> <p>To assemble, first remove the line trimmer head and the weird spinning washer plate from the line trimmer.</p> <p>Press the 10-32 nut into the pocket on the inside of the housing top and then position the housing top over the business end of the line trimmer. The access hole normally used for locking the trimmer head should line up with the hole and nut. Insert the 10-32 socket cap screw in from the top of the trimmer head and screw into the nut to secure the housing top in place.</p> <p>Next, place the impeller over the shaft and then slide the 3D printed nut into the center of the impeller. Using a 10mm allen wrench, tighten the nut onto the threaded portion of the trimmer shaft in the CCW direction. (The threaded stud has a LEFT-handed thread.)</p> <p>Finally, place the housing bottom over the top and secure with the six 8-32 socket cap screws. Give the impeller a spin using your 10mm allen wrench in the hex socket exposed end of the nut. Make sure nothing is rubbing inside, otherwise you will end up with a bunch of melted plastic.</p> <p>To remove the blower, you don't need to do a full disassembly. Stick a rod, screw or allen wrench into the offset hole in the housing bottom. There are matching holes in the impeller so that if you rotate the impeller, you can stick the the rod through the mating hole to lock the impeller. Then use the 10mm wrench to remove the nut. Flip the trimmer over and remove the 10-32 screw. Just reverse this process next time you want to put the blower back on.</p> </p></p> Category: Machine Tools
With this file you will be able to print Leaf Blower Attachment for Line Trimmer with your 3D printer. Click on the button and save the file on your computer to work, edit or customize your design. You can also find more 3D designs for printers on Leaf Blower Attachment for Line Trimmer.