LeapFrog Creatr Extruder Modifications for NinjaFlex Rubber Filament
thingiverse
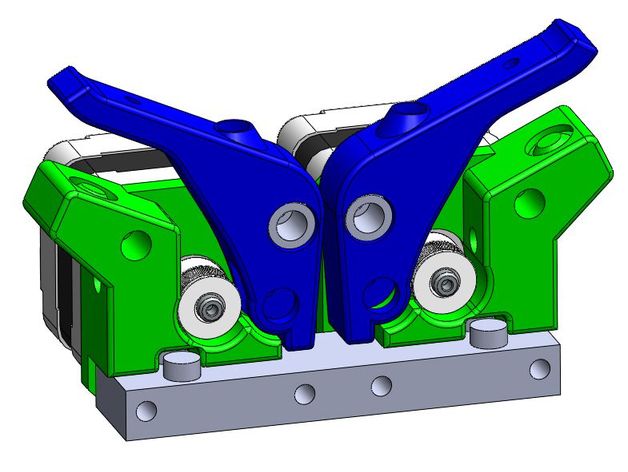
Modify your Creatr extruder with a spring-loaded drive mechanism for seamless printing of flexible NinjaFlex filaments. The Creatr's extruder is a modified MK8, but most spring-loaded extruders on Thingiverse may not fit or contain flexible filament correctly. Collaborate with NinjaFlex engineers to create an optimized solution. Printer settings: speed at 30 mm/s and temperature at 220°C. Print parts including Pin, Arm, Base Plate (single extruder) or Mirrored Arm, Mirrored Base Plate, Pin (dual extruder). Remove front plate, fans, motor with two screws, fixed bearing plate, spacer plate, and replace the drive gear pulley with a 1.75mm filament pulley. Purchase a spring from McMaster Carr and a 1.75mm drive gear pulley from Ultibots. Visit NinjaFlex's site for printing tips. Posted instructions, step file for assembly upon request.
With this file you will be able to print LeapFrog Creatr Extruder Modifications for NinjaFlex Rubber Filament with your 3D printer. Click on the button and save the file on your computer to work, edit or customize your design. You can also find more 3D designs for printers on LeapFrog Creatr Extruder Modifications for NinjaFlex Rubber Filament.