Leaping Arches 3/4" PEX bases using LED strips. Single and double included
thingiverse
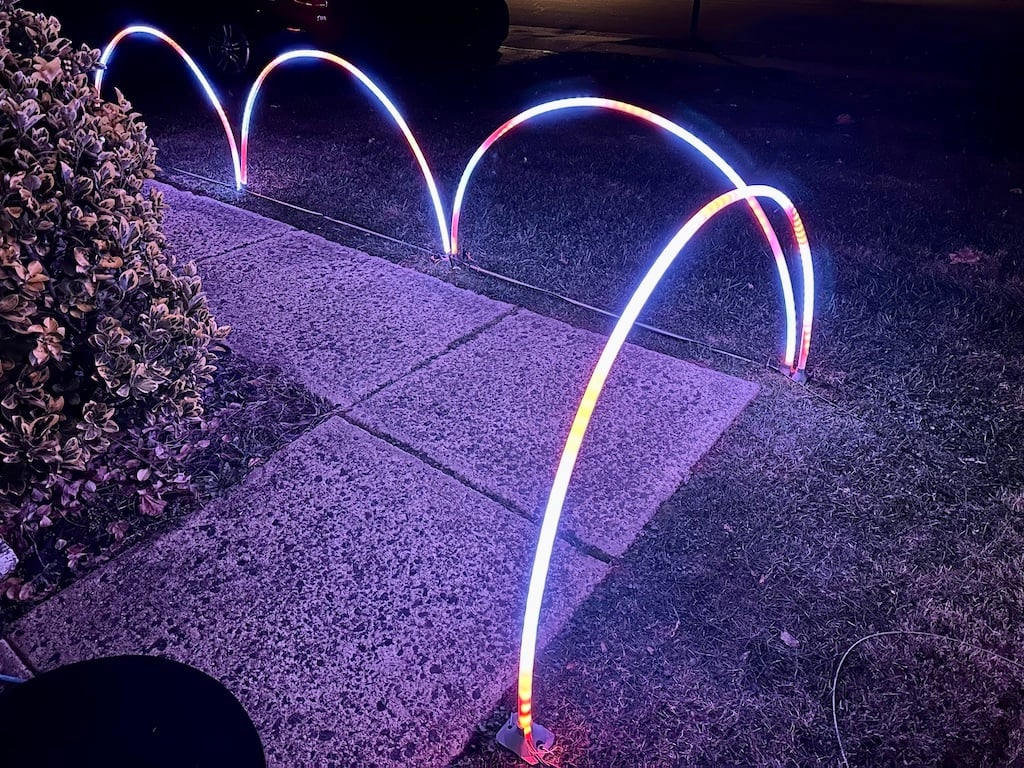
These are bases that hold 3/4" PEX tubing, allowing you to make your own "Leaping Arches" for decoration. I use them in with xLights + DigOcta (ESP32) + WS2811 IP65 LED strips. 2 arches can be made from a single 5 meter LED strip. A 30 LED/meter strip will show some individual lights, 60 LED/meter or higher will have more uniform illumination. The picture included is 30 LED/meter. There are 3 components: 1. Double arch base. 2. Single arch base. 3. 3/4" End Cap for wire retention / sealing. The double arch base has a slot to allow the PEX tubing to be inserted into it after the LED strip is already run inside the tube. The cut out is at an angle to the bend direction so that the walls are strong in the direction where the PEX tubing wants to oppose flexing. The single arch base is for starting or ending a line. The single could be used in pairs at the junction point of the arches if desired or if your printer won't print the larger double base. I have supplied 4 different versions of the single with cable exits coming from different angles to allow for optimal wire routing. Other than the exit angle there is no difference between the single bases. I used a thin piece of string with a weight on the end to first fish through the PEX tube, then I pulled the LED strip (with adhesive backing in place!) through the tubing using the string. I recommend a strain relief like this one: https://www.thingiverse.com/thing:5236399 when pulling the LED strip through the tubing. Don't pull the LED strip through using the power / signal wires! The included endcap is optional but it does allow for: 1. Sealing the ends if you desire with hot-glue. I didn't do that but if you are using non outdoor rated LED strips, sealing the tube might be a good option. 2. Preventing the end of the LED strip from going into the tube while you fish the other end through. The notch is smaller than the connector on the ends of most LED strips so having the endcap will act like a hard stop. 3. Provide a base for a rubber band to attach to the strain relief and hopefully prevent the LED strip from twisting inside the tubing. Each base has two methods of attaching to the ground. There is a horizontal hole in each side for a 1/2" EMT metal tube. You can drill a self tapping screw through the bottom of the base and into the EMT tube to secure the arches at fixed spacing. Alternately you can also use the 10mm holes in each corner to drive landscape stakes (I use 8" long, 3/8" diameter plastic stakes) , 60D nails, or landscaping staples into the ground. You can also use the holes to mount the bases to a 2x6 for extra rigidity. Using the EMT between the arches is optional but I find it helpful for getting perfect spacing (5' sections by cutting 10' sections in half) and for offering a solid place to secure (zip tie) any power injection or LED signal wiring. However, landscape stakes or staples are solid and easy to move if needed. To make 90 degree turns in a row of arches, use a double base but have one PEX tube at a 90 degree angle from the first. Use the singles at each end. For the PEX tubing, I've used both the 10' straight sections and the 100' coiled sections of PEX-B. I prefer the straight sections as the coiled PEX-B tubing is hard to handle. It's likely that PEX-A is the best option, but I didn't have it available to try. I cut my PEX at 8 feet (96 inches or 244 cm). Using 8' lengths will allow you to string a single 5 meter strip without cutting it between 2 arches. If you want to get use out of every last LED, you can cut the 5 meter strips in half and solder an extension between the two sections so that the cable that goes between the tubes inside the base won't have LED's on it. In that case 8' 4" (100 inches) is probably a good starting point. Cut a little long on your first set but take careful measurements and cuts on your remaining arches as it looks nicer if all the arches are the same height and spread. I tried many of the other designs here that are similar. However, the ones that hold the tube at a 10-20 degree from vertical angle were not stable for me and were quite difficult to get PEX-B to properly bend into them without enormous effort. It's counter intuitive but the 90 degree angle required less bending to get the tube into the arch shape. None of the the other 90 degree bases had the features of EMT holes, flexible wire exit positions, and holes for stakes. For the arches in the photo, I used 5V WS2812B 30 LED's per meter IP65 strips. These are generally the least expensive option and the look good. I needed to power inject every 2 strips or 4 arches. For the photo I put power and signal at one end, and power only at the other far end. They look good but the individual LED's are visible. If I were doing it over, I'd use WS2811, 12V strips in either 60 LED's per meter or 96 LED's per meter. For arches the 60 LED / meter is probably the sweet spot. Feel free to suggest improvements in the comments section. ToDo: Create xLights model and add to download.
With this file you will be able to print Leaping Arches 3/4" PEX bases using LED strips. Single and double included with your 3D printer. Click on the button and save the file on your computer to work, edit or customize your design. You can also find more 3D designs for printers on Leaping Arches 3/4" PEX bases using LED strips. Single and double included.