LED light post for N-scale (9mm track width) and H0-scale railroad models
prusaprinters
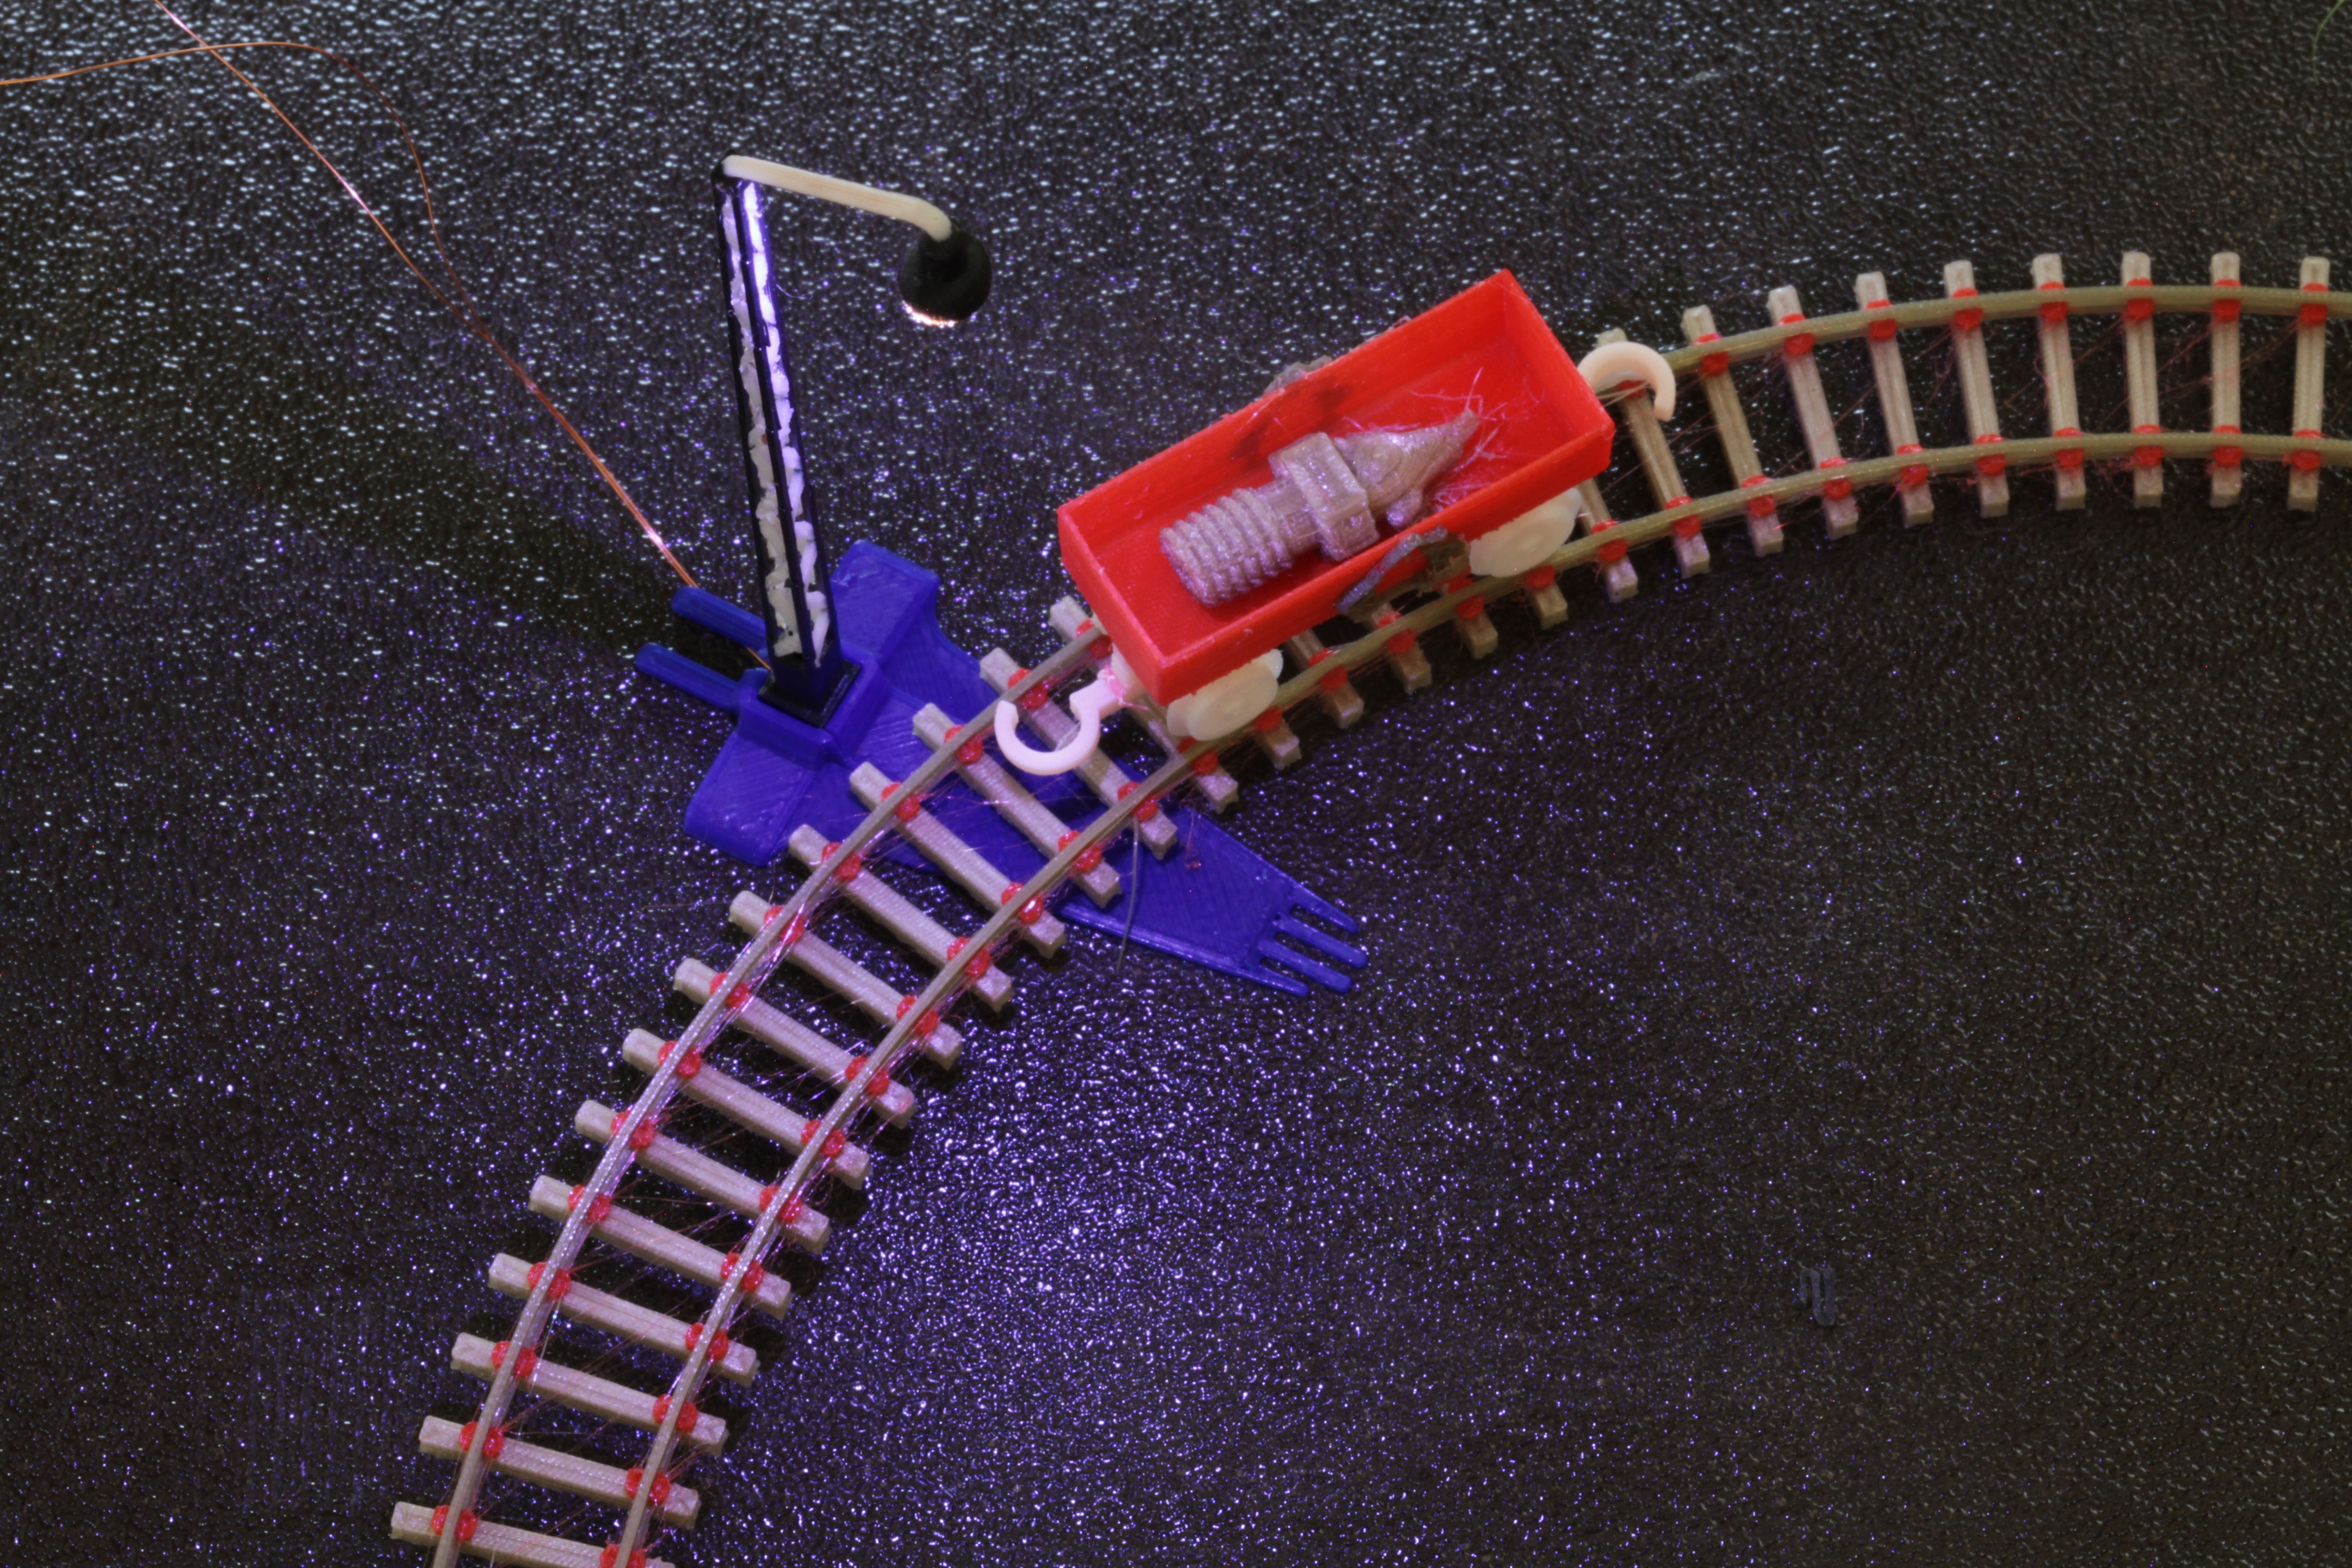
<p>Initially I designed this lamp post for a friend of mine, then decided to scale it down to fit my own N-scale model railroad as well. The height for the N-scale model lamp post is 75mm and it is designed both for single material and two material prints. I also added a printable 2xAAA battery holder in case you need one to be able to brighten up!</p> <p>Do you have a lack of N-scale railroads at home to render the lamp useful? No problem, just print the starter kit I have made for such cases: <a href="https://www.thingiverse.com/thing:3155082">https://www.thingiverse.com/thing:3155082</a></p> <p>Before printing, please consider this: the diameter of the upper part of this lamp is 1.05mm. The <strong>outer</strong> diameter that is, the entire lamp construction is hollow and holds two insulated threads of 0.15mm diameter each. So, if you want to print the N-scale or add the LED light to the H0-scale, you must use a 0.15mm nozzle (can be found at E3D-online). You must also use polycarbonate (PC-blend) for printing. However, I also made a solid version of the H0 lamp post in order to make it printable with a 0.4mm nozzle, making it available for all printing enthusiasts (I hope).</p> <p>This lamp was designed using blender, freecad-daily, gimp and inkscape. If you would like to see my other designs, just search for "frimmel" at <a href="https://www.thingiverse.com">https://www.thingiverse.com</a>.<br/> Please be aware that my designs are generally CC non-profit. Please respect this decision.</p> <p>For details wrt to the choice of LED, wiring, soldering et.c. please read the printing instructions.</p> <h3>Print instructions</h3><h3> Components to use </h3><p>For the prints you more or less <strong>must</strong> use a polycarbonate blend (for the solid H0 print even PLA might do, I haven't tried). The reason is, part of the lamp structure is tiny - solely 1.05mm in diameter and hollow inside. I have used <strong>Prusa PC-blend</strong> for the lamp prints and can strongly recommend you to buy a roll or two - a very useful construction material!</p> <p>First, you will need two <strong>coated</strong> wires of diameter 0.15mm (I suggest 30cm length per wire).</p> <p>Secondly, The N-scale model is designed for a SMD1206 type LED. SMD means "surface mount device" which means it's tiny, and 1206 implies the soldering area is 1.2mm x 0.6 mm. However, please don't faint, even an amateur as myself can solder this easily, just take a good look at my photographs before starting. The key is to plan first, use some sticky tape to fixate the part and wire, then solder. Then fix the next wire (take your time), and solder only when the setup looks ok.</p> <p>For the H0-scale there will be more space for the LED. However, I still suggest the SMD1206, just fixate the LED with a drop of glue in the end.</p> <p>You also need some equipment for soldering. If you don't have that, then don't buy it. Instead ask a friend for help.</p> <p>Both the LED and coated wires can be bought world wide, I bought mine from ElectroKit in Sweden.<br/> LED: <a href="https://www.electrokit.com/produkt/lysdiod-vit-1206/">https://www.electrokit.com/produkt/lysdiod-vit-1206/</a><br/> Wire: <a href="https://www.electrokit.com/produkt/koppartrad-0-15mm-rulle-620m/">https://www.electrokit.com/produkt/koppartrad-0-15mm-rulle-620m/</a></p> <h3> Parts to print, including assembly instructions</h3><p>Please also refer to the set of attached assembly photographs when reading these instructions.</p> <h4>Preparation in case you plan to attch a LED light to the lamp post</h4><p>For the LED print, you must pause the print at a certain height (see the heights below), add the wiring, and continuing the print. For making this part of assembly easier, I took a drip of paper glue and glued the two wires together just before carefully adding them to the print. You must be very careful with where the bends are, and you cannot use force on the printed item as it will deform immediately. Take your time, the print won't go away.</p> <h4>Lamp post</h4><p>There are <strong>5 options</strong> here, all except the last printable either with or without LED. Some of the .3mfs include two lamp posts.</p> <p><strong>1.</strong> N-scale for 0.15mm Nozzle MMU (3 hours)</p> <p>spårbelysningN_MMU_xy0.15mm_z0.1113mm_PC_PC.3mf</p> <p>To add wiring for the LED, pause print at 2.60mm (preferrably during the material change).</p> <p><strong>2.</strong> N-scale for 0.15mm Nozzle SINGLE COLOR (33 minutes)</p> <p>spårbelysningN_SINGLECOLOR_xy0.15mm_z0.1113mm_PC.3mf</p> <p>To add wiring for the LED, pause print at 2.60mm.</p> <p><strong>3.</strong> H0-scale for 0.15mm Nozzle MMU (7.5 hours)</p> <p>spårbelysningH0_MMU_xy0.15mm_z0.1113mm_PC_PC.3mf</p> <p>To add wiring for the LED, pause print at 4.38mm (preferrably during the material change).</p> <p><strong>4.</strong> H0-scale for 0.15mm Nozzle SINGLE COLOR (4 hours)</p> <p>spårbelysningH0_SINGLECOLOR_xy0.15mm_z0.1113mm_PC.3mf</p> <p>To add wiring for the LED, pause print at 4.38mm.</p> <p><strong>5.</strong> H0-scale for 0.4mm Nozzle SINGLE COLOR (no LED option, 2 hours)</p> <p>spårbelysningH0_Nozzle0.4mm_SINGLECOLOR_xy0.4mm_z0.1mm_PC.3mf</p> <p>After printing, first <strong>let the plate cool down</strong>, then ensure to remove the lamp post with great care (see the pictures, lift from lower end and upwards, always monitoring what is going on). Use your hands, possibly cut off some support using a pair of pliers during the process (the rest of support can be removed later). Most important is to first release the object. Then to clean it.</p> <p>Now solder the LED as close to the lamp as you dare (see the photos). Remember that the LED must point downwards in the end, and the cables give little room for twisting and bending, so have it in mind already when soldering.</p> <p>Solder the other end of the wires either directly to the scrap metal parts (the battery holder) or add som in-between wiring of your choice.</p> <p>Consider to check the wiring before pushing the led into the lamp post. Not the least, check that there are no short-circuit. This you can do using a multimeter. If you don't have one and cannot ask a friend, you can for a short moment add batteries to the battery holder, however, <strong>just do it for a fraction of a second</strong> to see if the light works (it would immediately blink if working - remember you need to check both directions of the circuit). By doing it this way, even a short circuit won't drain the batteries for you.</p> <h4>Lamp post stand</h4><p>Print the apropriate size (either N-scale or H0-scale). Please note, the .3mf files are setup for 0.4mm nozzle. I used PolyAlchemys ELIXIR for giving a bit of color to my lamp (the photos shows a PLA printed stand, though).</p> <p><strong>1.</strong> N-scale</p> <p>lyktfotN_Nozzle0.4mm_xy0.4mm_z0.15mm_ELIXIR.3mf</p> <p><strong>2.</strong> H0-scale</p> <p>lyktfotH0_Nozzle0.4mm_xy0.4mm_z0.15mm_ELIXIR.3mf</p> <h4>Battery holder</h4><p>The battery holder consists of two parts - the actual holder printed in PLA, and two "pressure pillows" (instead of feathers) printed in flexible material (I use Filaflex 82A, for sure other variants will work just as fine):</p> <p>batterihållare_xy0.4mm_z0.2mm_PLA.3mf<br/> batterihållare_fjädring_xy0.4mm_z0.2mm_FilaFLEX.3mf</p> <p>On top of the printed parts, you need two small pieces of conductive scrap metal (I used a thin metal lid from the household garbage). Just add the scrap metal into the corresponding slots, add the "pressure pillows" behind them (with the bulging side towards the metal) and...done you are! The holder has support for standard lab cables (as found in scools or in electronic stores). As an alternative to separate cables, you can solder the wires from the lamp directly onto the scrap metal parts. <strong>You will not be able to get it working by solely pressing them to the scrap metal parts, though, as the thin wires are coated!</strong></p> <p>Remember: the LED will only light up if the electric circuit is in the right direction. If nothing happens, then just swap poles.</p>
With this file you will be able to print LED light post for N-scale (9mm track width) and H0-scale railroad models with your 3D printer. Click on the button and save the file on your computer to work, edit or customize your design. You can also find more 3D designs for printers on LED light post for N-scale (9mm track width) and H0-scale railroad models.