 prusaprinters
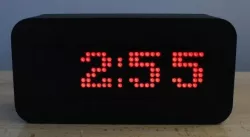
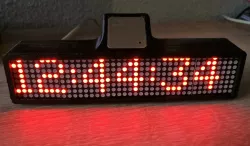
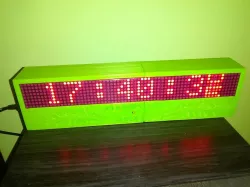
LED Matrix Digital Clock
Digital Clock using an 8 X 32 MAX7219 LED Matrix as the display. Additional hardware required includes an Arduino Nano, a DS3231 RTC module, 2 large push buttons, a mini-USB to USB cable, a 5V 1A wall adapter, wiring, and an adhesive like glue or silicone. The hardware for this design is originally from a video by MOUNT DYNAMICS on YouTube. The altered code for my version is provided as a .ino file, and can be uploaded in the Arduino IDE.
ASSEMBLY INSTRUCTIONS:
1.Print all of the components first, this will allow you to get an idea of the sizing and positioning of components.
2.Solder the components together, using the instructions from MOUNT DYNAMICS' video https://youtu.be/1rt031sYztw, as well as the following considerations;
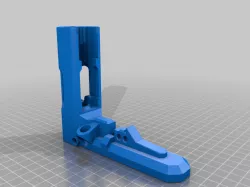
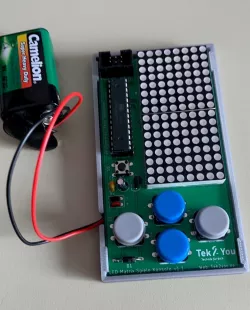
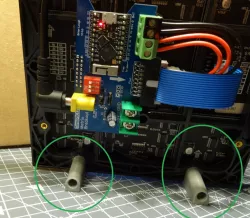
The Arduino Nano will positioned in the small rectangular cutout on the Back Housing, with the Mini-USB connector facing outwards. The buttons will be on the left side of the housing, secured in placed by the Button Bracket. The RTC can go anywhere in the housing, but make sure to keep the CR2032 Battery of the RTC accessible for changing.
Please Verify all electrical components work and are tested before proceeding to the next step. Code should be uploaded to the Arduino and tested to verify functionality.
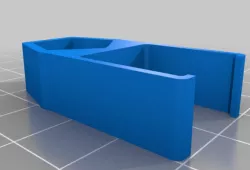
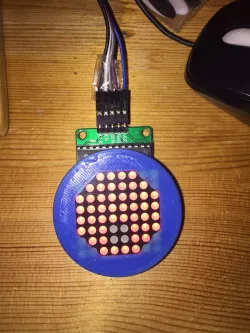
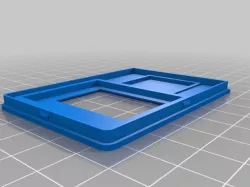
3.Once all electrical components are soldered, position the matrix within the front plate. The Matrix friction-fits into the front plate, but you might need to lightly sand or file a little bit away to account for manufacturing error.
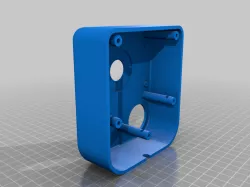
NOTE: The larger holes indicate the "top" side of the plate, with the larger protrusions on the Back Housing being the "top" side.
4.Secure the Arduino Nano into the rectangular cutout, and Adhesive the RTC module to the desired location in the housing. Position the buttons in the 2 holes, placing button 1 in the top position, and snapping the button bracket in behind the buttons.
5.Attach the Diffuser to the Front Plate, applying a very small amount of adhesive to the border.
6.Attach the Front Plate to the Back Housing.
Print Settings
Printer Brand:
Creality
Printer:
Ender 3
Rafts:
No
Supports:
Yes
Resolution:
200
Infill:
20
Filament:
Canadian Maker Series PLA
Black
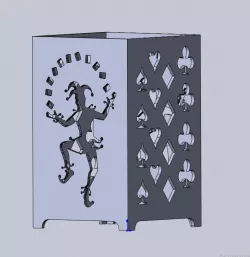
Category: Household
Direct link to the original creator's page
Also Available On
More from jem
Similar Models
 thingiverse
 prusaprinters
 thingiverse
 prusaprinters
 prusaprinters
 prusaprinters
 prusaprinters
 thingiverse
Model Specifications
Frequently Asked Questions
How do I download LED Matrix Digital Clock ?
Click the "View on prusaprinters" button above to visit the original model page on prusaprinters. You can download the STL file directly from the creator's page for free.
What 3D printer can I use for this model?
This STL file is compatible with most FDM 3D printers (Creality Ender 3, Prusa MK3S+, Bambu Lab, etc.) and resin printers (Elegoo, Anycubic). Check the original page for recommended print settings and materials.
Is this 3D model free to download?
Yes, this model is available as a free download on prusaprinters. Some creators accept tips or donations.
Can I modify this STL file?
Most STL files can be modified using free software like Blender, TinkerCAD, or Meshmixer. Check the license on the original prusaprinters page to see if modifications are permitted by the creator.