LED Matrix Stand and Raspberry Pi Mount
thingiverse
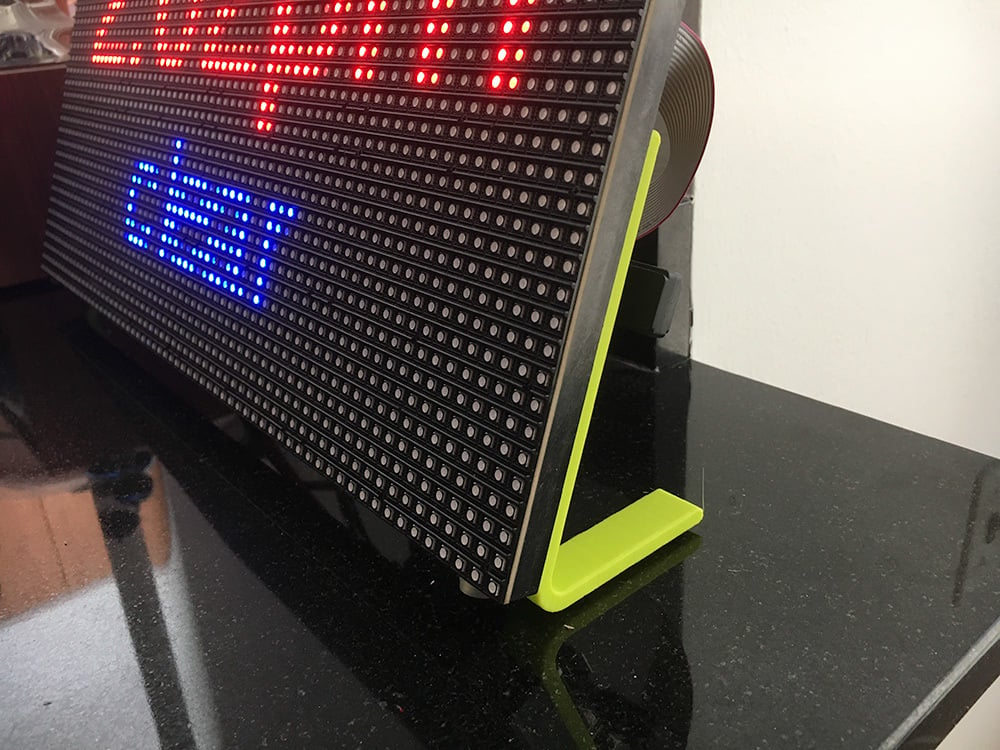
This is a stand for the Adafruit LED panels. The one I bought is this one: https://www.adafruit.com/product/2276 ...and I used a Pi with this HAT: https://www.adafruit.com/product/2345 There are a ton of HUB75-compatible displays out there and I'm not sure if the dimensions are all the same. But this build works with the above components. Model consists of two parts: An arm that you use to prop up the display at a 20-degree angle, and a simple mount for your Raspberry Pi. The arm is easy. Orient it the way it makes sense to avoid supports. The LED panel comes with M3 threaded inserts and that's what the holes are designed to mate with. You print the arm twice (once for each side). All you need are four screws and you're done. The Raspberry pi mount is a little more involved. The LED panel came with a really short HUB75 connector so you really can't mount the Pi towards the center where there are already inserts. What I ended up doing is adding an M3 heatset insert to the back of the panel near where you plug the cable in (http://amzn.to/2BWi75K if you don't already have these). The panel already has the holes they just aren't stuffed. Again soldering iron method works well but be careful 'cause you only have one shot at it. The mount I created consists of a tongue you can use to hang off of the hole mentioned above (note the photo has an older version of the mount - the one in this project has a slightly longer tongue so you can add/remove it with the pi attached). The mount is designed to take 2.5mm heat set inserts (the ones I used had a max outer diameter of 4.04mm with an overall length of 5.56mm). The soldering iron method works well, but I also used a thin metal spatula to drive it the last couple of millimeters to get a nice flush finish. I have an assortment box full of inserts, but if you don't have that here's what you need: http://amzn.to/2DezUBy Sounds harder than it is. It's actually pretty easy if you've used heat set inserts before. UPDATE: I just looked on the Adafruit site and noticed the panel they have pictured is slightly different than mine. The one I have came with the inserts already installed at the midpoint on either side. In their picture they are missing. Shouldn't be a big deal but you might need a couple of more M3 inserts.
With this file you will be able to print LED Matrix Stand and Raspberry Pi Mount with your 3D printer. Click on the button and save the file on your computer to work, edit or customize your design. You can also find more 3D designs for printers on LED Matrix Stand and Raspberry Pi Mount.